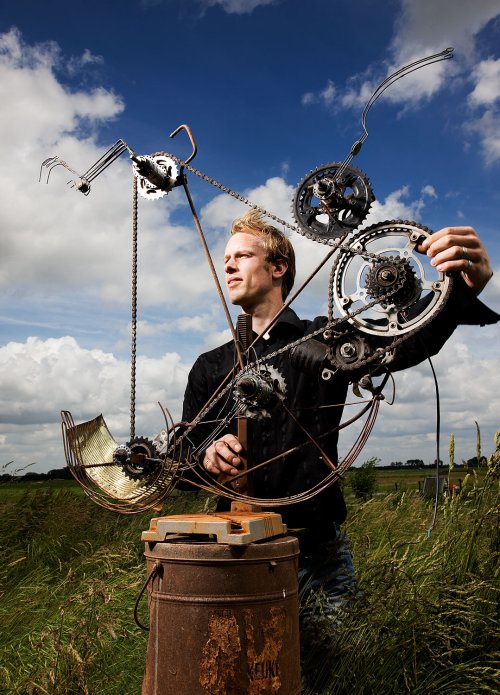
This blog gives some insight in the development of my sculptures in my atelier with production photos and explanation.
Real size flying crow
Following the realization of the sculpture of three small flying crows, the Brussels artist Hans op de Beeck asked me to develop a real size flying crow using the same mechanism for generating its motions. From today onward this sculpture is shown at his large solo exhibition in the Royal Museum of Fine Arts Antwerp.
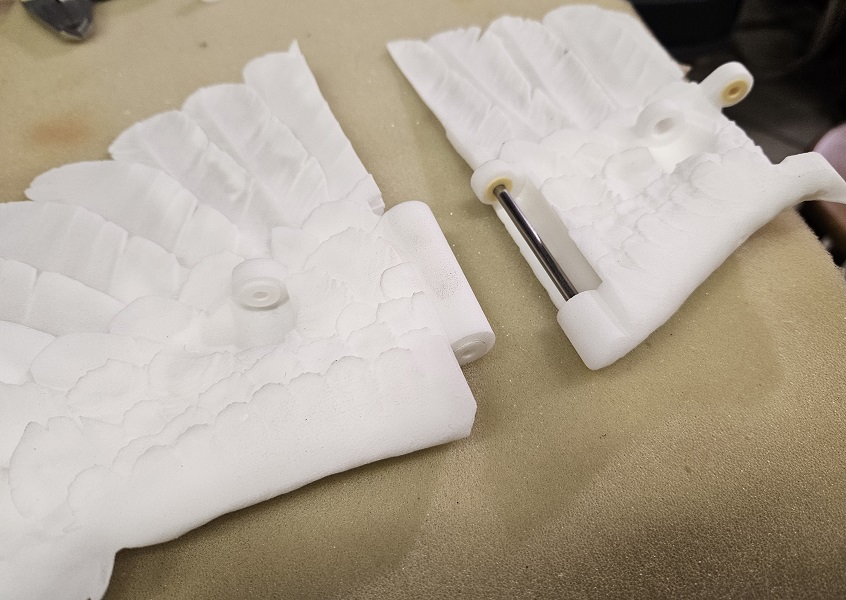
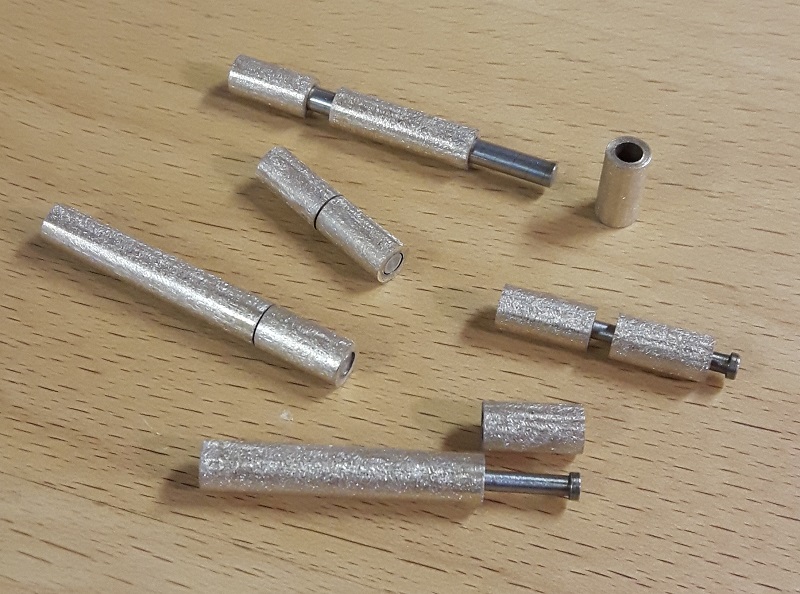
The crow spanning about 80 cm from one wing tip to the other was designed by his studio and was 3D printed in five segments. With respect to the small crows I had to completely redesign the joints between the segments as they cannot simply be scaled. Here you see the connection of the two wing segments by an axle with two slider bearings.
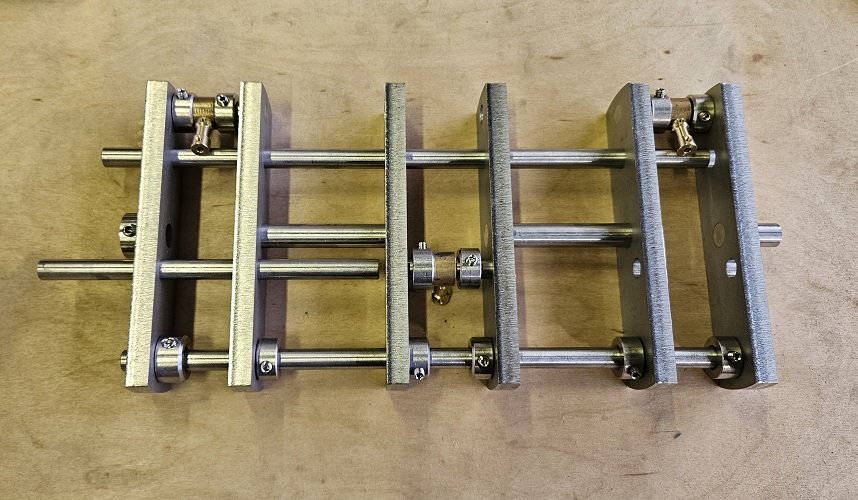
This is the production of the crank for driving the motion of the wings, with three bronze slider bearings and multiple rods for aligning the stainless steel parts during assembly.
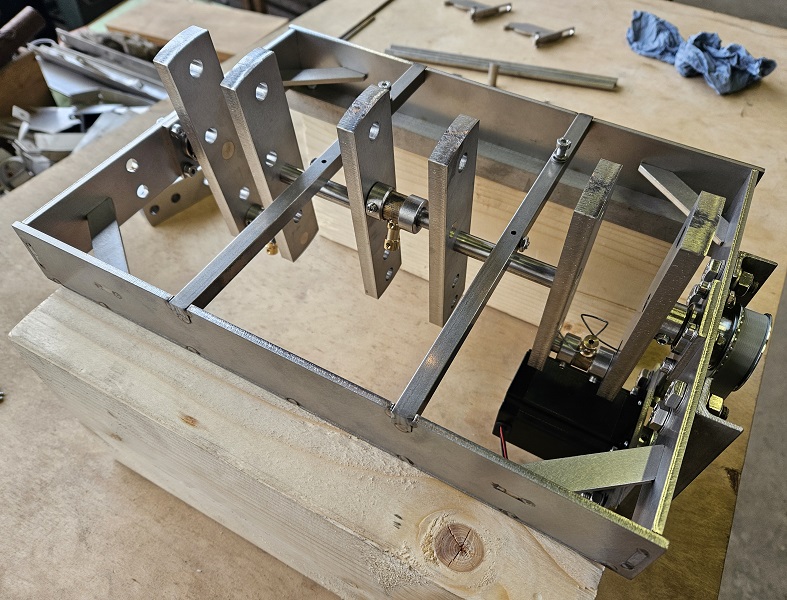
Here the crank has been installed within the frame and connected to the stepper motor by a tooth belt.
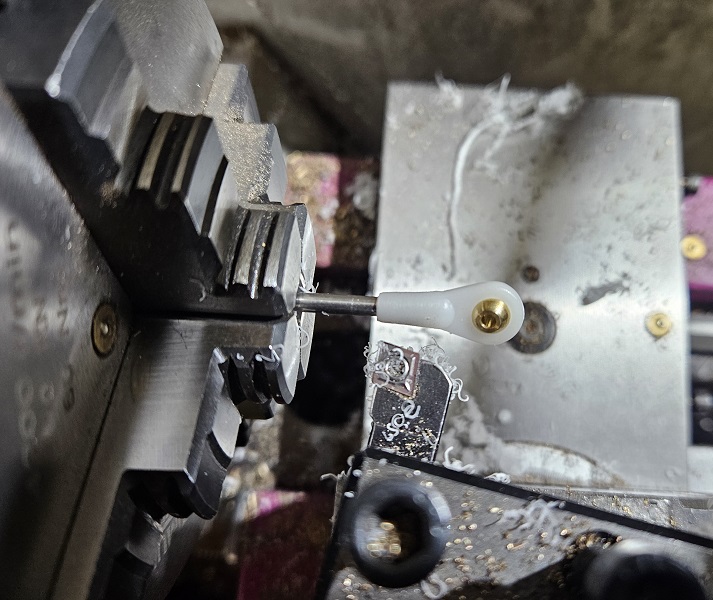
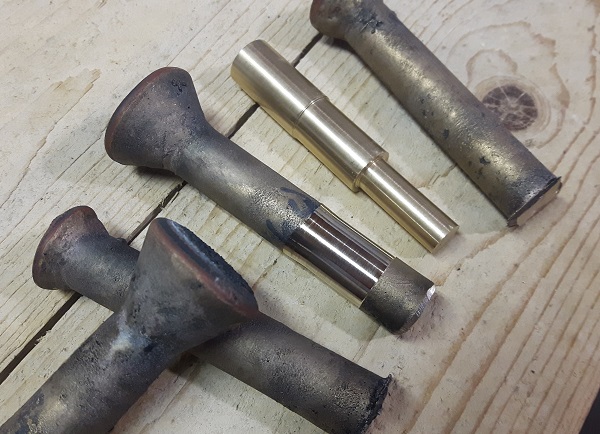
For the connections of the vertical rods to the wings I implemented these ball joints which I gave a nice tapered shape in the lathe.
Finally the complete crow was assembled and.....
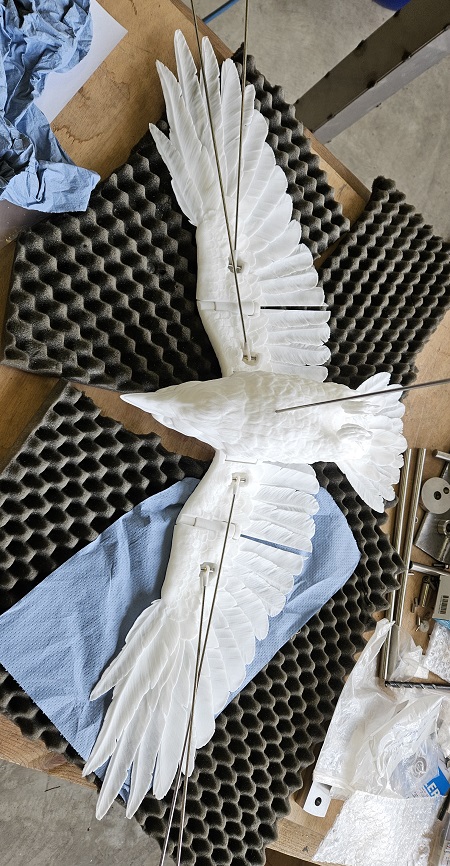
...ready to make it's first flight.
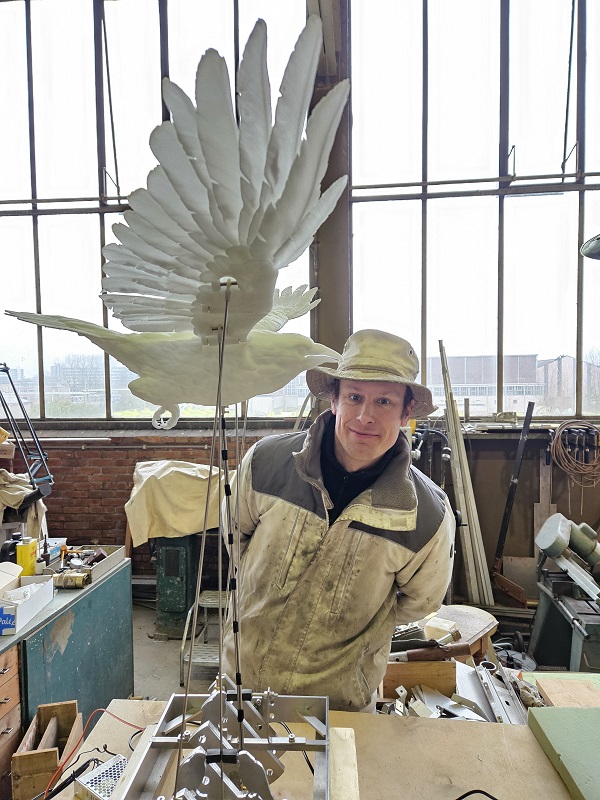
In the studio of Hans the crow obtained the characteristic 'Op de Beeck-gray' color and was installed on a nice cylindrical pedestal. All set for its first exhibition at the Royal Museum of Fine Arts Antwerp.
Three Flying Crows
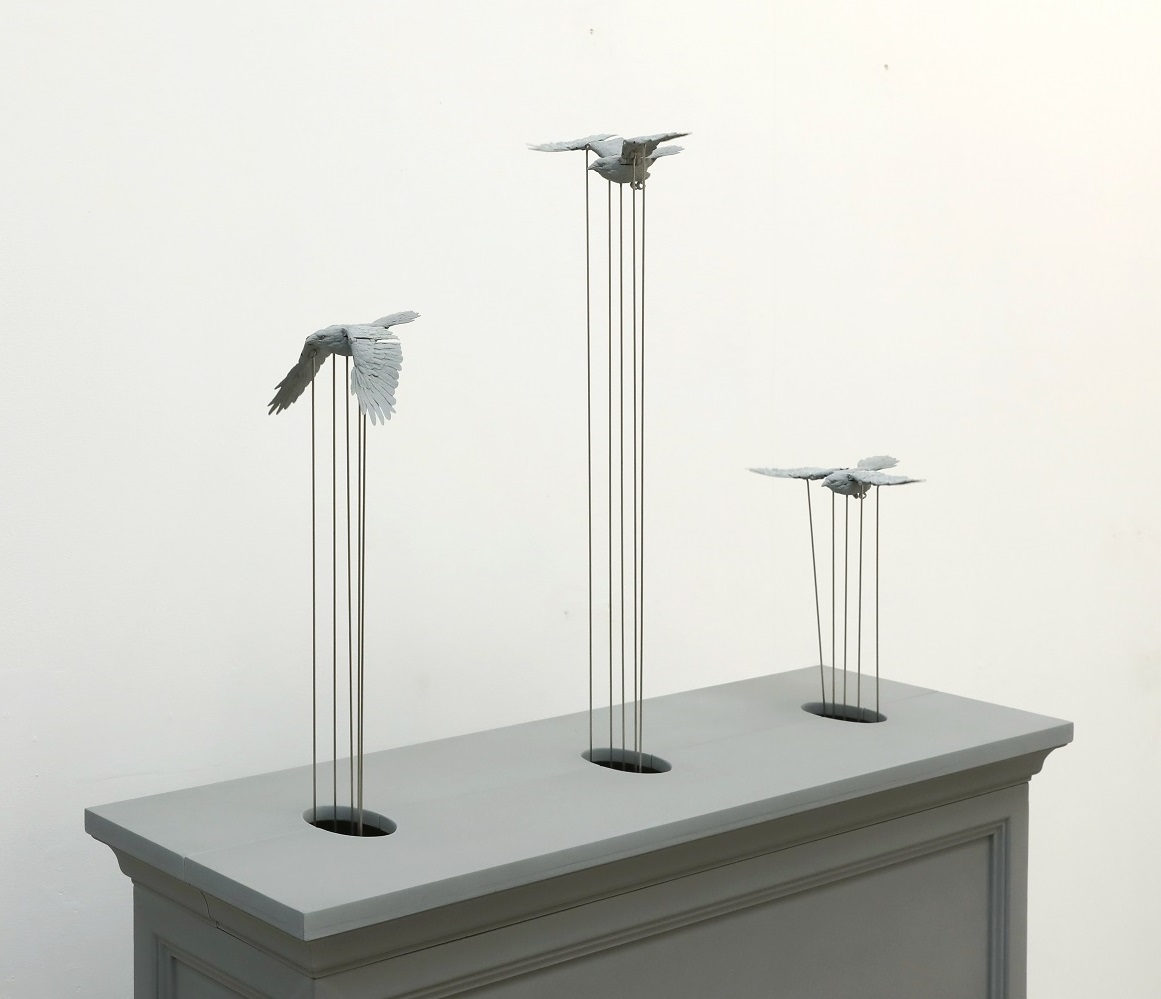
Today an exhibition of the Brussels artist Hans op de Beeck was opened at the Templon Gallery in New York, showcasing the sculpture 'Crows' that I developed on his request. The little crows were designed by his studio and scaled to about a quarter of the size of a real crow and had to fly unequally behind each other, each at a different height.

I wanted the crows to fly as realistically as possible and designed a mechanism in which five vertical rods moving up and down both hold the crows in place and generate the flying motion of the wings. For that I studied how real crows fly, how their wings precisely move and how fast. With an extensive kinematic/geometric model I investigated all the lengths and distances between the joints for generating the best motion.
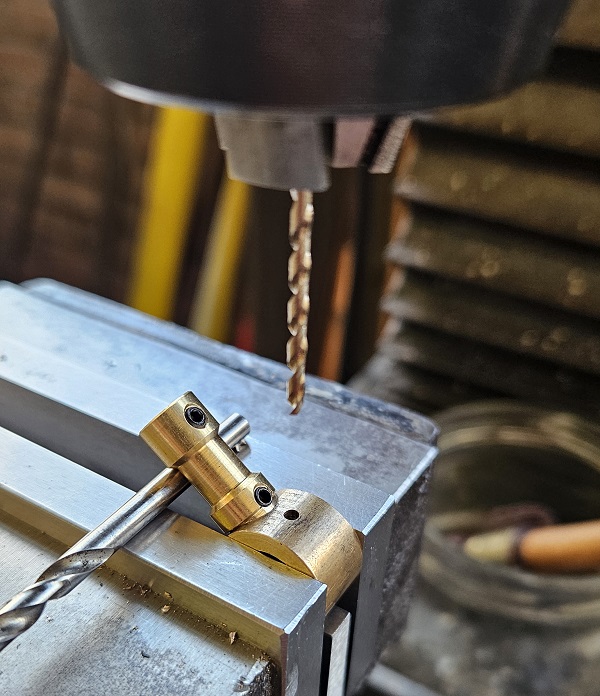
After the design phase I produced all the parts which required a high precision since deviations as small as 0.1 mm in distances would result in crows not flying at all. The first challenge was to make the crank mechanism for each crow. I made bronze rings as slider bearings with fixture for the vertical rods on top.
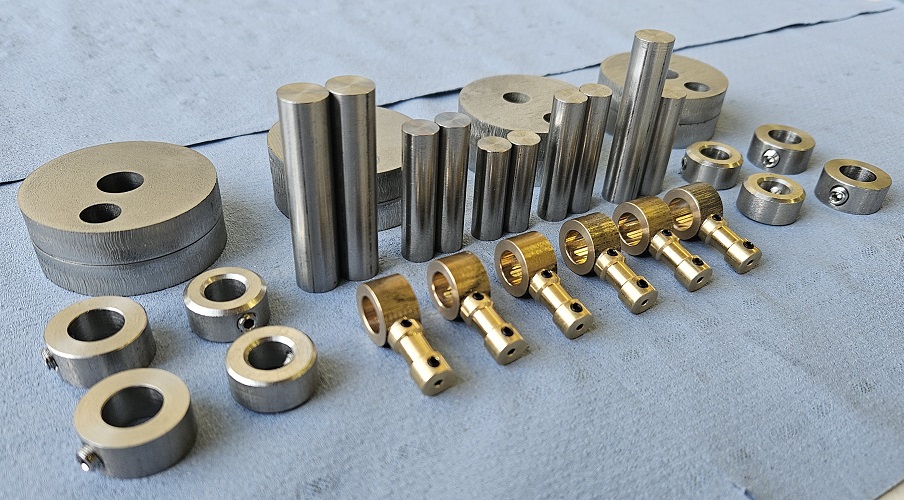
The cranks I made of stainless steel discs and axles that I glued and welded together. They are driven by belt drives which connect the three cranks together and have them move with a single motor.

As you can see from the crank, the central rod moves up and down while the outer rods move up and down as well but at a later moment, while the other two rods are fixed and steady.

The crows I divided in five segments that were 3D-printed with the joints for the axles of the wings integrated. Although the 3D print quality was excellent, still quite some handwork was needed to make the wings move smoothly and almost frictionless.
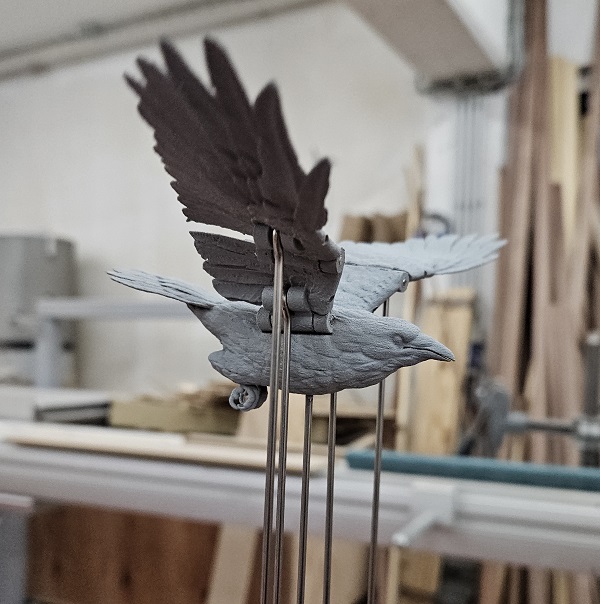
Back in the studio of Hans the birds were painted in his characteristic 'Op de Beeck-gray' color and placed in a stylish pedestal. Ready for transport to New York, its first exhibition.
Exhibition Delftse Kunstkring
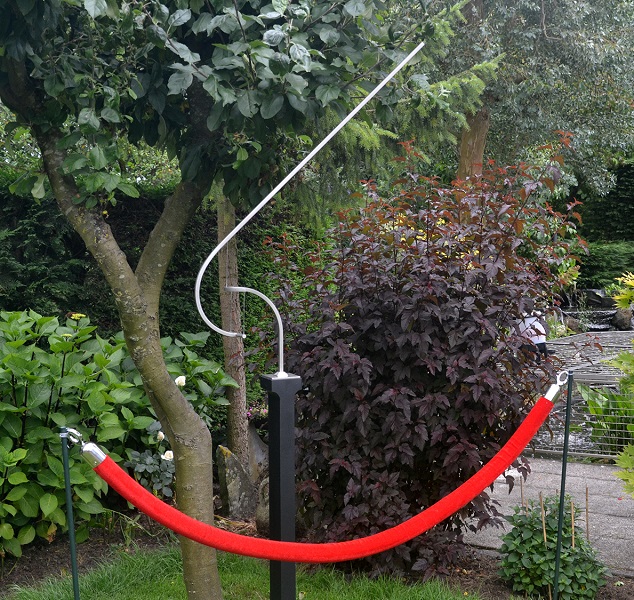
This weekend some sculptures are exposed at the exposition Changes of the Delftse Kunstkring in Delft (NL). This is the presentation of Freedom:
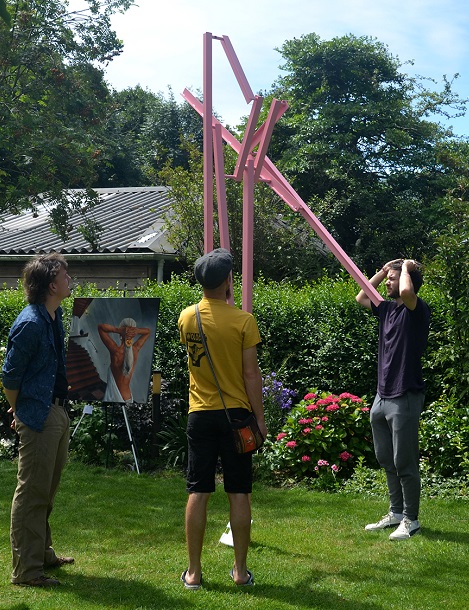
Also Plumage I Flamingo is on display:
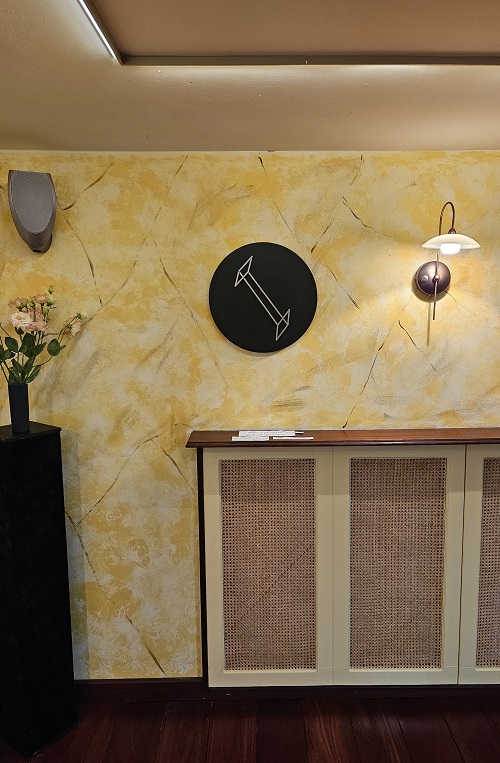
Wall sculpture No Time is shown inside:
The sculpture I developed together with 5 artists of the Delftse Kunstkring, which we named 'Changes', is moving all around:
Kunstschouw 2024 exhibition
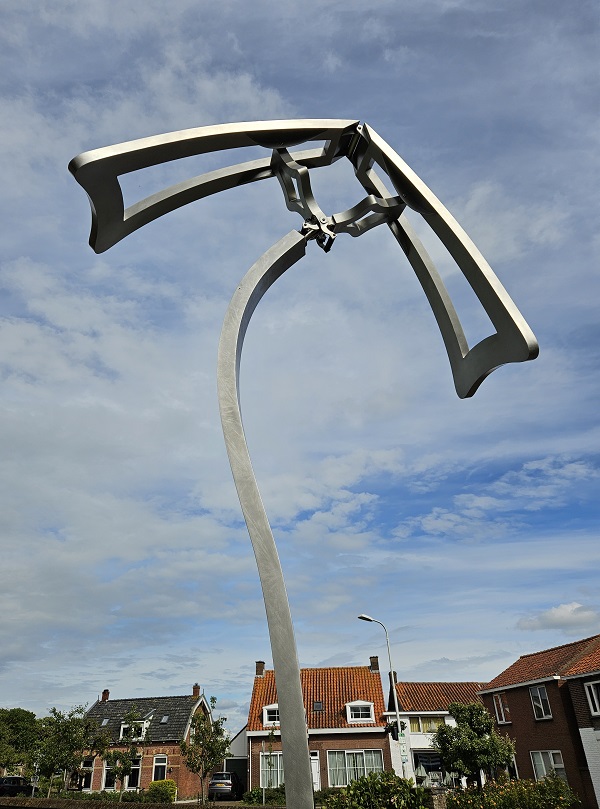
The Kunstschouw 2024 exhibition has started today, displaying some of my sculptures until June 23 in Burgh and Renesse. The Anemone Magnifica is located aside the small church of Burgh and will automatically move every 5 minutes from 9:45am until 21:45pm every day. The Anemone Magnifica will also be visible after the exhibition until the end of November.
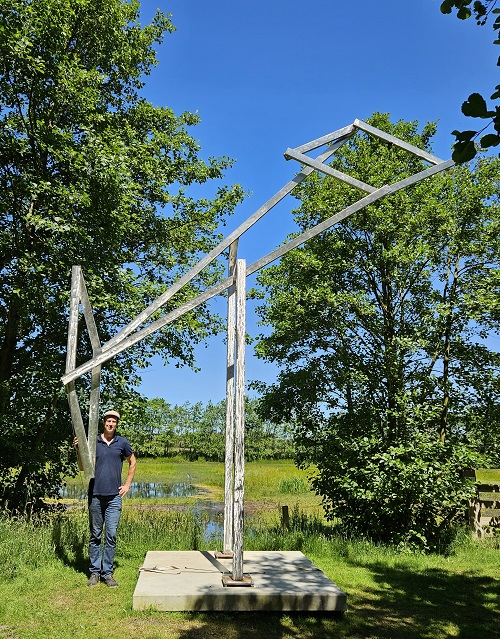
My newest sculpture Timeless is exposed for the first time in the beautiful private park at the Hoogenboomlaan 19 in Renesse:
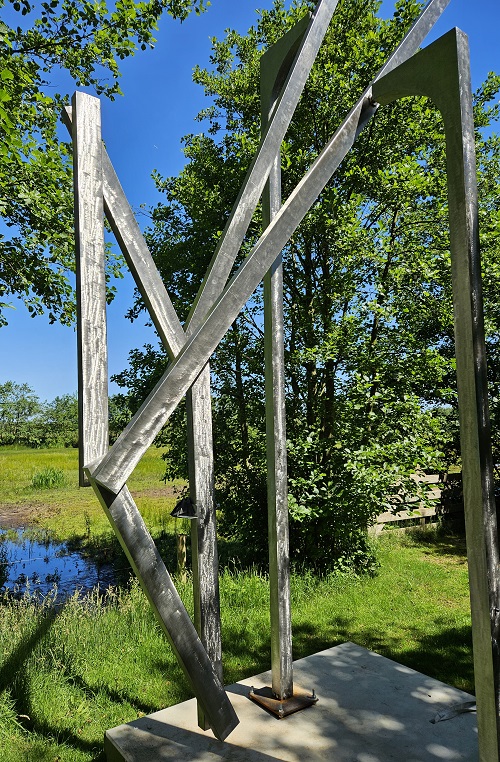
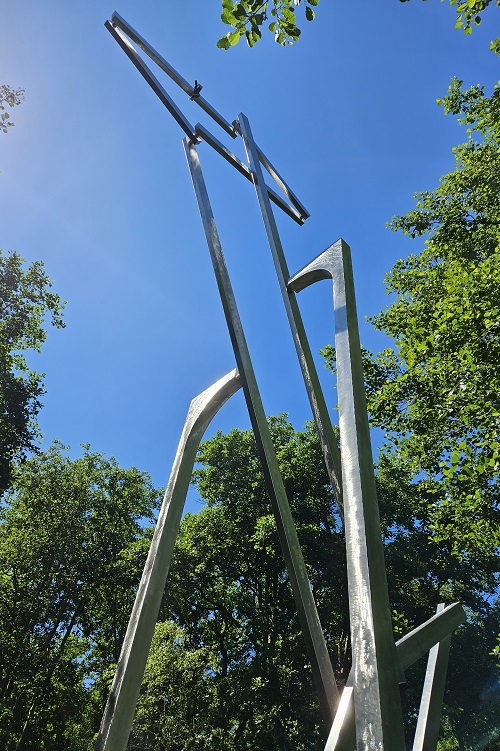
Also Plumage I Flamingo is shown in the same park:
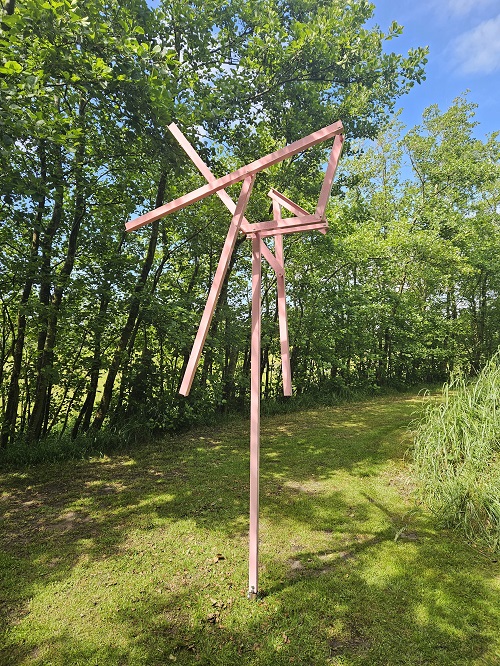
And inside a building at the park Between Heaven and Earth is exposed:
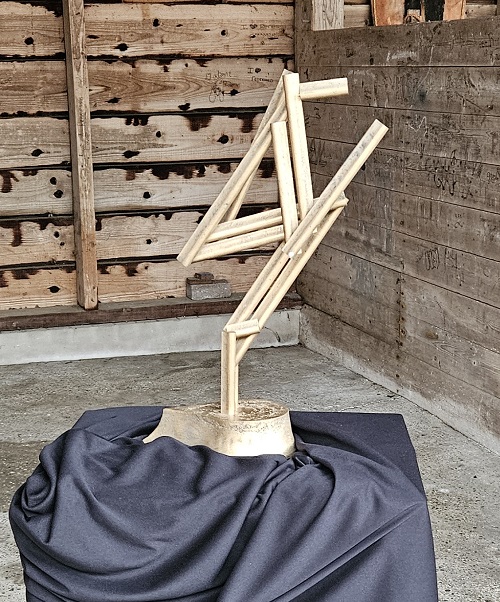
Timeless ready for expo!
After some months of hard work my new interactive 8 meters high balanced stainless sculpture Timeless is ready for exposition. Here some photos of the production. The two long pillars with rectangular cross section I built from lasercutted plates of stainless steel which you can see assembled here, just before welding them together.

At the top of each pillar I implemented a 1:47 belt transmission in three stages to the thick output shaft. This was quite complicated to make and was meant to be able to drive the sculpture by rotating a crank handle near the ground 47 times to have the sculpture move around once. This way of interacting with the sculpture, however, I found not satisfactory. Yet the transmission showed to function excellently for generating extra inertia to smoothen and slowing down the motion of the sculpture, enhancing its beautiful motion.
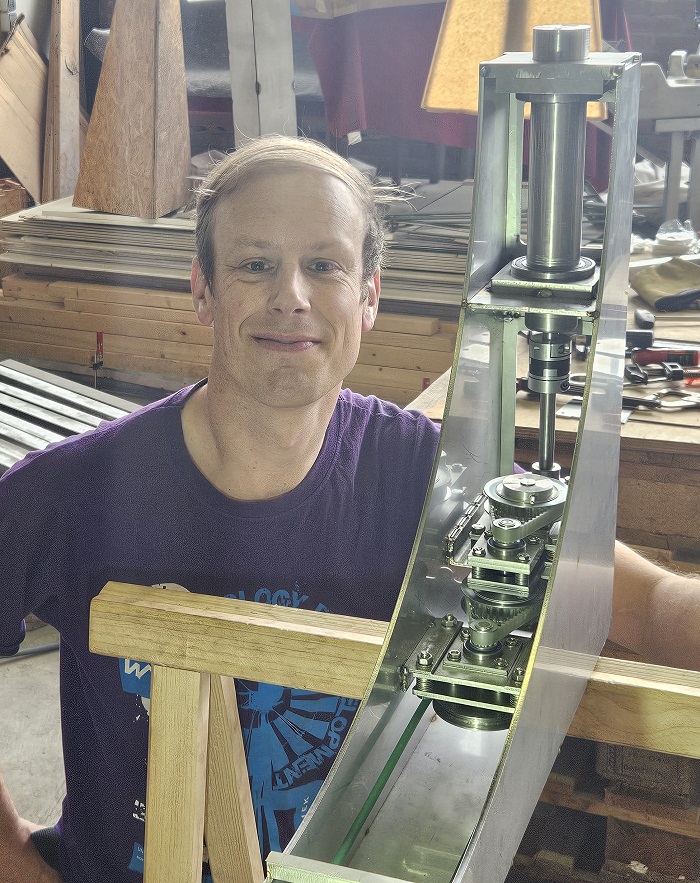
Here the top of the pillar is being closed by bending the inner plate of stainless steel into the curved shape and fixing it by welding.
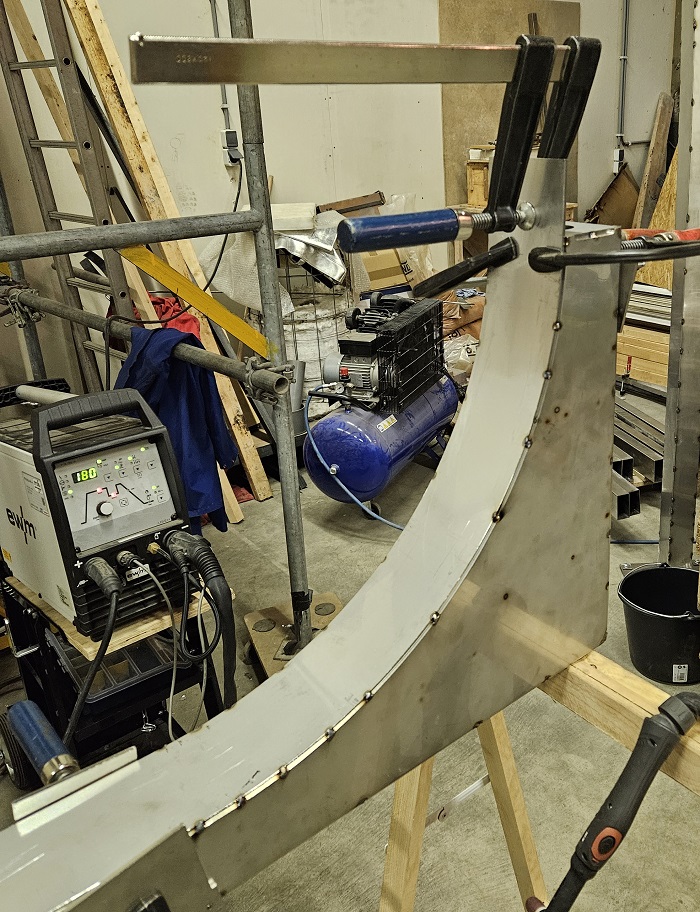
All the edges had to be filled by welding and subsequenly they were grinded to obtain flat surfaces with nice straight edges.
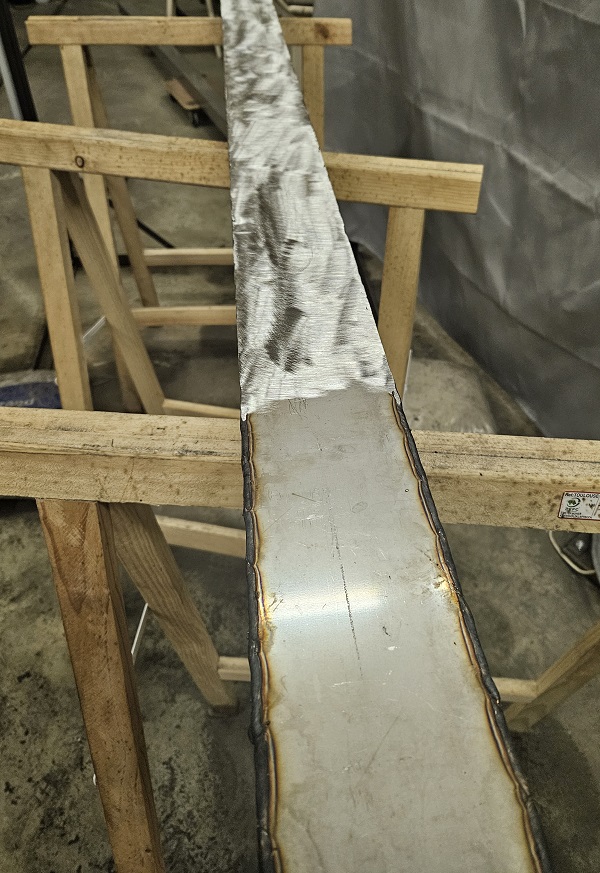
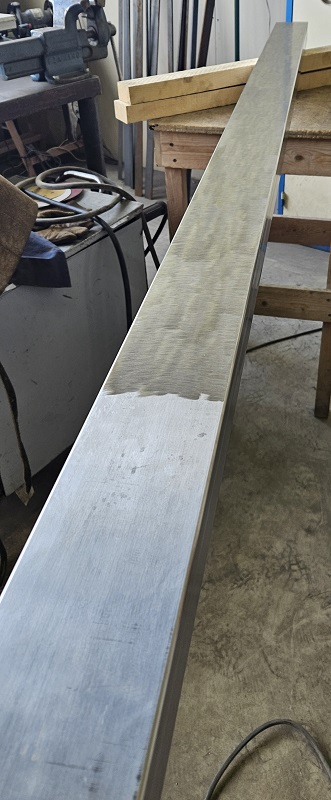
The long moving beams and the parallellograms I manufactured from rectangular tubes that I grinded as well to give them the same very shiny appearance as the pillars.
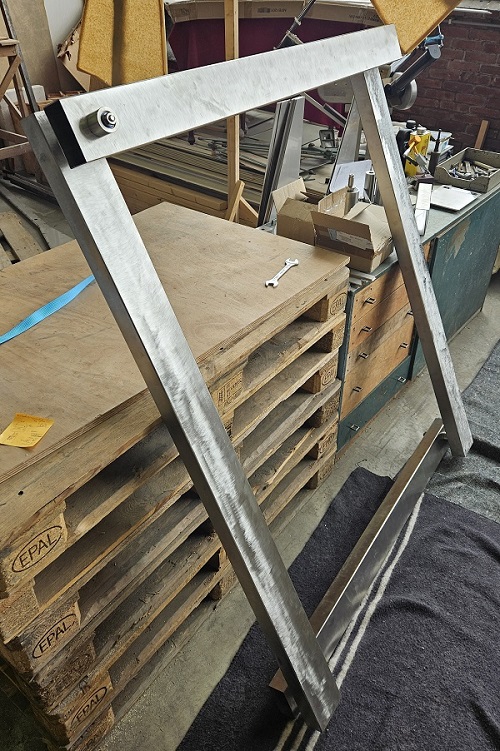
This is the first assembly of one of the two moving parallellograms...
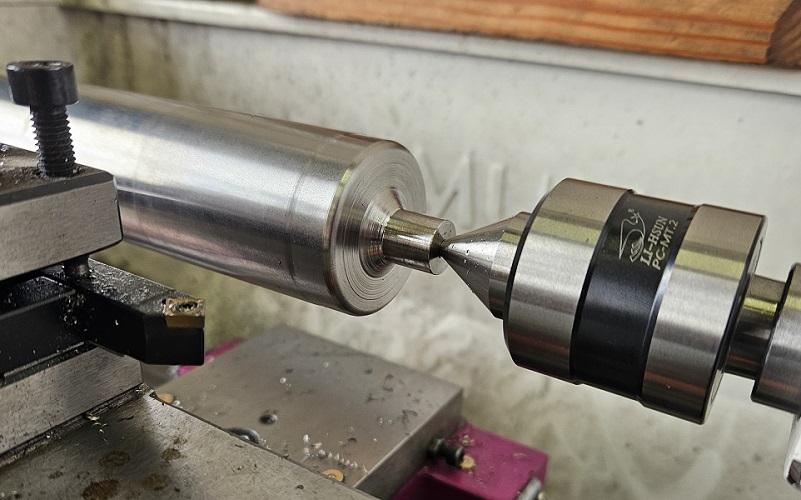
...and this is one of the two output shafts being made in the lathe:
Setting up a new large sculpture for the first time is always very exciting. We first placed the two pillars on the concrete base and aligned them properly. Then we attached the two long beams at the top of the pillars by bringing them up a ladder.
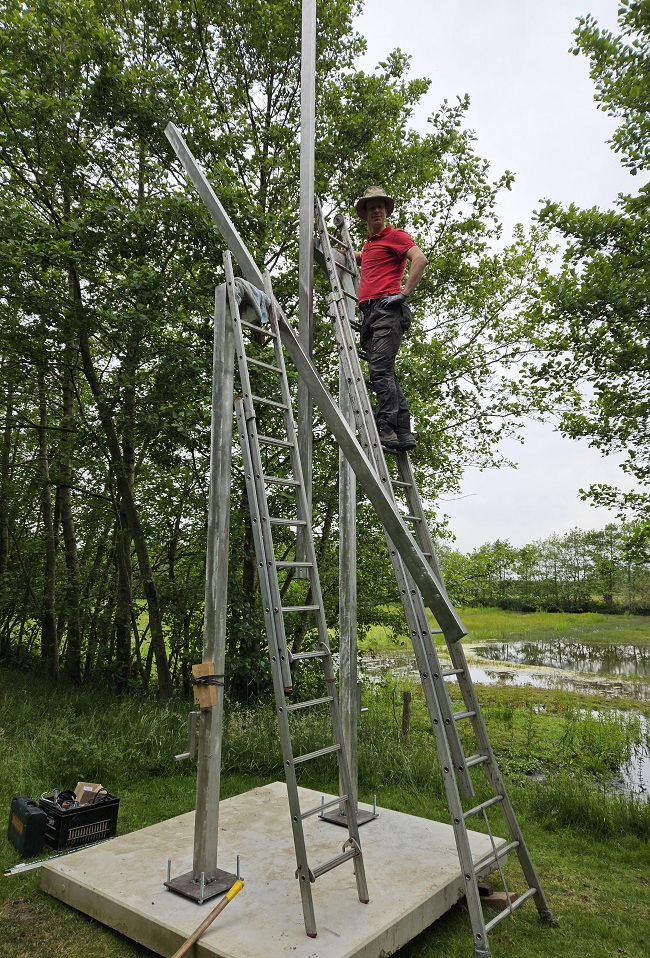
Finally the parallelograms were installed on each side of the long beams, completing the sculpture. The very first thing I always like to test immediately: does the balance look good? Only after the sculpture has been finished this can be checked and fortunately, the balance turned out to be extremely good here, as you can see also from the video:
Portrait carousel
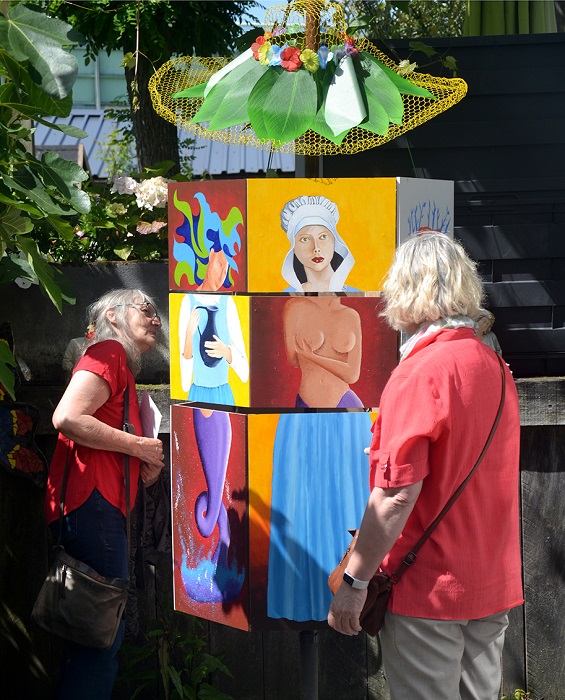
For the exhibition Changes of the Delftsche Kunstkring, which will be on June 29-30 in Delft with a couple of my sculptures on display, I have been asked to contribute to a collaborative sculpture with five other artists. The wish was to have a carousel mechanism with portraits which can be turned around.
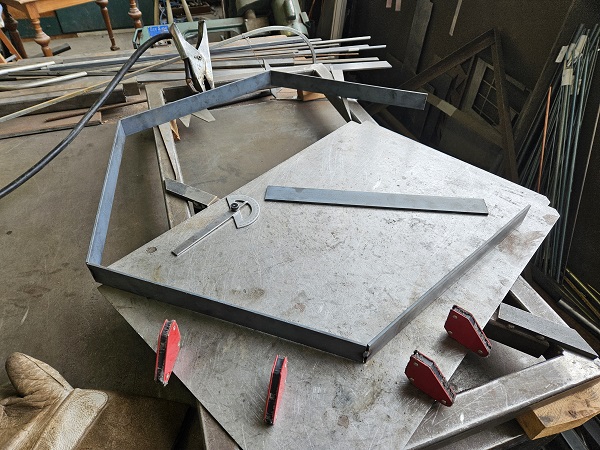
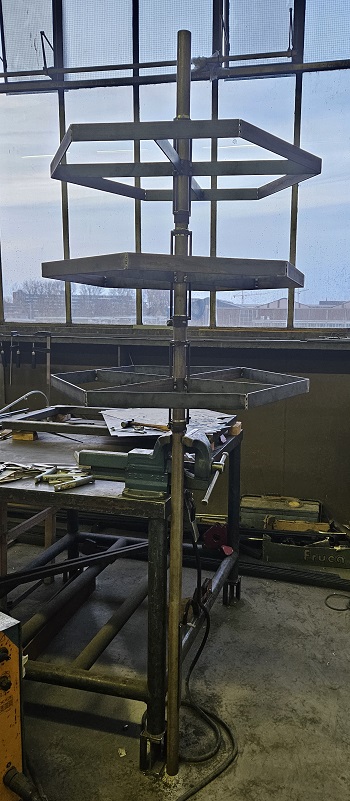
Here some photos of one of the rotors I made of steel with six sides as a hexagon.
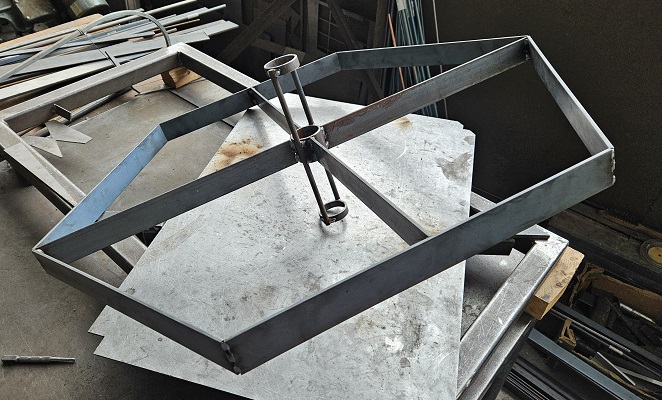
Three such rotors I placed at different heights along a vertical tube.
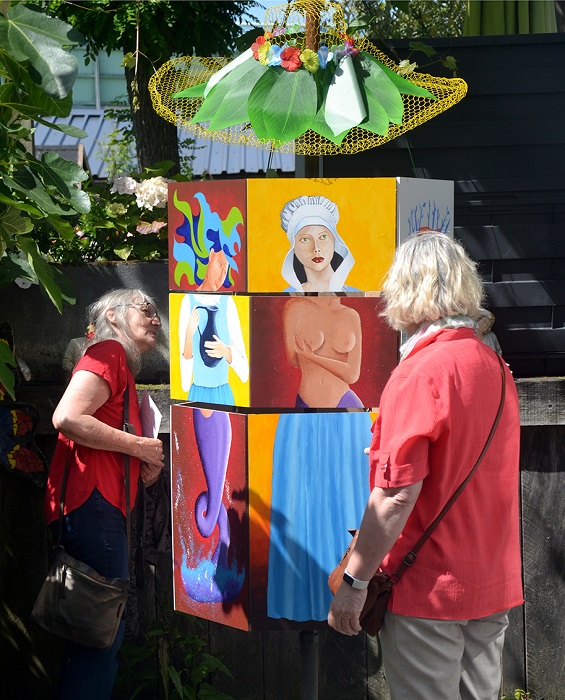
Then the other five artists started painting: six different heads for the upper rotor, six different bodies for the central rotor, and six different legs for the lower rotor. By turning the rotors one by one, various interesting and funny combinations of a person are obtained.
Lead casting of counter-masses
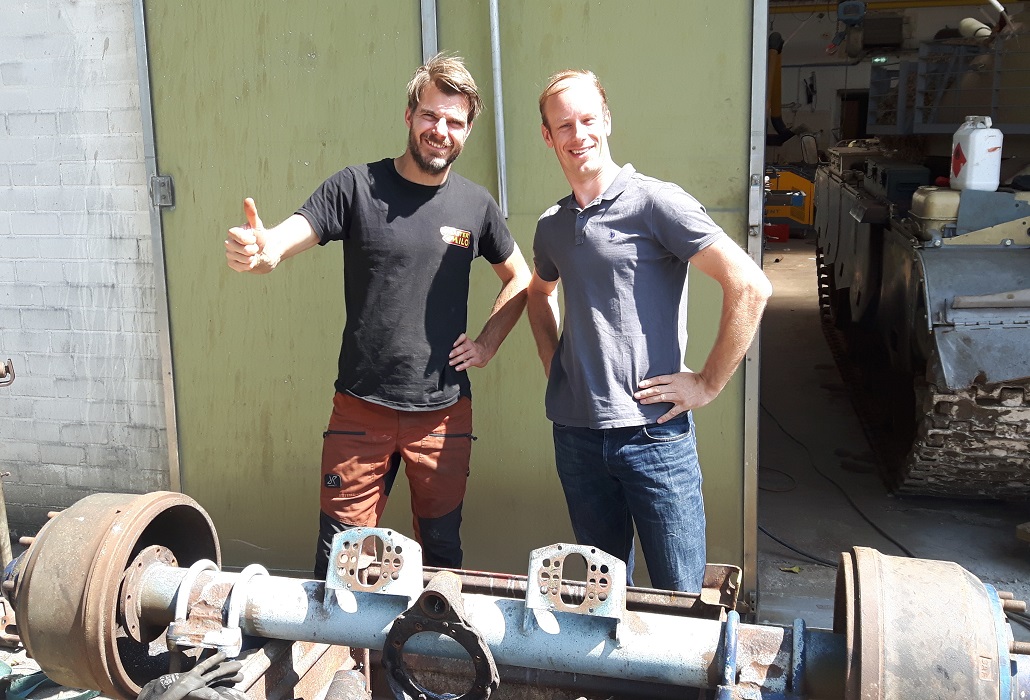
Some years ago I was working on a nice large balanced sculpture with floating pyramids of stainless steel (see blogs here, here and here), but due to the covid-cancellation of the exhibition the sculpture remained unfinished. On Friday I made another step with the sculpture by lead casting of the two counter-masses of 32 kg each, for which I asked the help of Emile Luijben alias Mastermilo.
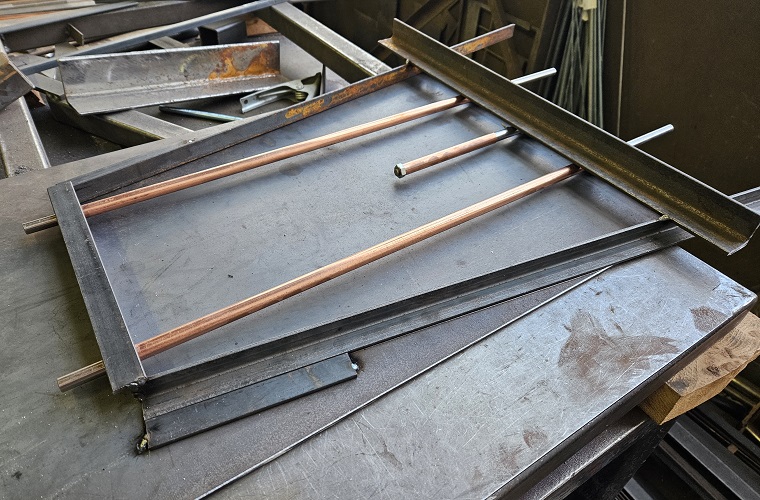
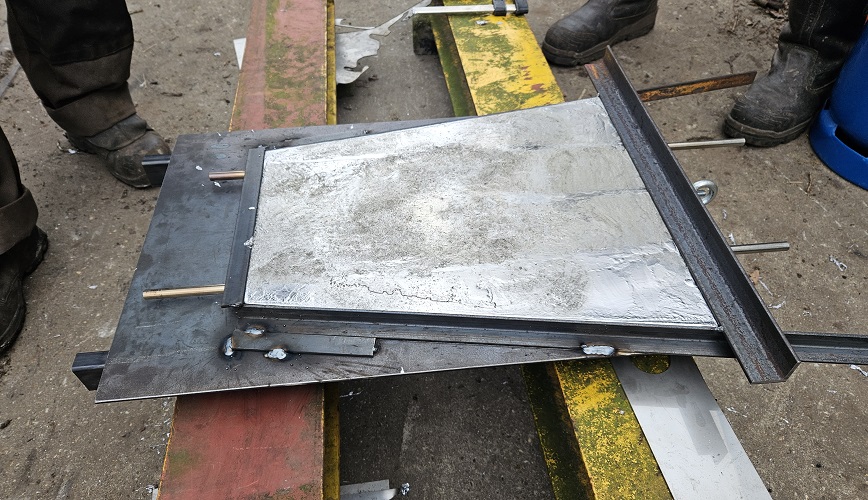
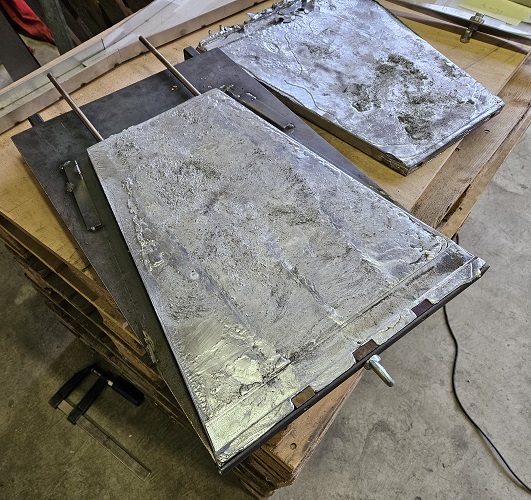
The counter-masses are 20 mm thick trapezium shaped plates for which I made a mold of steel. I placed two copper tubes along the middle of the plate to create holes in the plate such that it can be placed on rods. Then the plate can slide along the rods for fine-tuning of the balance of the sculpture, for which in the center of the mold I included a screw-nut.
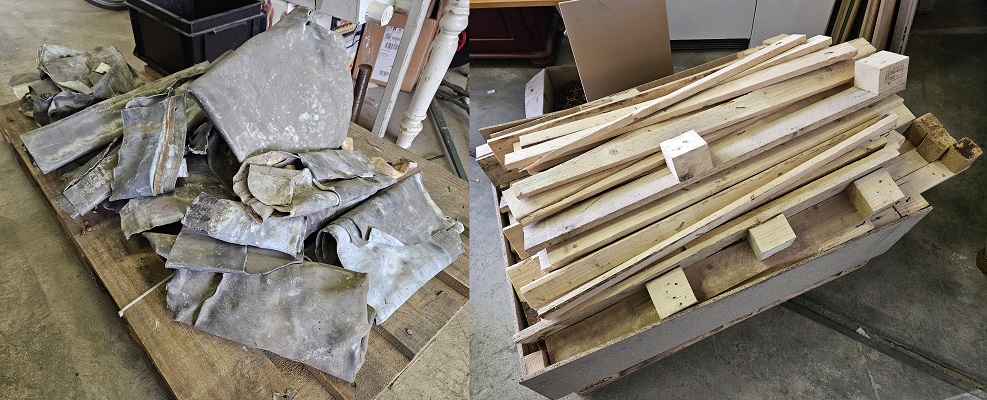
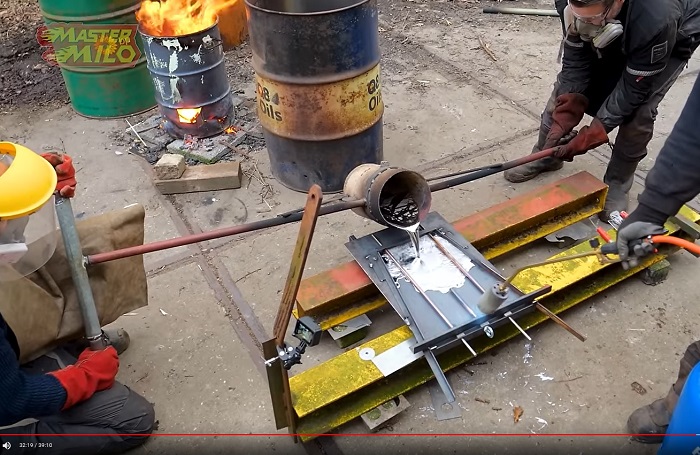
I collected 100 kg of old lead and wood from pallets for the fire. Then I went to Emile and his friends and in his workshop we made the setup for the casting and melting of the lead. First we made a crucible from an old gas tank. Of course everything was filmed for his youtube channel.
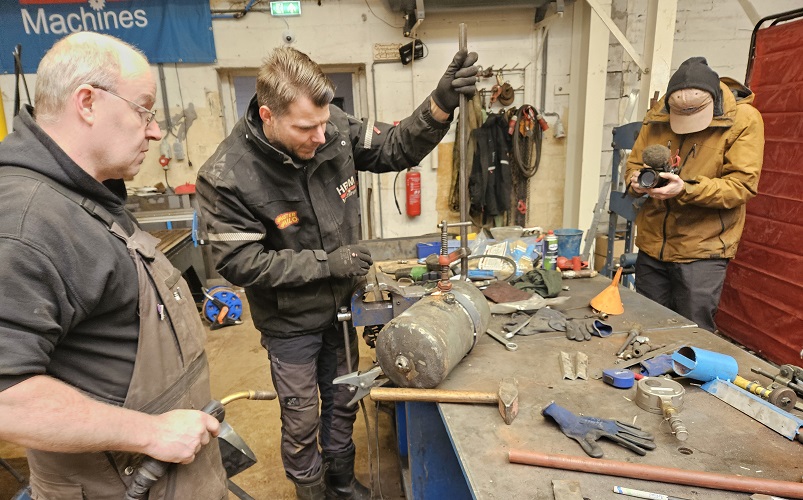
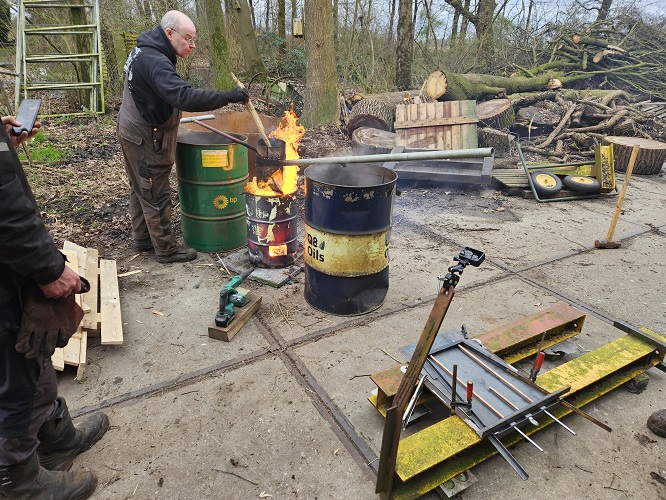
In the meantime the fire was prepared outside, using oil barrels for the wood fire. It was impressive to see how quickly 50 kg of lead was molten, the heat of the wood fire made the lead easily reach its melting point of 327 °C.
After a first failure, the two plates of lead turned out quite nicely. We had some difficulties with the steel mold which deformed much more than expected due to the heat of the lead. That was interesting to learn.
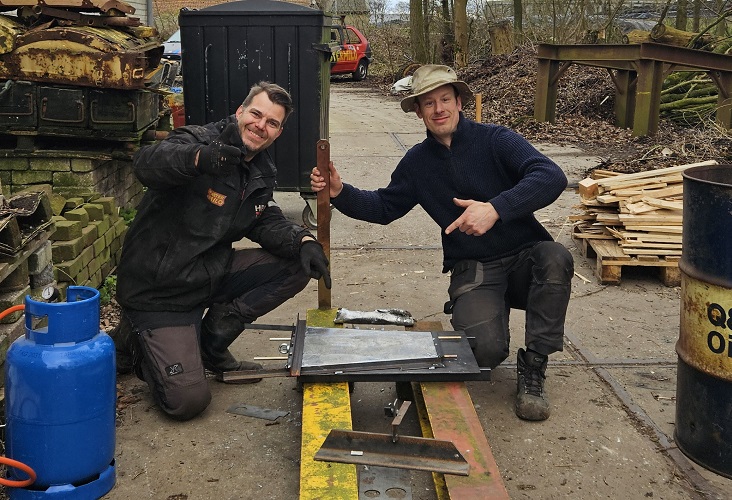
You can watch the complete lead casting process in this video of Emile:
Timeless sculpture
During the last month I have created a new large balanced sculpture, which I named 'Timeless'. The sculpture is based on my earlier sculpture No Time, however 20 times larger - almost 8 meters high - with some minor modifications.
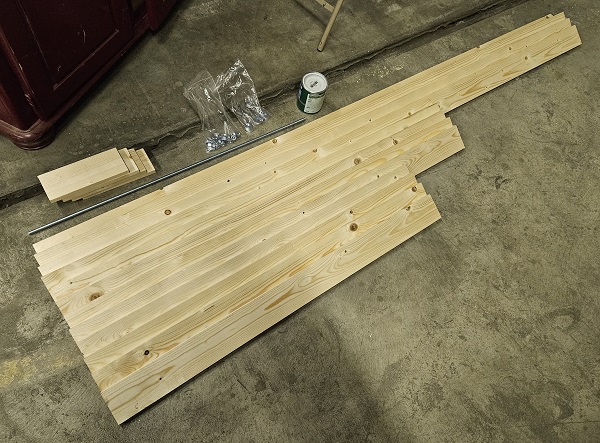
These are the materials that I used: wood, threaded steel rods with nuts and washers, and grey paint.
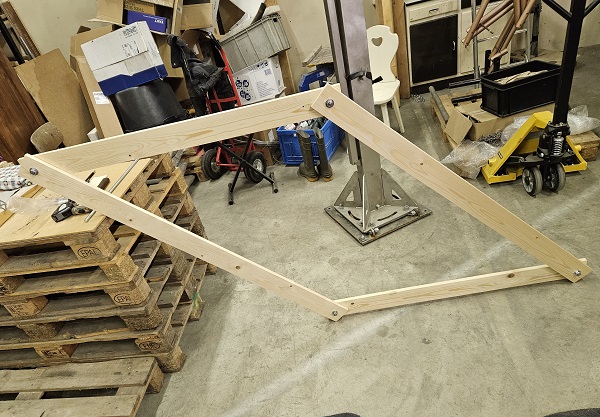
This is one of the two parallelograms assembled. Of a parallelogram the links of each pair of opposite links have equal lenght.
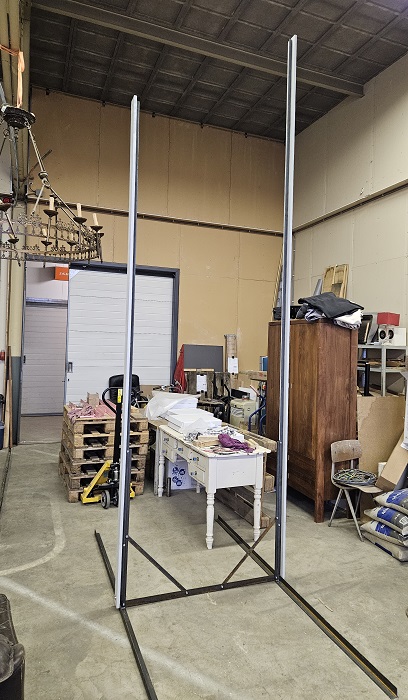
I made a steel frame to support the sculpture and added the two pillars of which the tallest is 4 meter high.
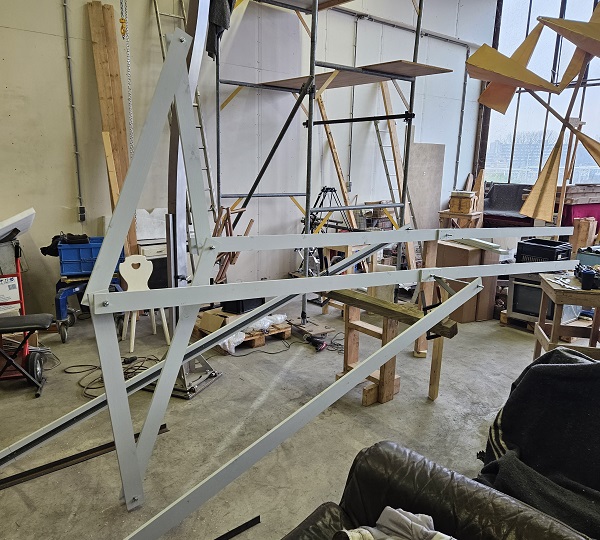
This is the assembly of the sculpture, placing the parallelograms on the long central links...
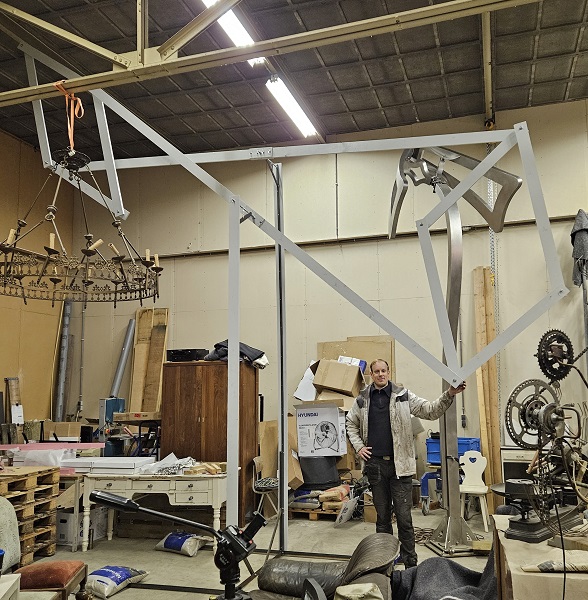
... and when placed upright, this is the final quite impressive result. At first I didn't realize how large it would become (the materials in the first photo do not suggest something so large) - my atelier is not even that high - however I love the monumental appearance. And because it is balanced, it can be easily moved by hand into any position.
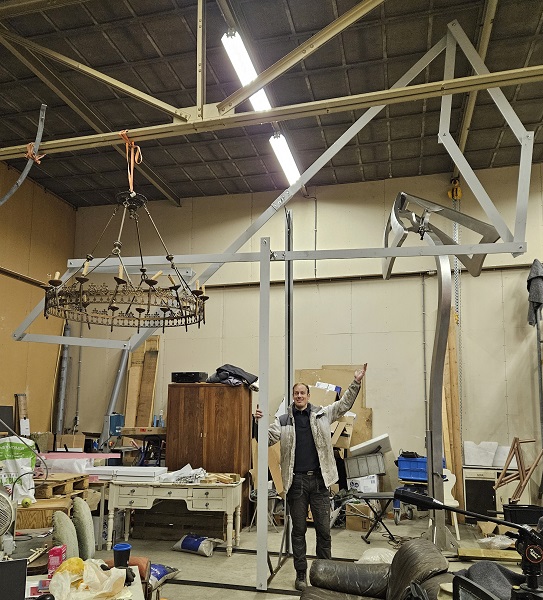
With respect to my earlier sculpture No Time, here the central rotational points are located above one another instead of next to one another and with one pillar in the front and one pillar in the back, the sculpture can move freely all around, which for this sculpture is more fascinating. The next step now is to make the sculpture of stainless steel.
Kunstroute Leiden
For the Kunstroute Leiden 2023 I was invited by Charlotte Icke-Lemmens to create an exhibition at the Alien Art Gallery in Leiden, shared with Vincent Icke. I was immediately very enthusiastic about their illuminated home and very pretty garden. I selected 8 sculptures, among which 6 that were for the first time publicly on display.
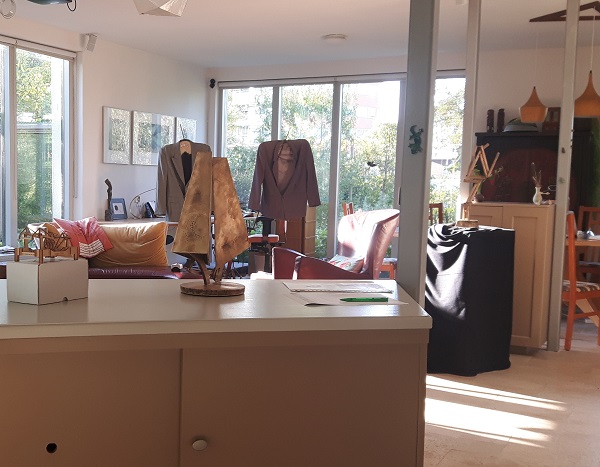
This photo shows an overview of the exhibition inside, with in the back the always successful sculpture Two Men Late at Night of 2005.
The sculpture Between Heaven and Earth of 2021 was placed centrally and the sculpture Hug of 2022 on the side.
I was especially pleased to notice how well the Hug sculpture was praised: "It is impressive that the cold and heavy material bronze is able to radiate so much sensitivity and warmth."
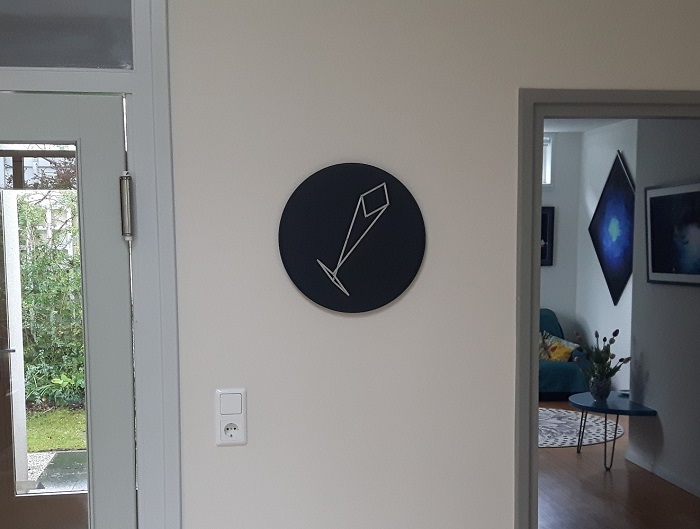
The new sculpture No Time of 2023 was placed on the wall near the entrance where many visitors could gather and move the balanced mechanism by hand.
Outside, the freshly finished Plumage I Flamingo of 2023 was placed in a colourful flowerbed with visitors moving it into a variety of poses ...
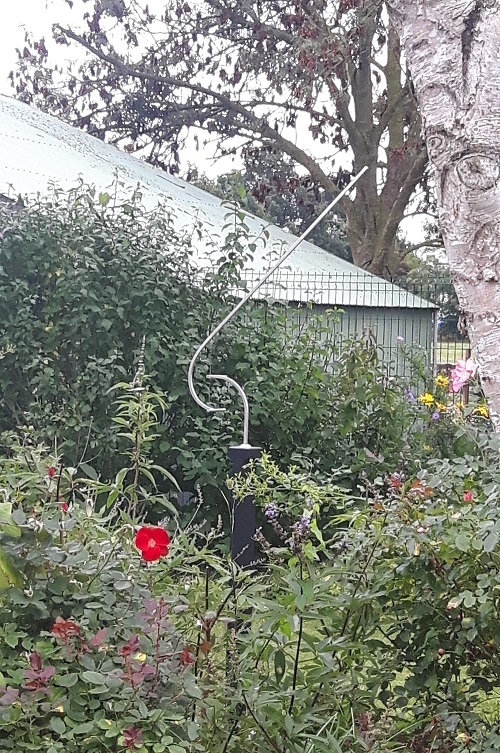
... while nearby the sculpture Freedom of 2023 was placed in a cosy open space in the grass.
To attract attention, the sculpture Between Heaven and Earth of 2011 I had placed in the front of the garden near the road, welcoming all visitors.
The last sculpture on display was 'The Three Cheerers', which was still work in progress and unfinished. The exhibition was an opportunity to test the sculpture and to try out the interactive actuation by the visitor.
Renewing the Plumage I sculpture
The Plumage I sculpture from 2012 came back from a museum in the UK many years ago, completely destroyed unfortunately as they had roughly disassembled the sculpture by using a hand grinder. Terrible! I still had the old parts in my storage and suddenly I got excited to see if I could bring the sculpture back to life and if it still would be balanced.
Fortunately all the important parts where still there and after making some new axles, the sculpture could be reassembled and...... to my utmost surprise: still works perfectly, moving very smoothly and still very well balanced!
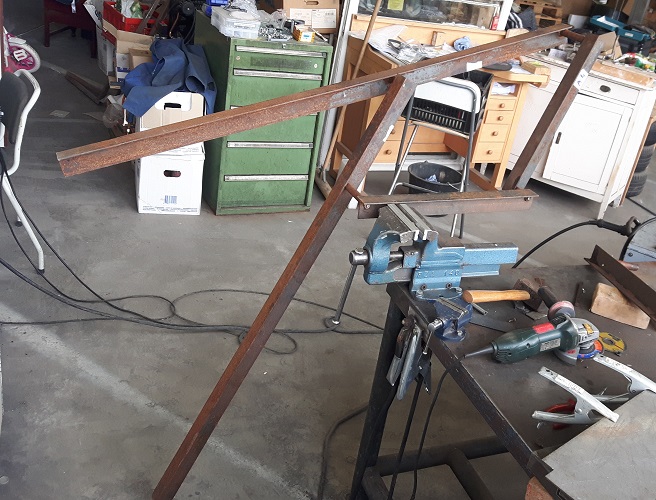
Here some images of the grinder damage, and I suspect also some hammering as I had to make the steel straight again
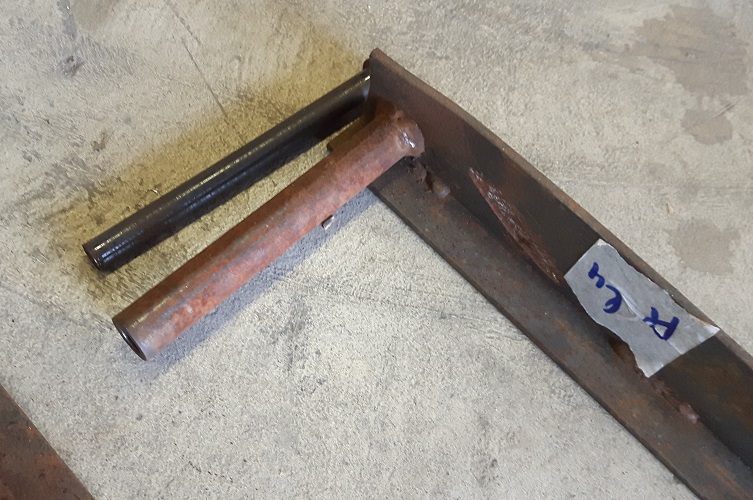
I filled the damaged parts by welding
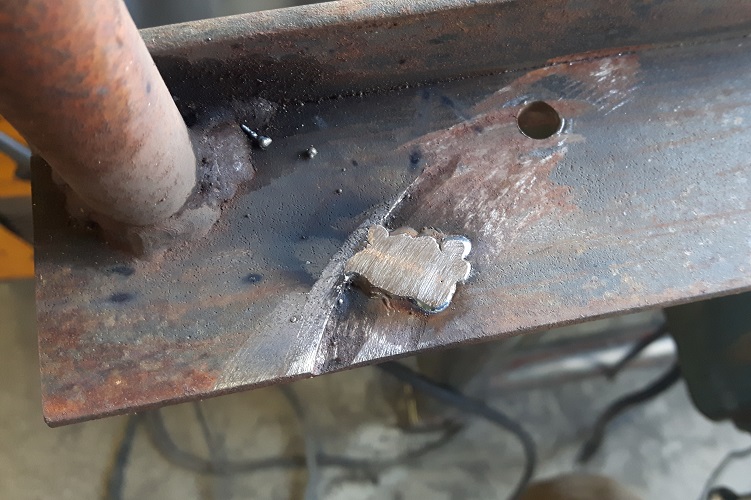
and then restored the shape by grinding
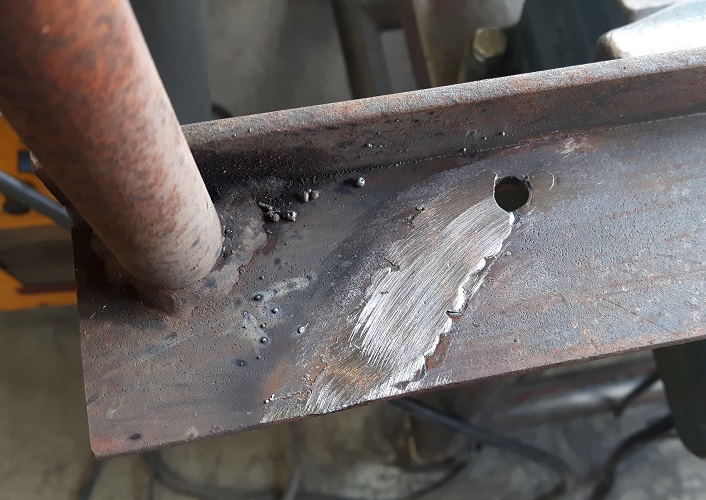
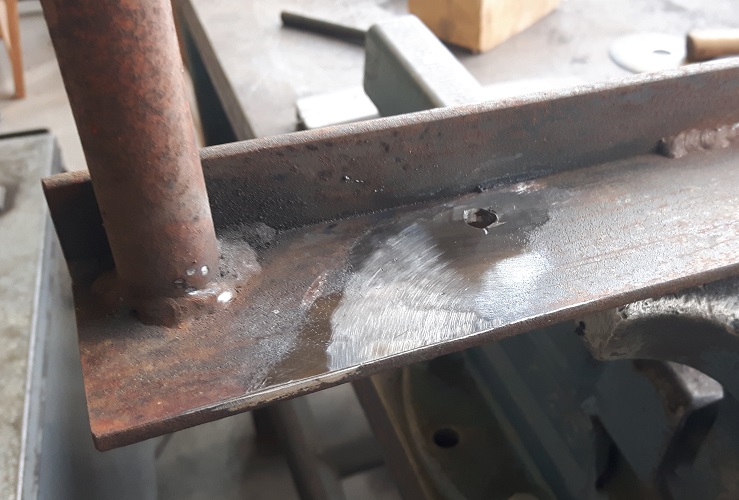
This is the fully restored sculpture. I had to make a new pillar and decided to make the sculpture a little higher than the version of 2012, since that makes it even more impressive.
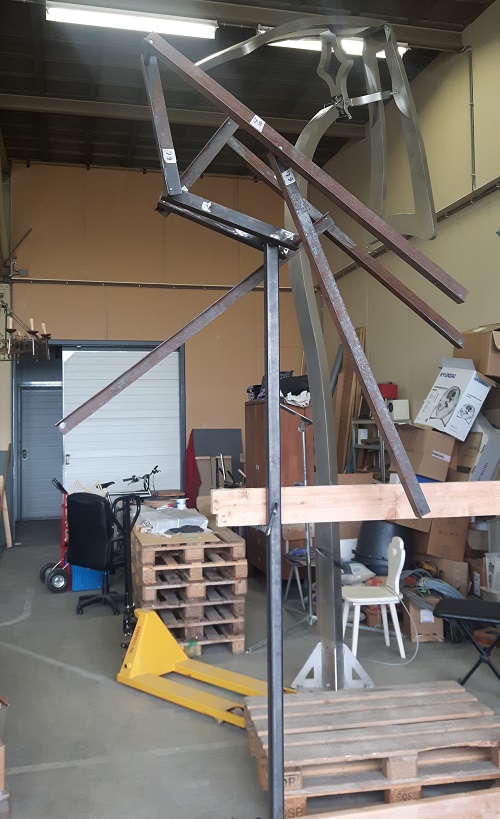
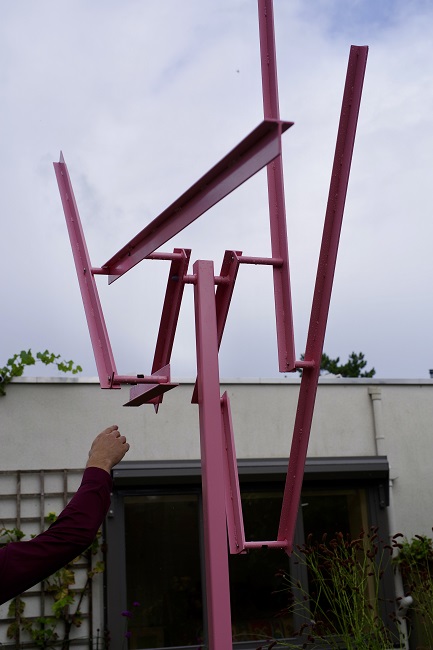
Also the rust I do no longer like for this sculpture and I decided to paint it.... pink! The sculpture will now continue as the 'Plumage I Flamingo'.
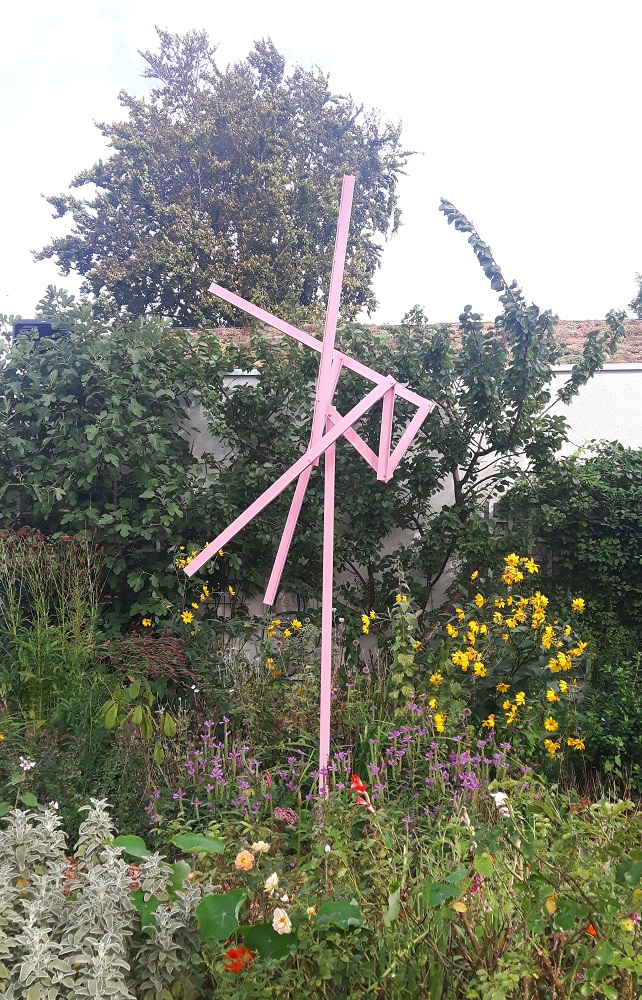
'No Time' finished
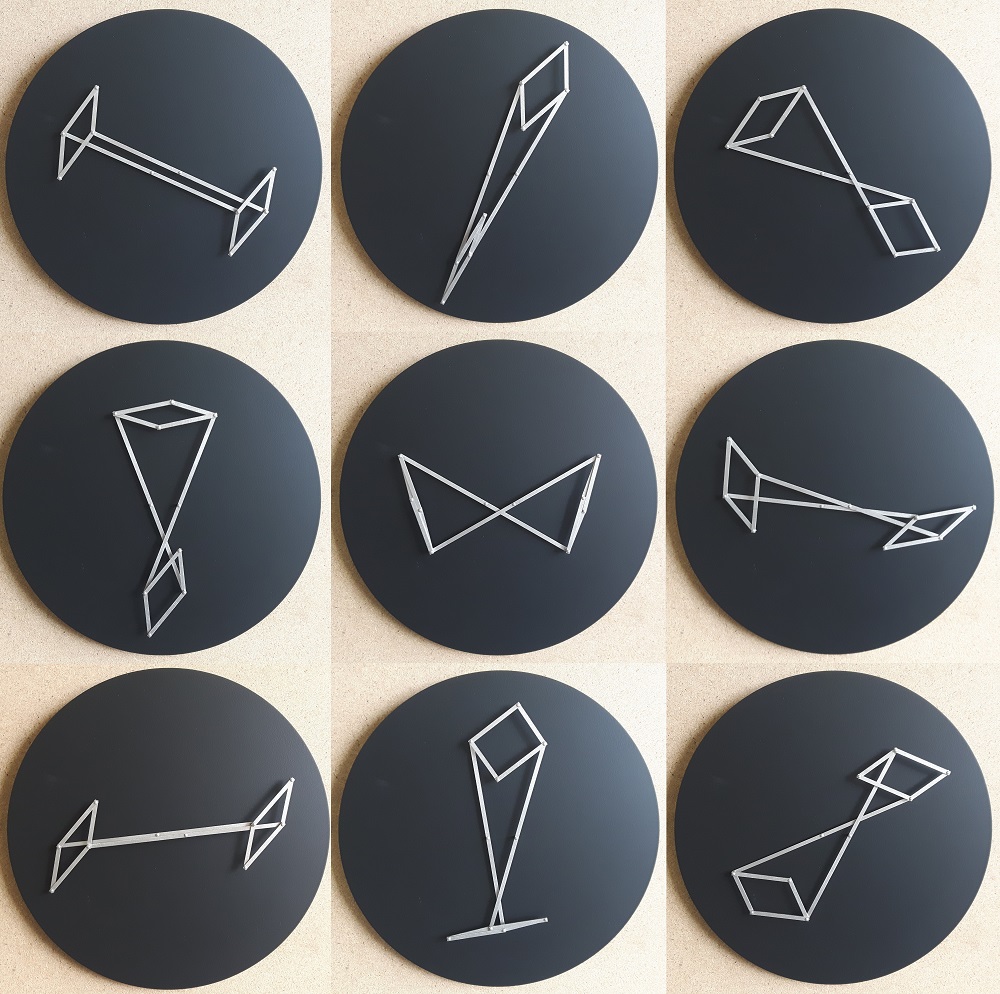
The sculpture with the composition of two parallelograms has been finished. Here you see the final assembly of the polished stainless steel links with the rotational pins.
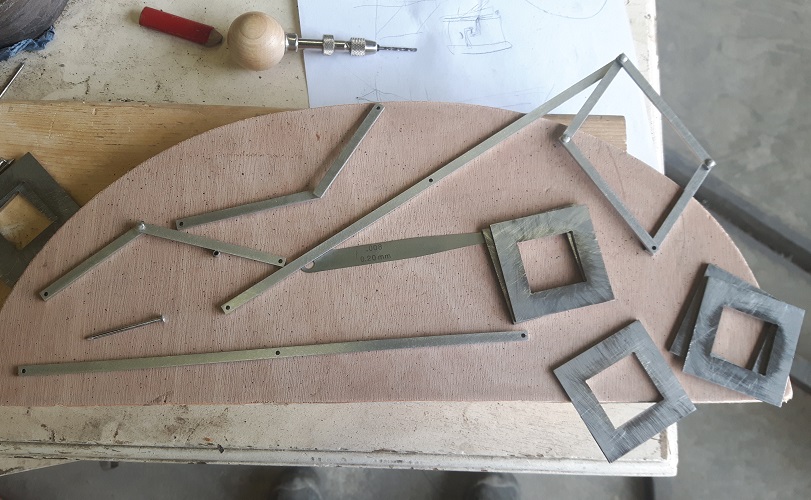
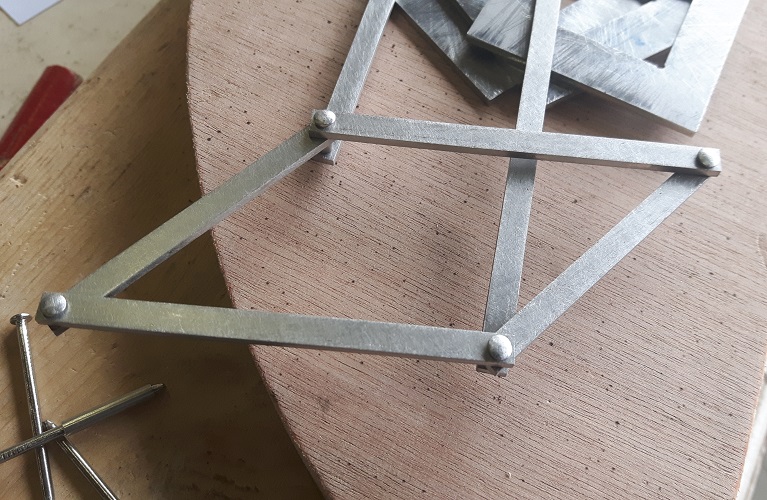
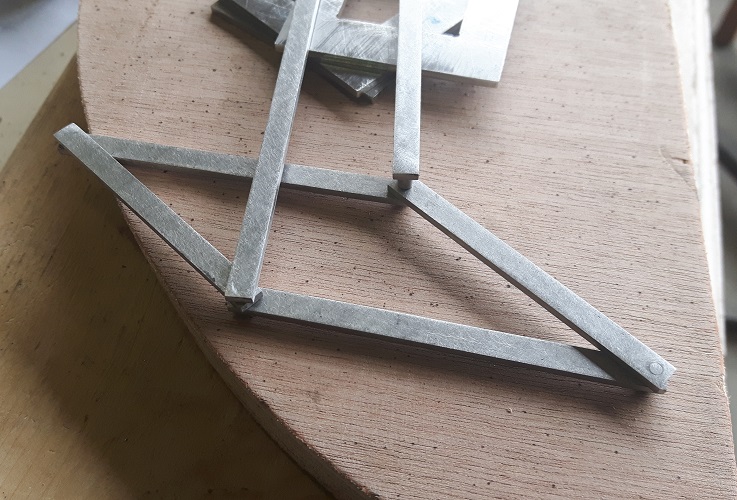
For the background I made a disc of 40 cm diameter with a black color for a nice contrast with the shiny stainless steel. This photo shows 9 of the beautiful possible poses into which you can move the sculpture by hand.
Tensegrity sculpture Freedom
Tensegrity designs are very fascinating: structures with rods and wires where rods do not touch other rods. They show a delicate equilibrium, if you would cut just 1 of the wires the complete structure will collapse. I did some tests with a simple tensegrity structure, a beam supported by just 3 wires which are perfectly vertical, to investigate how the balance and the stability can be influenced.
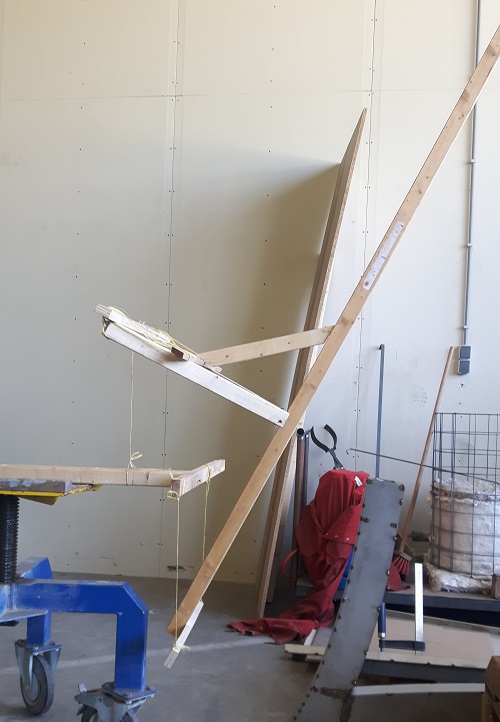
After the experiments I made a new design of the floating beam: a nicely curved steel bar ending with a straight diagonal line. The floating beam is attached with 2 vertical wires below and 1 vertical wire on top.
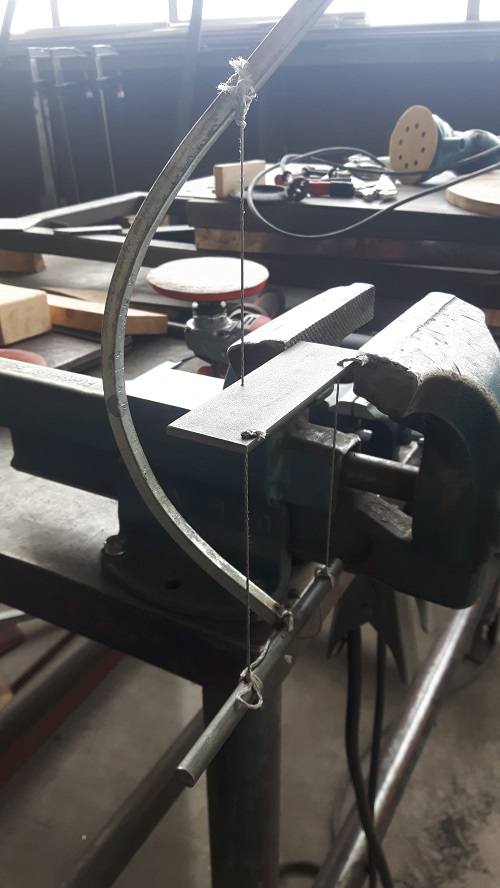
Welding of the rod for attachment of the 2 wires below.
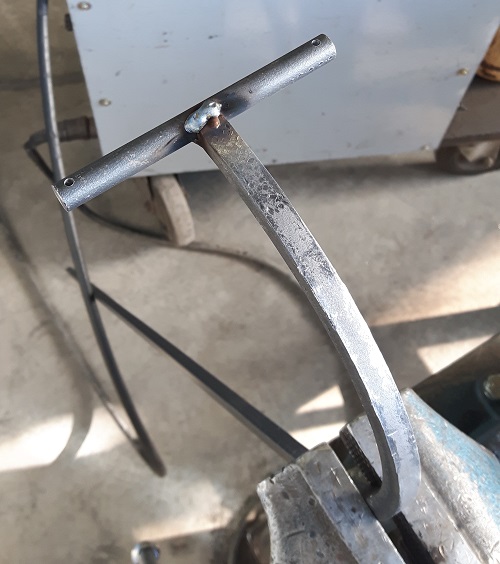
This is the complete first prototype of the new sculpture which I named 'Freedom'. Also the stand I designed with nicely curved shapes. The sculpture stands stable since the center of mass is exactly in the middle of the stand. The next step is to make the sculpture of polished stainless steel, its final state.
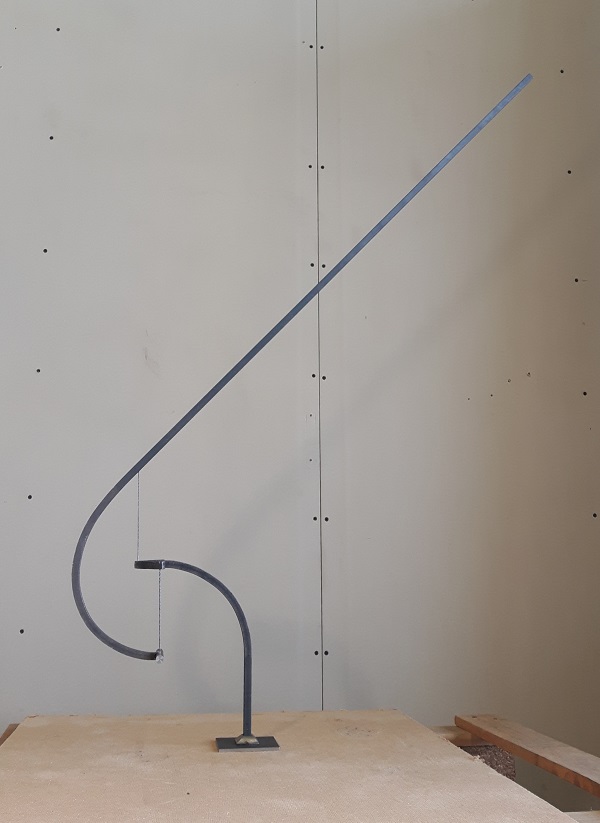
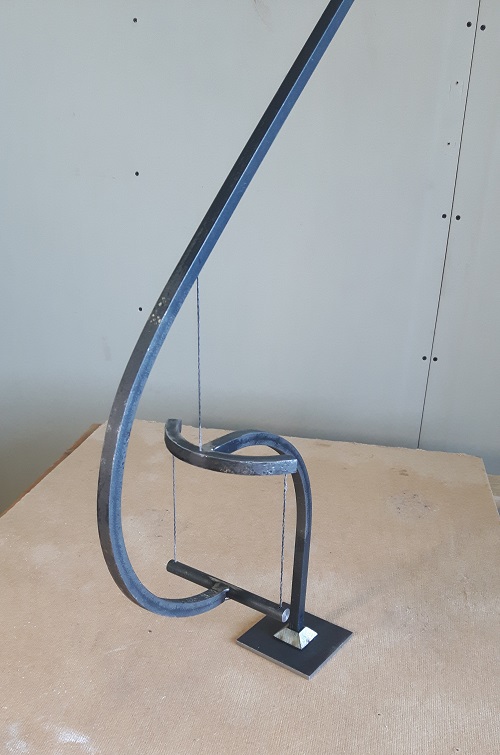
Composition with two parallelograms
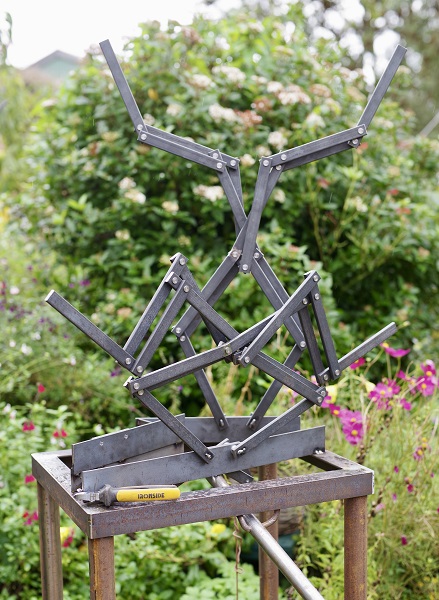
I have designed a small balanced sculpture and made a first prototype of stainless steel. First I made a paper model of the mechanism, which consists of two floating parallellogram linkages with two fixed rotational points in the center.
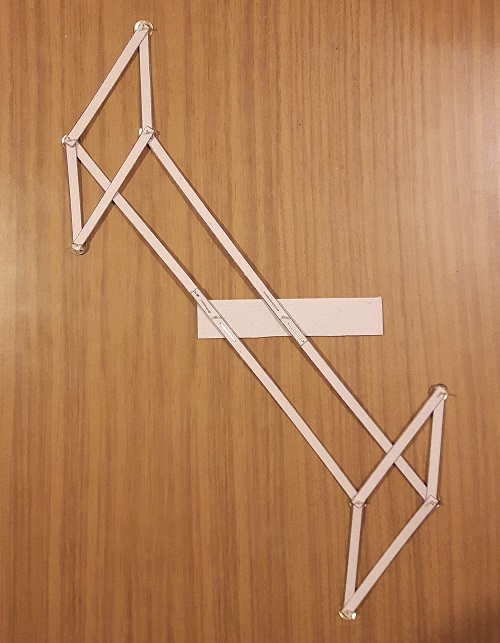
This is a close up of two links connected with a pin...
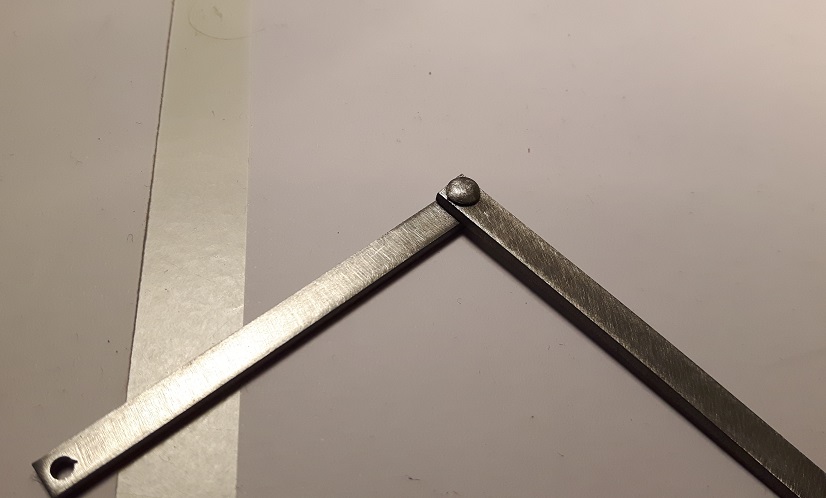
... and this is the firs assembly of the prototype.
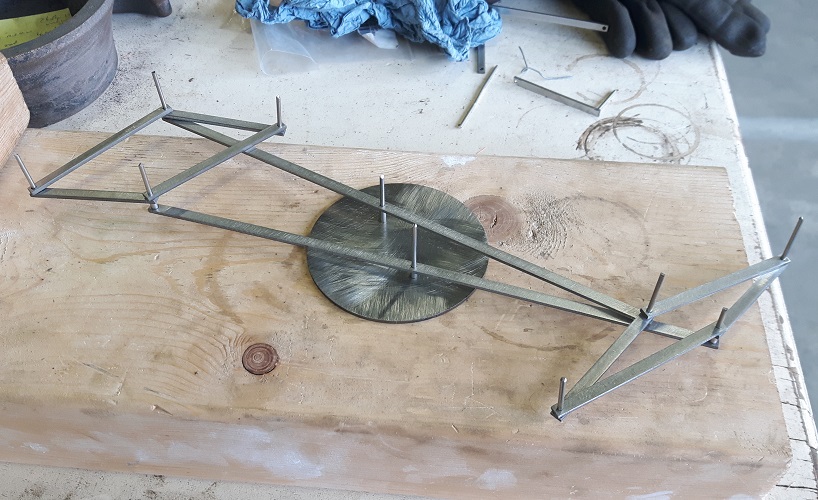
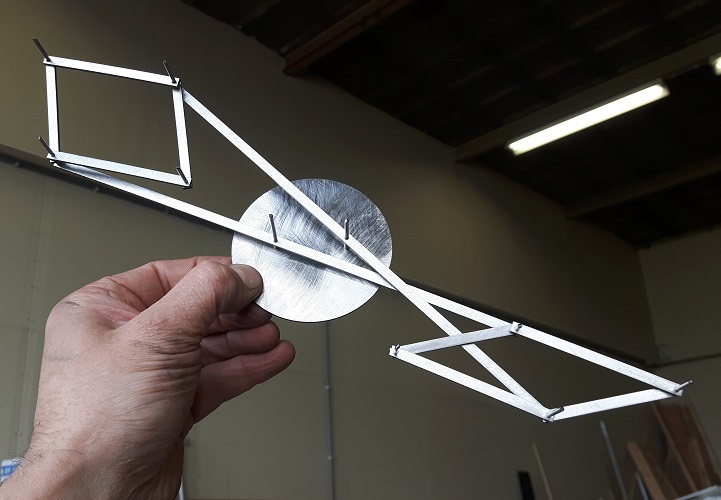
The finished prototype moves very smoothly and turned out very well balanced for which it stands still in each possible pose.
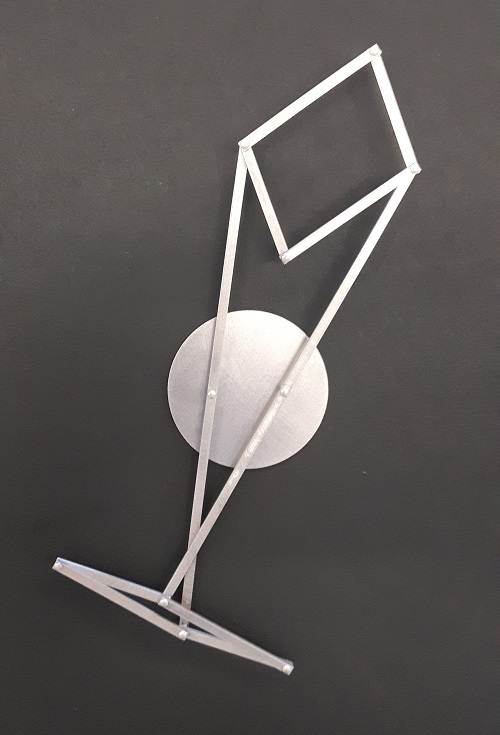
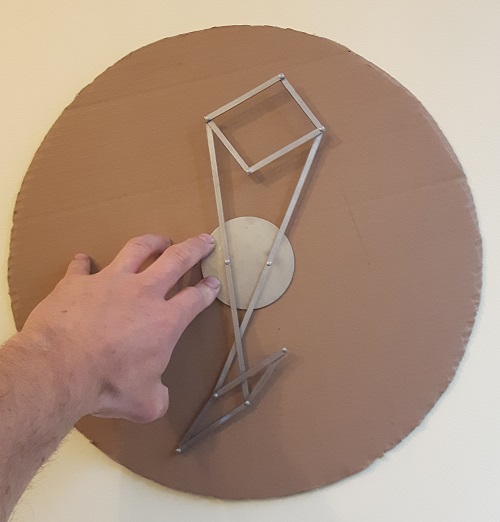
The next step is the design of the background. That will be a circular disc with which the sculpture can hang on the wall.
Hug sculpture
I showed the assembly of the Hug-linkage earlier, here some photos of the assembly of the two pyramid shapes to complete the Hug sculpture.
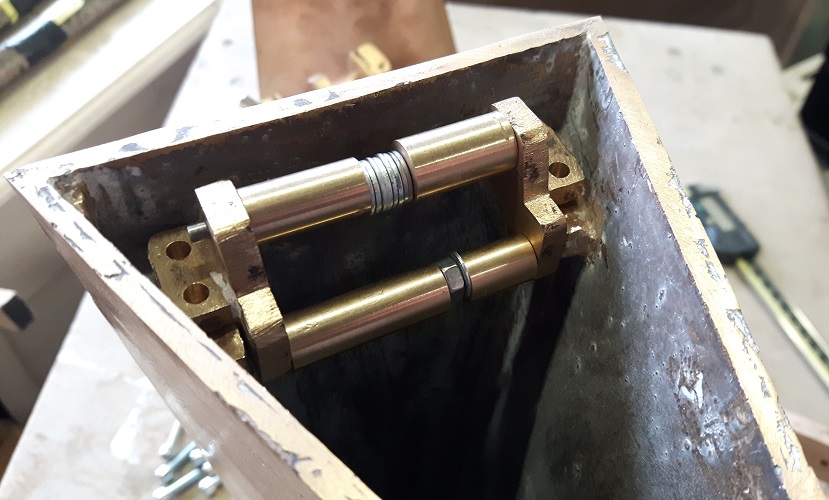
Inside the pyramid shapes the axles have been mounted with screws.
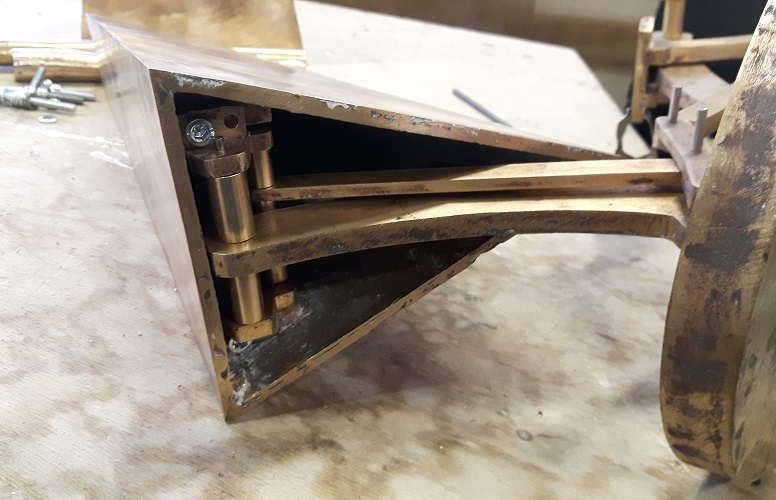
In this photo the attachment of the pyramid shape to the base and the linkage is shown. The thin bar will make the second pyramid shape on the other side move synchronously in opposite direction.
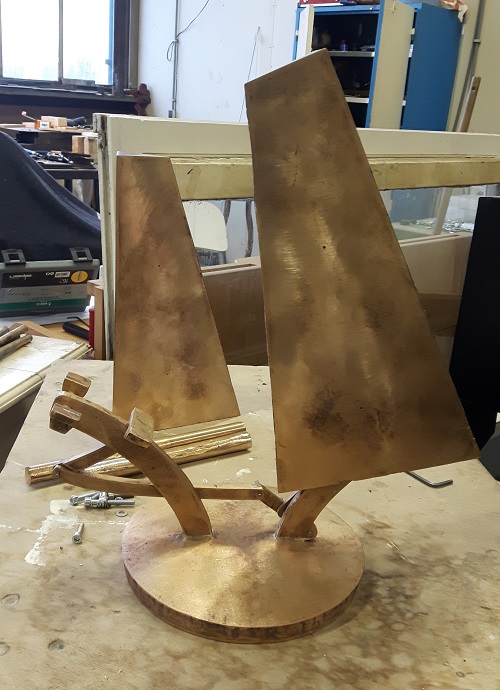
Here the first pyramid shape has been placed and after having mounted also the second pyramid shape similarly, the sculpture is complete.
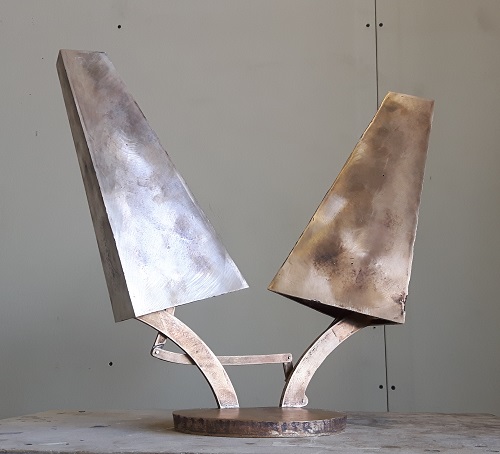
The two pyramid shapes express in the open pose the feelings of lonely distance and strong desire and attraction to one another.
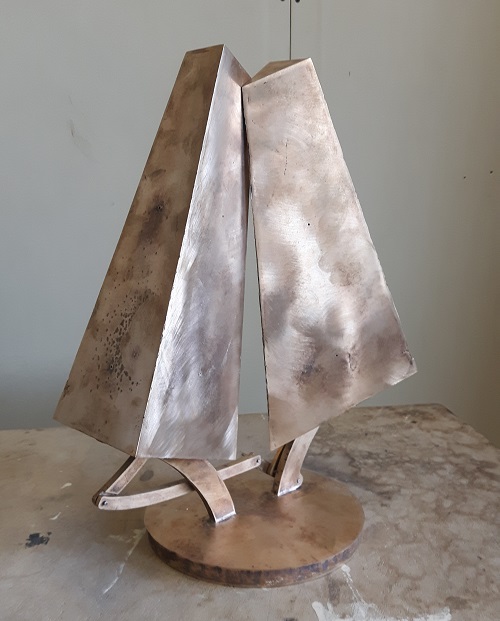
In the closed pose they show the warm intimacy of a hug.
Car Swing 5G
We also tested the swing for 5G forces on the driver. As you can see in the first video, the swing works well but unfortunately the motor supports broke:
After the reparations, the 5G forces were experienced by Emile with full turns overhead:
Anemone Magnifica at Delft Highlight Festival
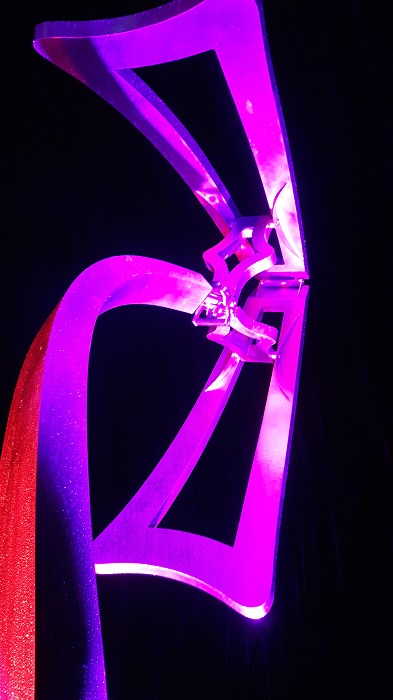
Last weekend the balanced flower sculpture Anemone Magnifica shined at the Delft Highlight Festival 2023 (Delft, NL).
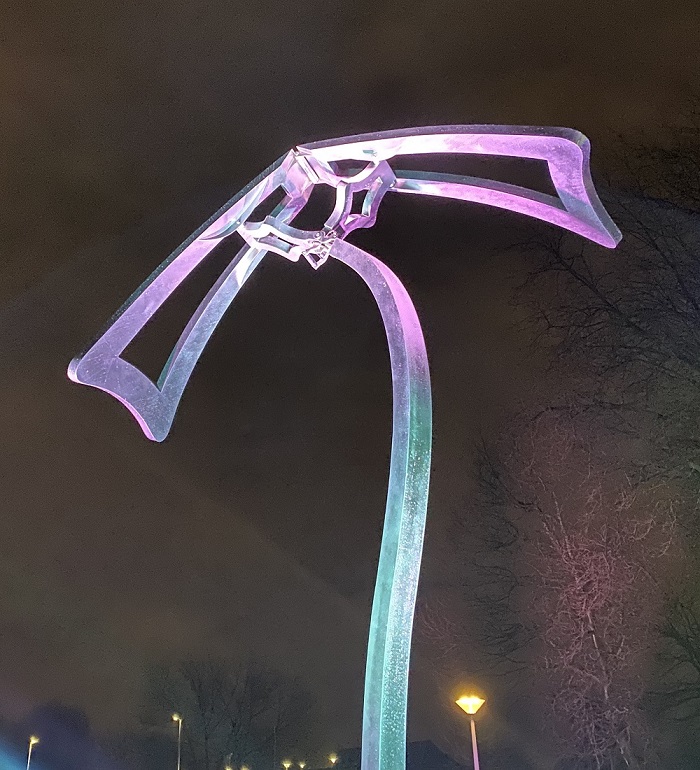
During the three nights of the festival the sculpture was beautifully highlighted with alternating colours.
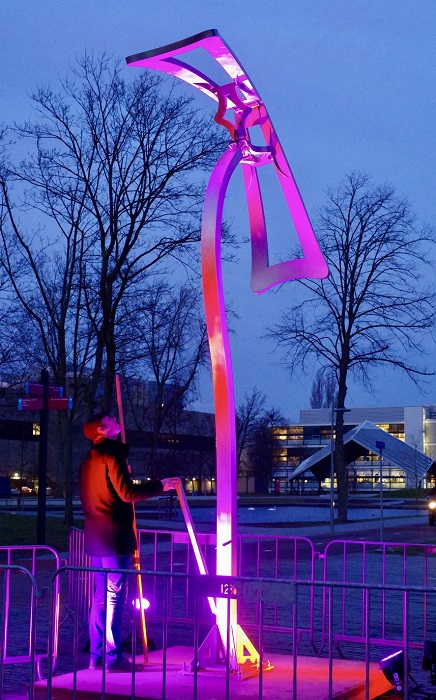
The sculpture received wonderful responses from the visitors, addressing the aesthetics and the motions of the flower, interactively driven by themselves.
Car Swing in action!
The Car Swing works beautifully!
Here you can see a summary of how we built it:
Car swing almost finished
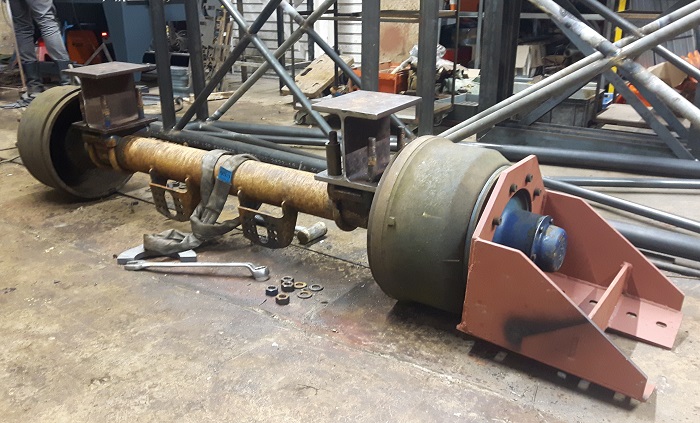
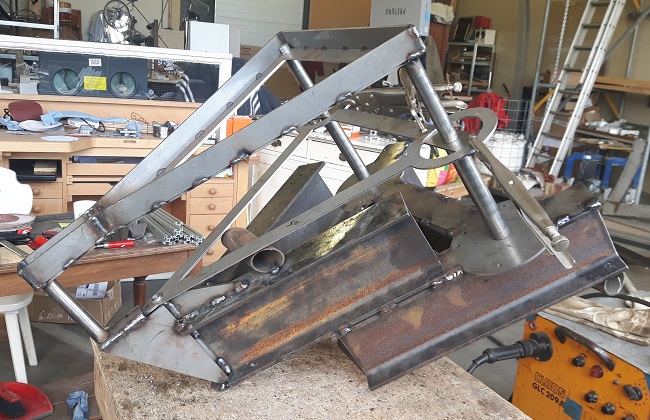
The Car Swing is almost finished! At Emile's (MasterMilo) workshop we keep on working on it daily with lots of welding and welding... Slowly all pieces are getting together. Here a photo of the main axle with two pieces of large H-beam attached for connecting the swing and on the side the part for mounting the axle onto the base frame.
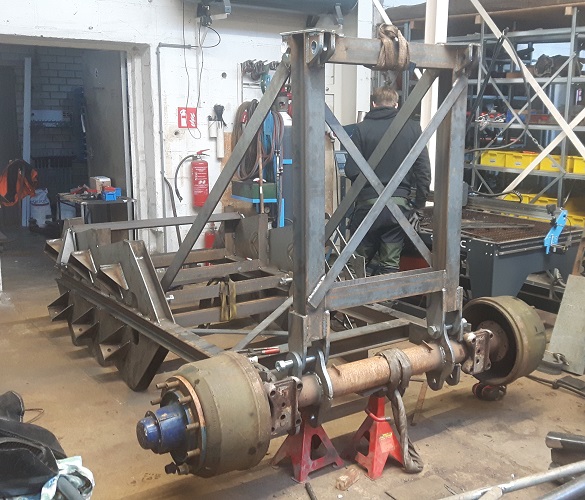
This photo shows the assembly of the countermass - laying horizontally to the back - with one of the side arms straight up and connected with a diagonal bar. Inside this countermass fit 6 legio blocks of 450kg concrete each, resulting in total countermass of 2700kg, which should be more than sufficient for balance of the swing.
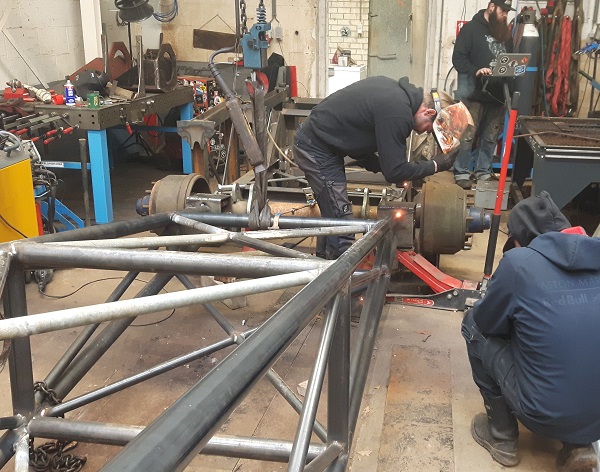
Here Emile is welding the swing structure to the H-beam pieces to mount the swing to the axle...
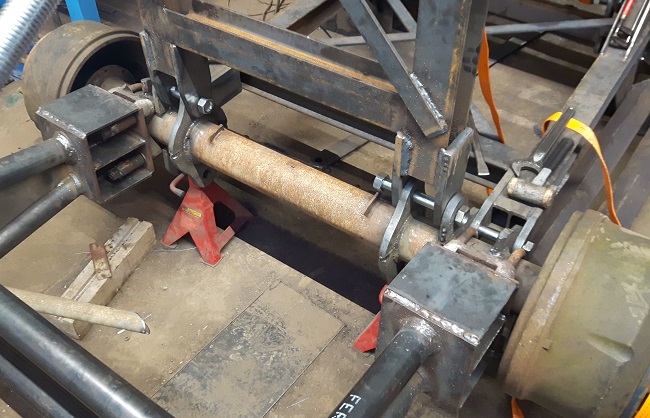
...and here the complete assembly of the swing around the axle has been finished. We had to weld plates of 20 mm thick steel with 32 mm holes to the axle for connecting the countermass and side-arms with M30 bolts. For being strong to withstand the large forces, the welds have been built up in multiple layers.
We have now finished the complete swing assembly...
...and have moved all the parts outside for assembly on the base frame. The next step is to mount the car to swing. The videos of the complete production of the Car Swing can be seen at Emile's Werkplaatsvlog.
Car swing on the way
The manufacturing of the Car Swing is taking speed: Emile (MasterMilo) is working daily on the production since the beginning of December. We hoped to have it ready and make the first looping before Christmas, however that turned out not feasible. Now we aim at finishing it during the first weeks of January.
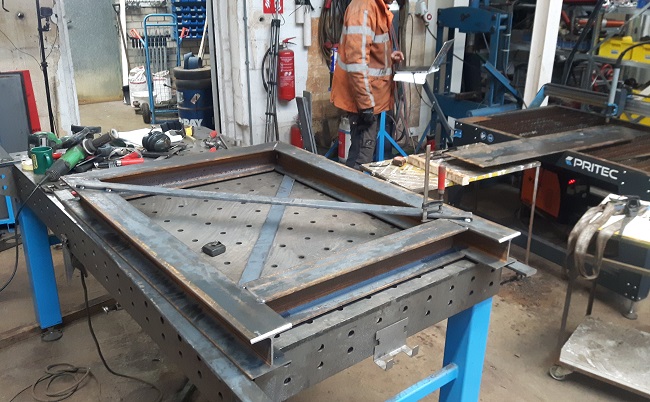
The first photo shows the assembly of one of the small side arms of the swing from H-beams of steel and diagonal bars for strength. The front side will be connected to the central axle while to the far end the cables will be attached.
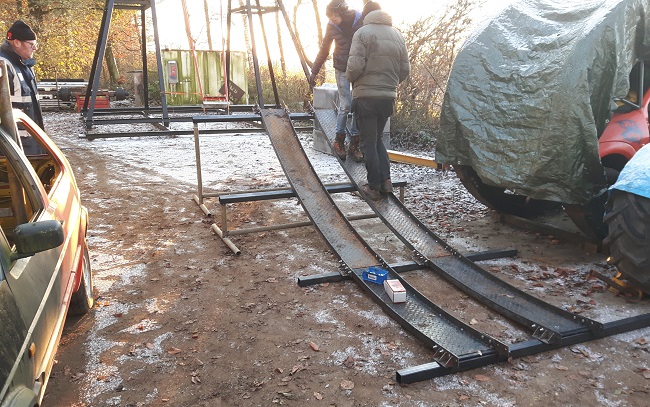
This is the first set-up of half of the ramp onto which the car will drive when passing by the ground such that it can gain speed. The distance between the two tracks can be adapted and tuned to perfectly fit with the tires of the car.
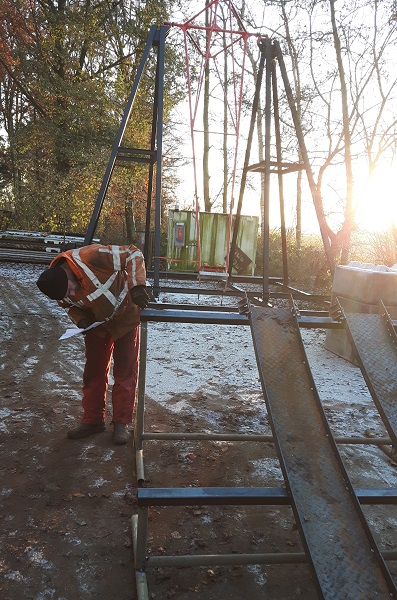
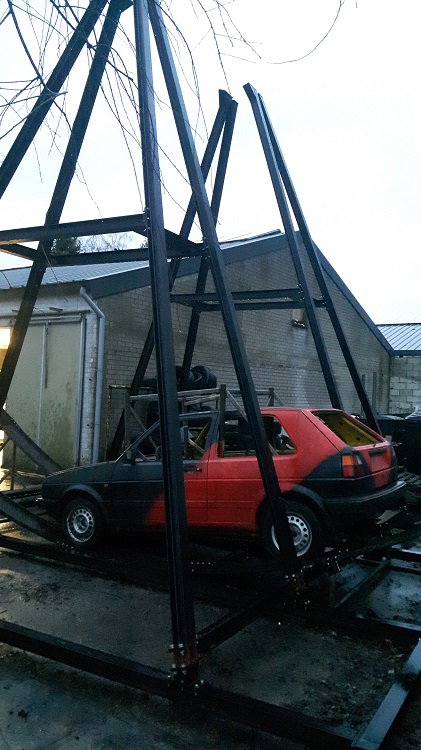
In the back the large framework is visible onto which the car swing will be mounted. This was already build during the summer and was 'tested' by Emile as a 'normal' swing in which you can swing to go overhead.
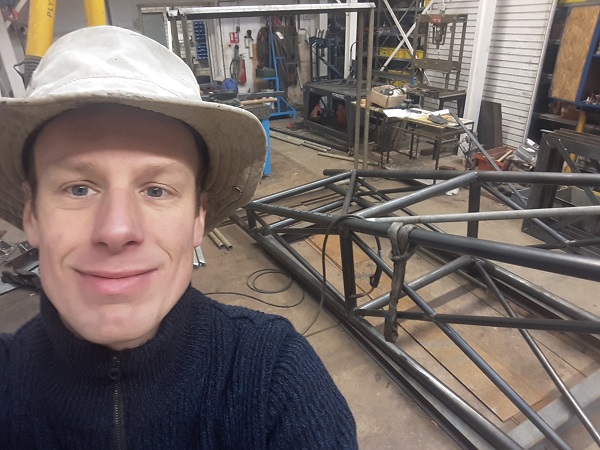
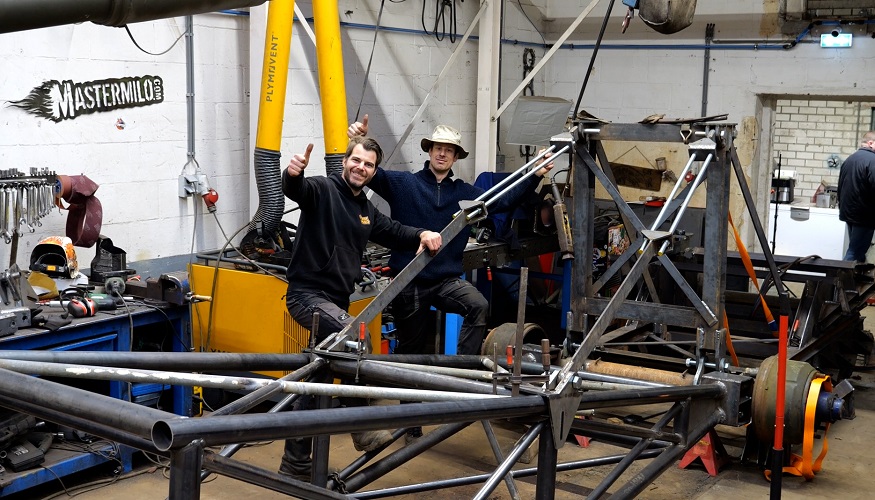
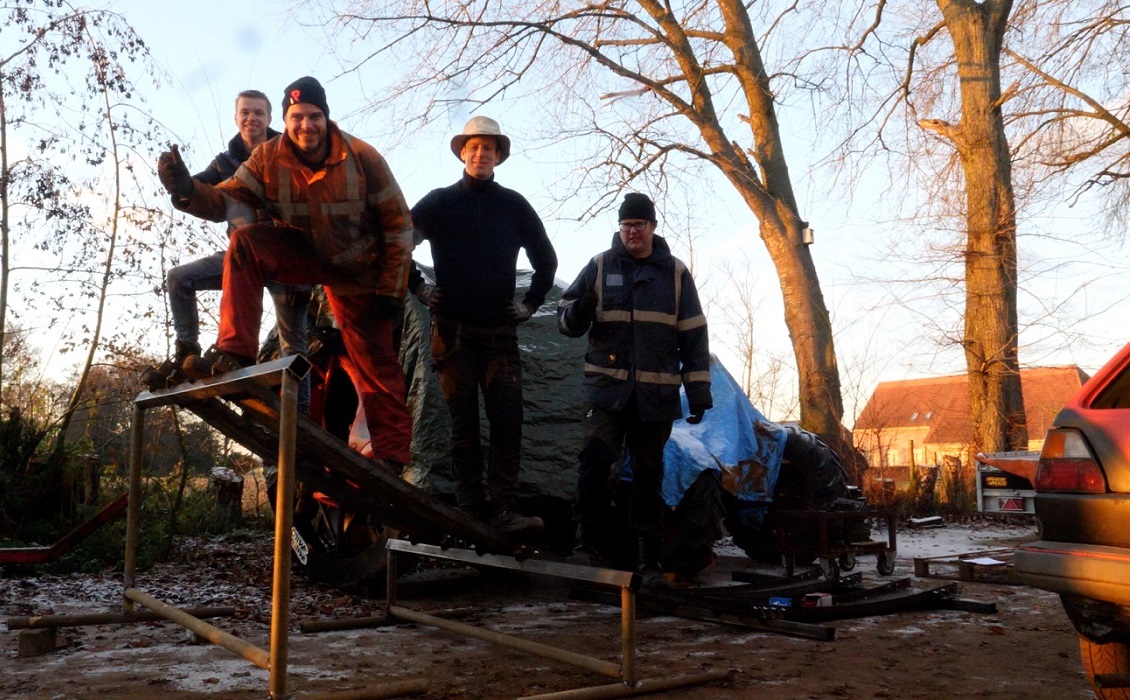
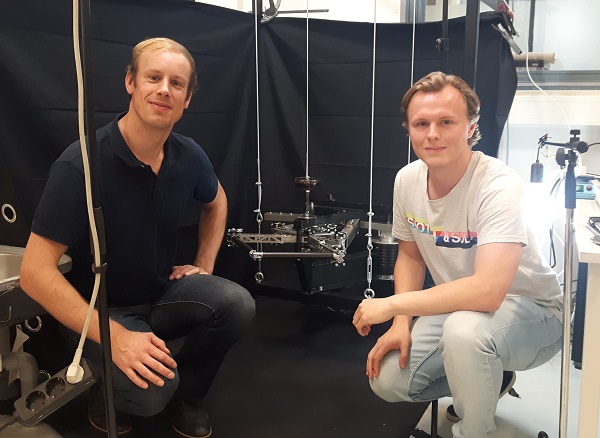
At the right of me you can see the large construction onto which the car will be mounted, made of round steel tubes. Below a team photo. The videos of Emile of the complete production of the Car Swing can be seen at his Werkplaatsvlog.
Cheering Sculpture
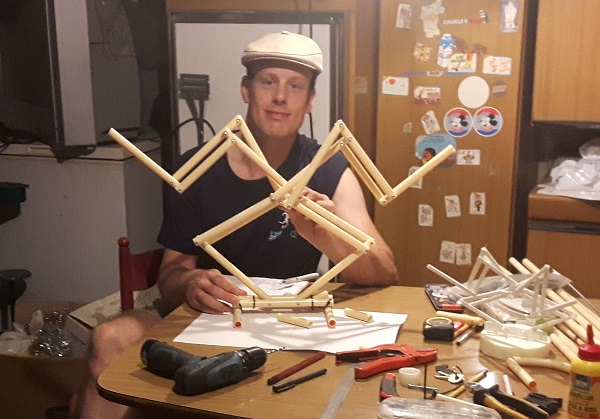
I'd like to present: The Cheerer! A new kinetic sculpture that I have developed in steps during 2022. Around Easter I made the first sketches and investigated the geometry and kinematics and studied the motions. During the summer I made some models and now I have just finished a large version of steel.
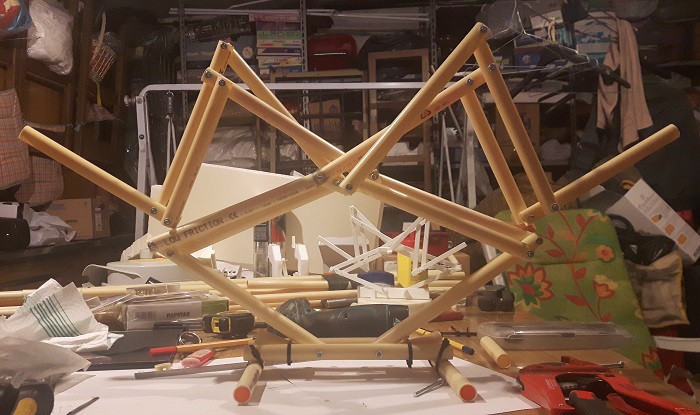
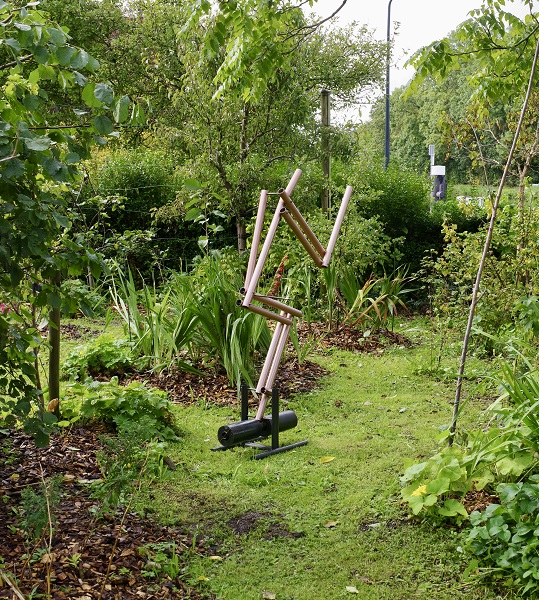
The Cheerer expresses the extreme delight after anxiously waiting for something of great desire to happen. For instance at a match, watching in tension and then.....goal! The model in the first photo shows the spectator sitting down watching in suspense, while the second photo shows the spectator in its ultimate cheering position.
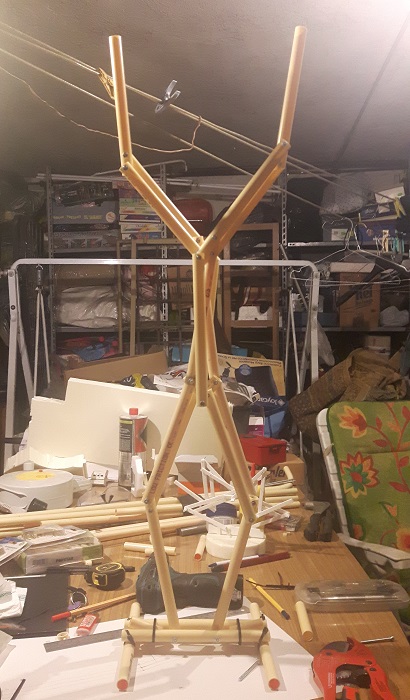
The model I made of plastic electricity tube, which is strong, lightweight and easy to process.
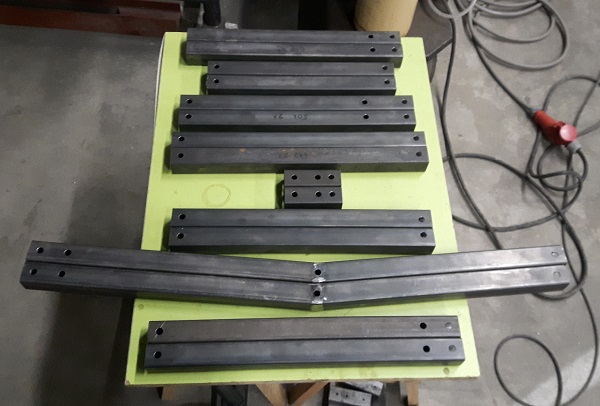
A two and a half times larger version of steel I made of 40x40mm steel tubes which are shown here with the holes for the axles.
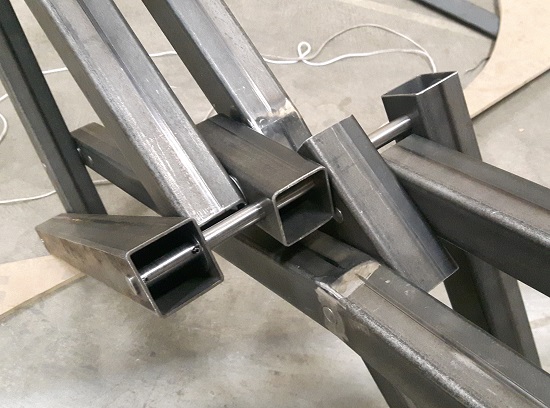
This photo shows the central axle where multiple parts are connected together.
After assembly of the sculpture also a strong base was made. As a special feature of this sculpture, I want it to actually jump up from its base to be briefly free in the air, like a person jumping up and losing contact with the floor.
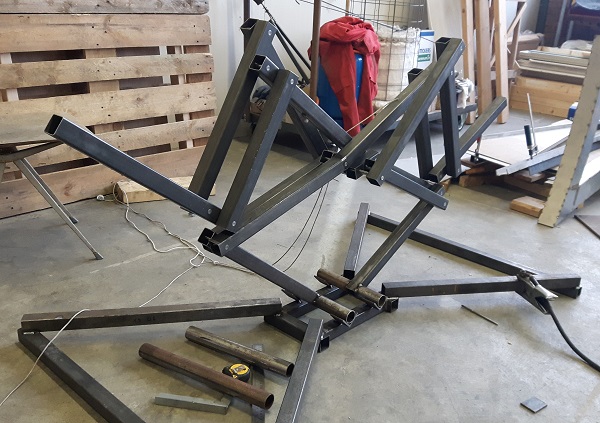
The sculpture is driven by a rope to pull the sculpture up. I would like to make some improvements such as installing a handle to actuate the sculpture for a better interaction with a spectator and also the jumping up of the sculpture needs to be optimized by experimental testing. A next step is also to make the sculpture of bronze, as large as the model in the first photos.
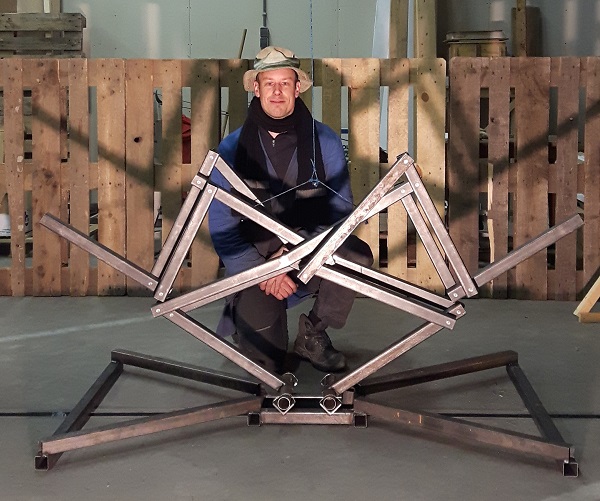
[A video of the sculpture cheering will be shown here soon.]
New high-speed robot manipulator
The second secret project I have been busy with during the last months is the development of a new robot manipulator which can move at very high speeds without causing vibrations of its base. The manipulator has been named Super-B, referring to the superb performance due to its Super (inherent) Balance, and has been filed for a patent.
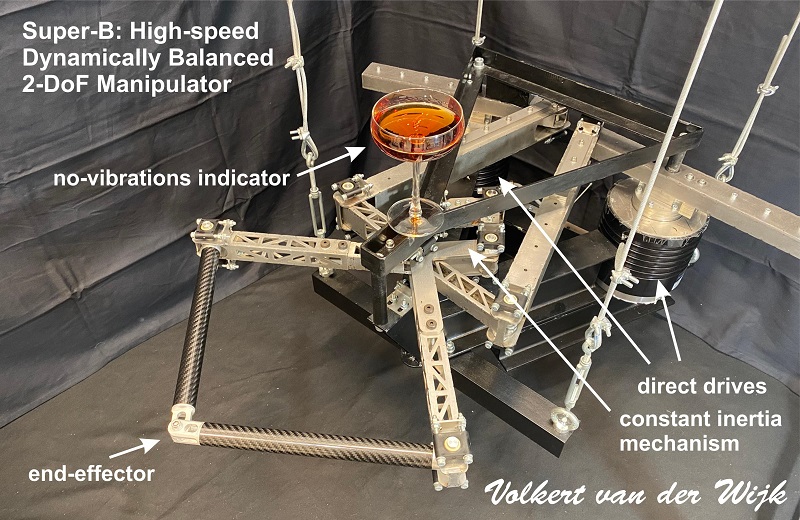
The first photo explains the main elements of the manipulator, which has 2 direct drive motors to control the end-effector for translational pick&place motions within the plane. The key innovation has been the constant inertia mechanism which allows the end-effector to be inherently balanced with two balanced manipulator arms as shown here. The design of the robot has been made by my graduate student Dennis Boere, who investigated a variety of design possibilities for which this one turned out the most advantageous.
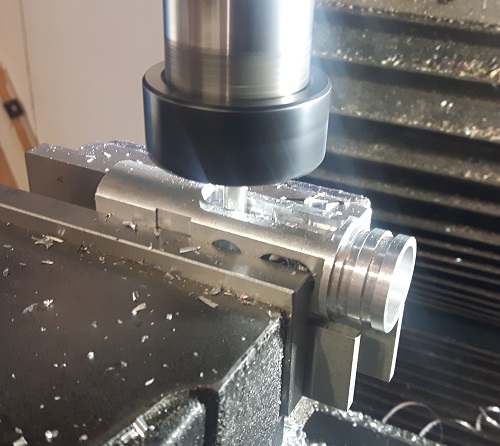
The production took quite some time. Here you can see the milling machine for the production of the aluminium end-effector...
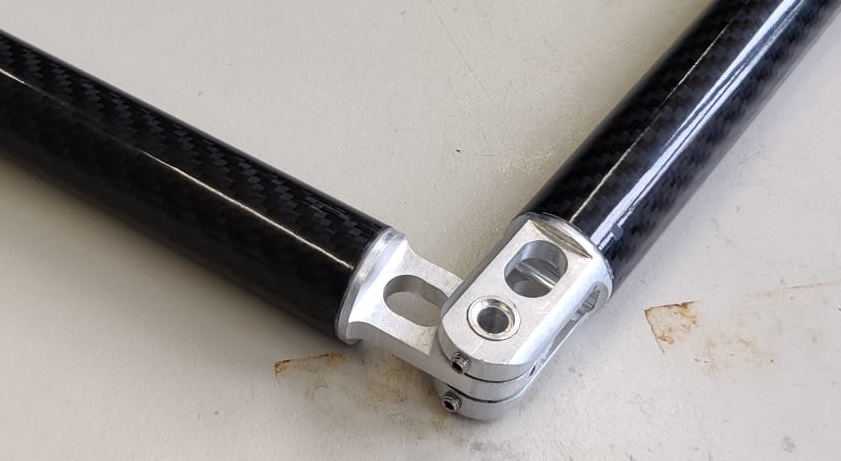
... which was glued into carbon-tubes to keep the distal links/parts as light as possible.
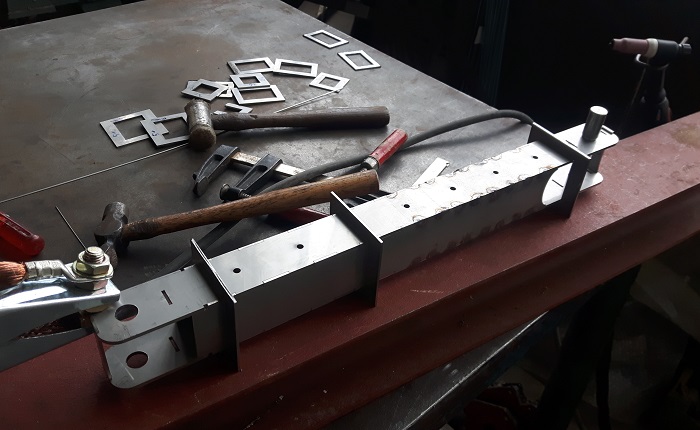
The other moving links/parts of the manipulator were made of stainless steel, by tig-welding of lasercutted pieces which fit as a puzzle.
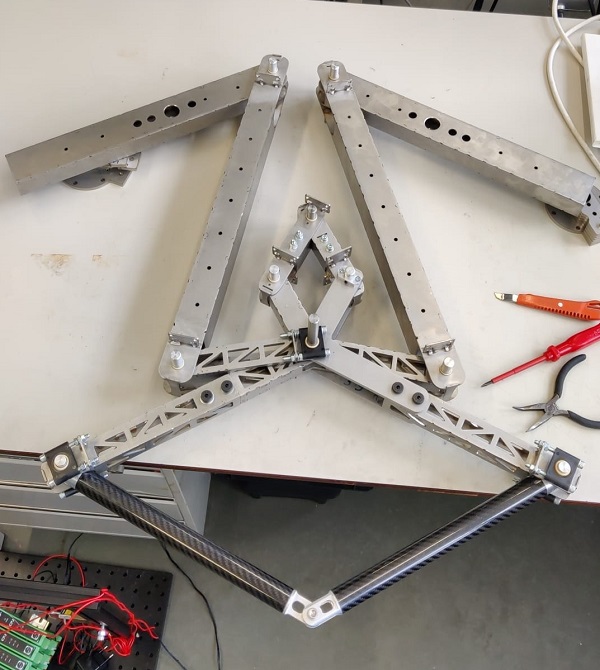
Here the complete linkage is shown during assembly. On all axles bearing tensioners were installed to eliminate the clearance. By carefully designing the masses of all elements, including some additional masses at specific positions, the dynamic balance of the complete linkage was obtained.
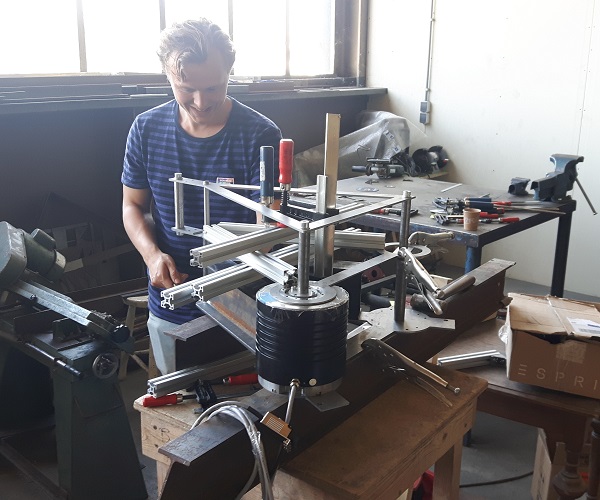
The production of the base frame of the manipulator was a challenge on its own, since the distances among the three rotational points need to be very accurate for dynamic balance. Above you can see Dennis fixing the parts before welding and underneath the base is shown during welding.
In this video you can see the mobility of the manipulator after it was fully assembled.
After the assembly we did some experiments for motions with 3 G and 8 G accelerations to verify the dynamic balance and to compare them to an unbalanced situation where the 'no-vibrations indicator' in the first figure was not much silent. The results and the video's of the Super-B are included in a scientific article that will be published soon.
Car Swing & Looping project
During the last months I have been busy with two so far secret projects (together with the birth of my wonderful daughter Sofia a few weeks ago). Here I'd like to share the first project: a huge installation named the "Car Swing" which I am developing together with Emile Luijben (Mastermilo) for the 'Op de proef gesteld' campaign of the University of the Netherlands.
This computer illustration shows what it is going to look like: A Volkswagen Golf will be swinging as a 6 meter long pendulum hence and forth and eventually make a looping at 12 meter height(!). Every time the car passes the ground it accelerates by the 'driver' giving gas to swing up higher and higher.
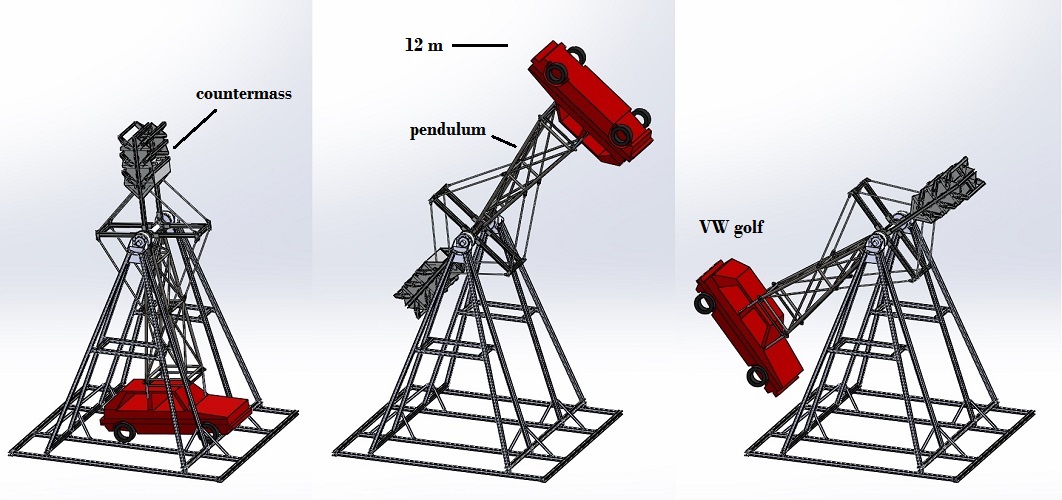
Together with Emile we've made the conceptual design. While I am busy with the dynamic simulations, calculations of the dynamic forces, and making a design that is strong enough, Emile is taking care of the production. The design is very challenging, as the dynamic forces will be significant: with a looping the car will exert 5G acceleration forces on the driver when passing the ground, which is 5 times heavier than gravity, making a 1000 kg weighting car act as if it is weighting 5000 kg, and a person of 80 kg as if weighting 400 kg. This is about the maximal acceleration force that is allowed in rollercoasters, and near the limit a human can handle without special gearing. With a countermass on the other side of the swing (blocks of concrete) the car can be balanced, reducing these enormous G forces and eventually making it possible to slowly drive comfortably in looping circles. However these countermasses introduce other large forces that have to be designed for.
This project was initiated by the University of the Netherlands with the aim to promote science. As Assistant Prof. of the TU Delft I will be explaining in the videos how to design such large moving structures, how to think of the (dynamic) forces that act in the material and how they have to 'flow' through the structure. And of course, how to balance them.
If you'd like to see more of the production in the workshop (the base frame has already been produced and used by Emile to make himself loop), then have a look at Emile's video's below or visit his youtube channel. He makes excellent and very insightful recordings.
Into a new atelier!
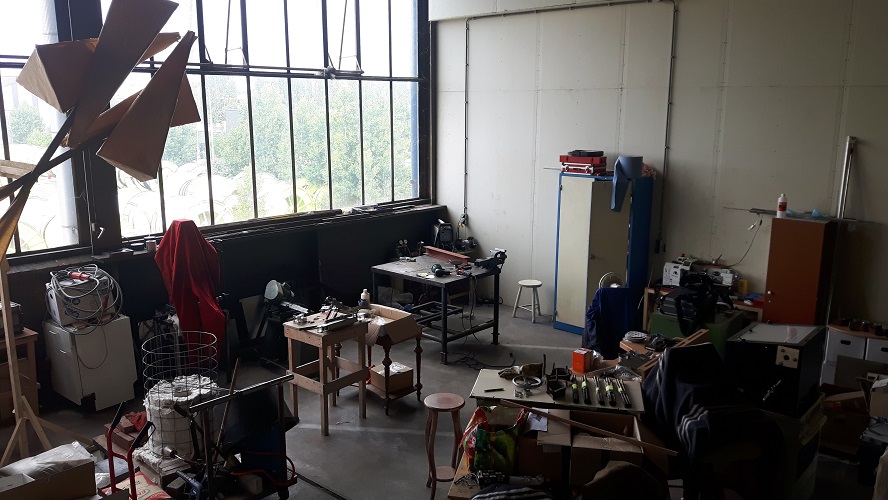
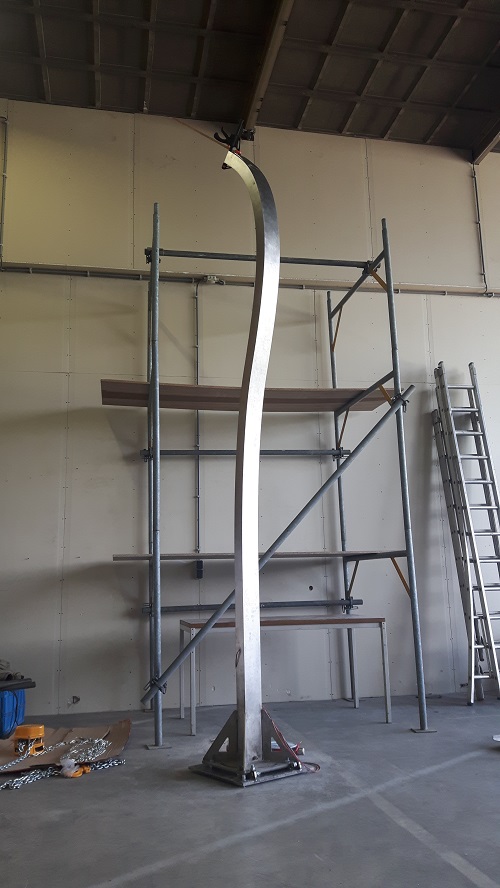
In the past few months I have moved into my new atelier in the old cable factory at the Schieweg 15 in Delft. It's a wonderful space: 150 squared meters with a lot of light from the North and a lot of height such that my large sculptures fit in. The first photo shows the core of the atelier: the metalworks corner. The second photo shows the installation of sculpture Anemone Magnifica.
Hug-linkage
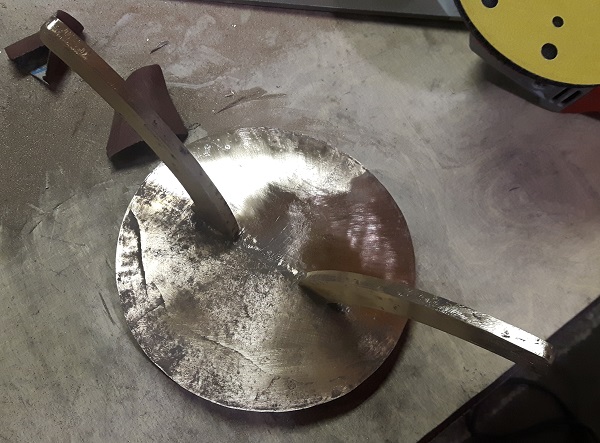
For my new sculpture 'Hug' I have started with finishing the surfaces of the bronze parts and also with assembling the linkage mechanism as shown below. The holes for the axles were precisely made and such that the moving bars will make the right side on top move synchronously with the left side on top with which they move either inwards or outwards simultanously.
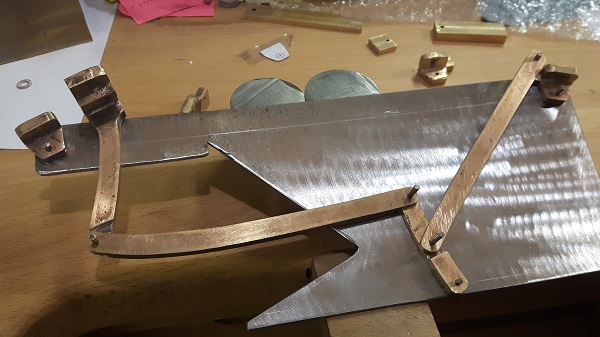
The motion is shown in this video in which the right part of the mechanism consists of a general four-bar linkage while the left part of the mechanism is a parallelogram. Then next step is to place the pyramid shapes on top.
'Between Heaven and Earth' finished!
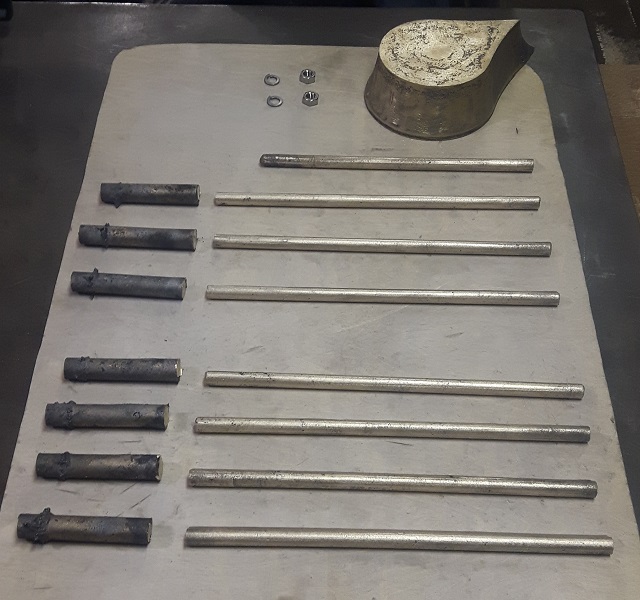
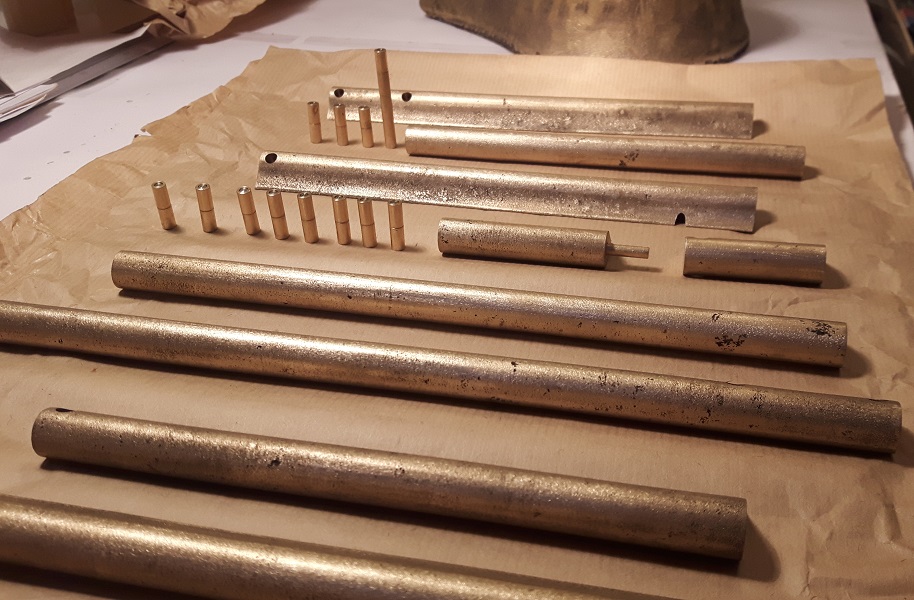
After many hours of experiments and work, the newest version of Between Heaven and Earth has been finished now too. Earlier I wrote about the teardrop profiles I'd casted. I wasn't 100% satisfied and decided to make an improved wooden model. With that model I casted a series of bronze bars with a nicer teardrop profile.
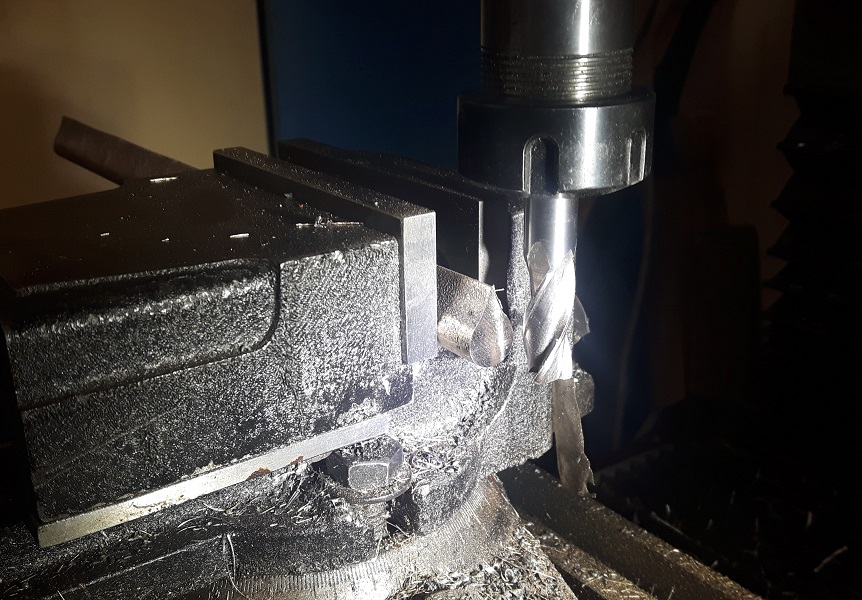
With the milling machine I gave the bars the correct lenght with a straight surface finish.
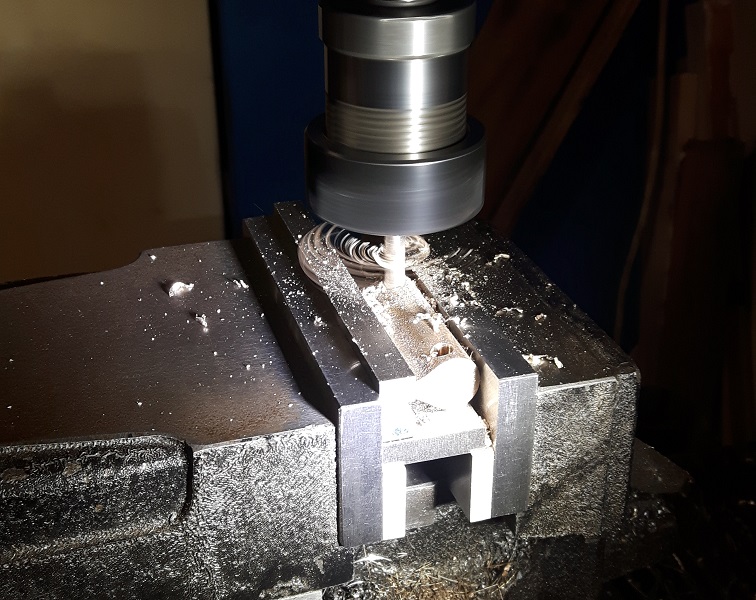
Also for drilling the holes for the rotational joints I used the milling machine such that the measures are accurate and the holes are well aligned.
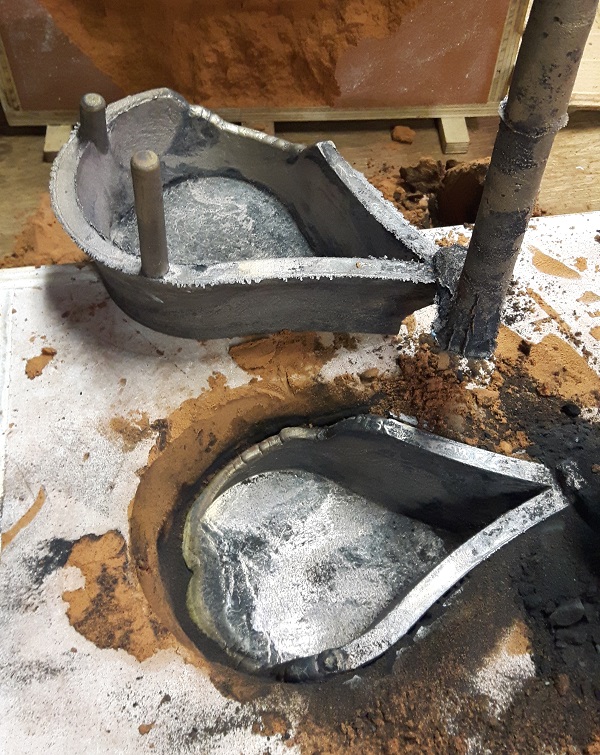
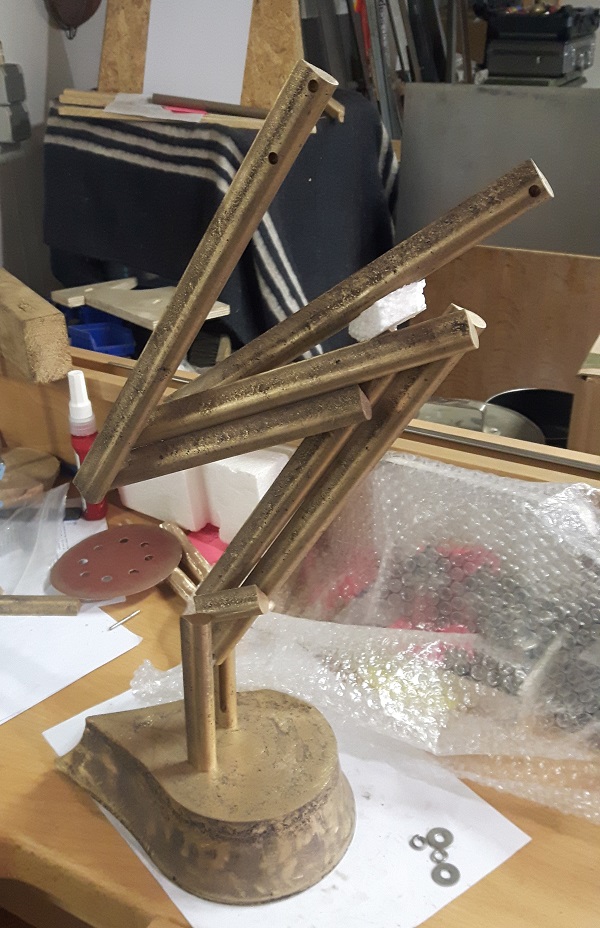
Bronze casting of the base was another challenge. The model, also designed with the same teardrop shape, I had 3-D printed. It took two failures to learn how to cast it well by pooring the 4 kg of liquid bronze more rapidly into the sand mold.
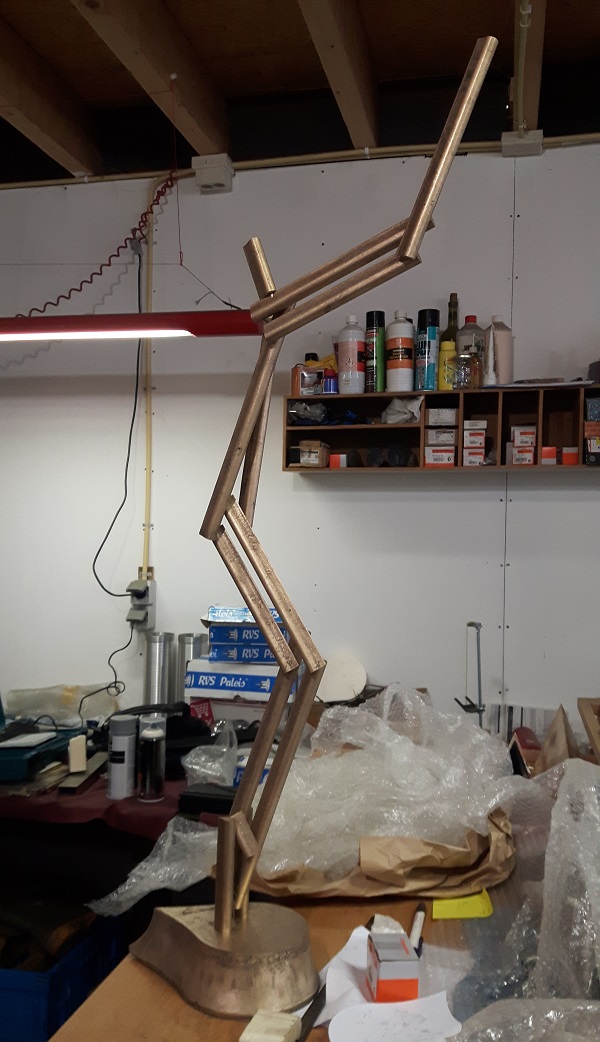
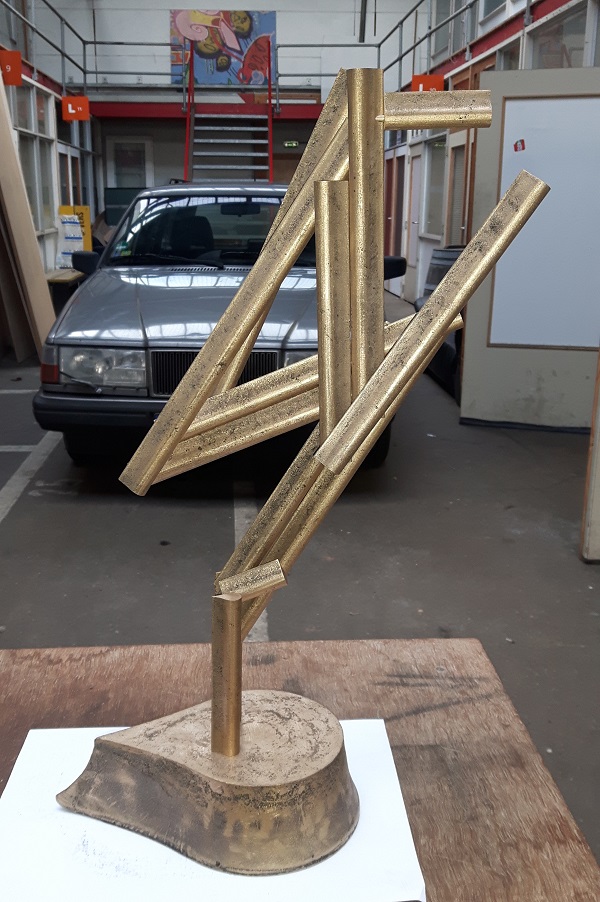
After finishing all the bars and bearings with stainless steel axles, the sculpture was assembled. Below you can see the results with the highest pose of the sculpture of 100 cm and lowest pose of 50 cm.
The sculpture shows a person huddled in despair. You, as a friend, are trying to help by lifting the person up where the person begs heaven for help. However when you leave, the person collapses again in utter despair. The next step is to make a small series of this sculpture for sale.
'Plumage in Bronze' finished!
Just before Christmas I finished the Plumage in Bronze balanced kinetic sculpture. Earlier I already made one of the sides, see this blog, and now also the other side has been assembled after weighting the bronze casted profiles carefully, determining their precise location of the center of mass (i.e. center of gravity) and placing the bearings at the precise points such that the obtained mechanism is balanced/stable in each pose to which it is moved. Soon there will be more pictures on the website.
Anemone Magnifica shines!
Since the Delft Highlight Festival was cancelled - due to Covid regulations - I built up the Anemone Magnifica sculpture at my atelier of which I share some images.
The sculpture is moved by interaction of the spectator. For finding the best way for this interaction, to obtain lovely smooth and slow motions by intuitive handling of the viewers hands, I did some tests of which this video gives a nice impression. Currently I am still improving the mechanical interface of cables and handles for generating these motions.
Stainless steel puzzle...
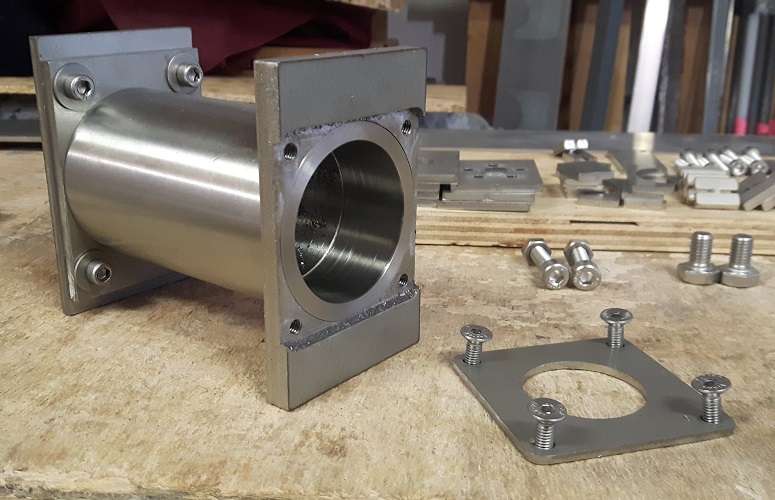
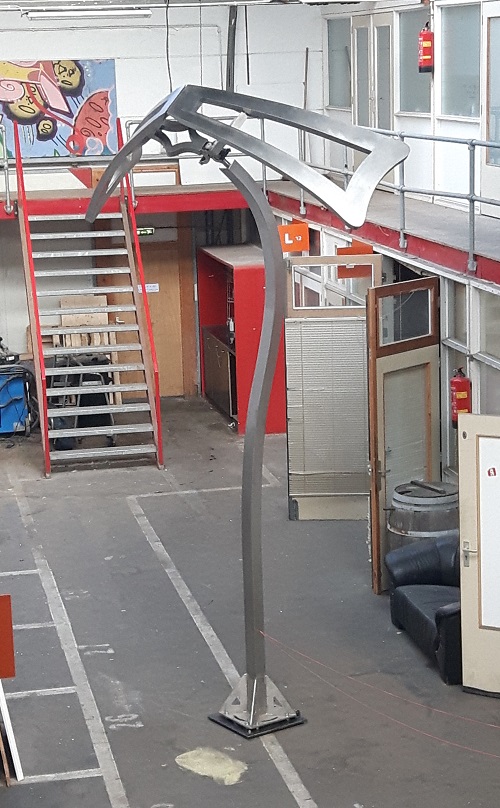
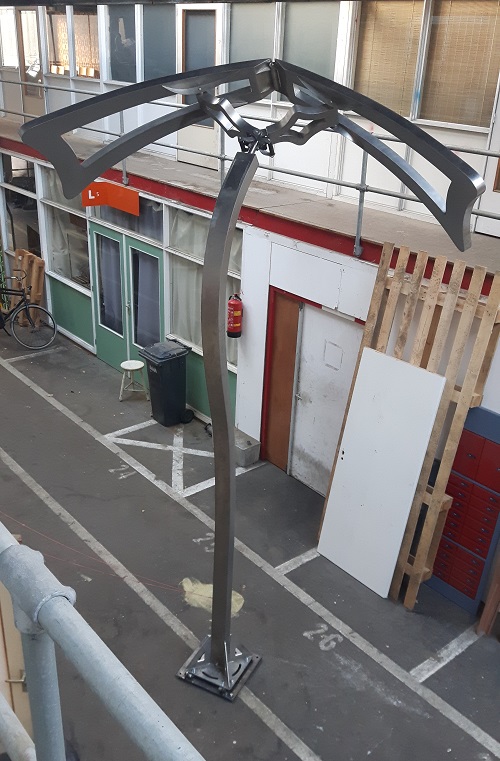
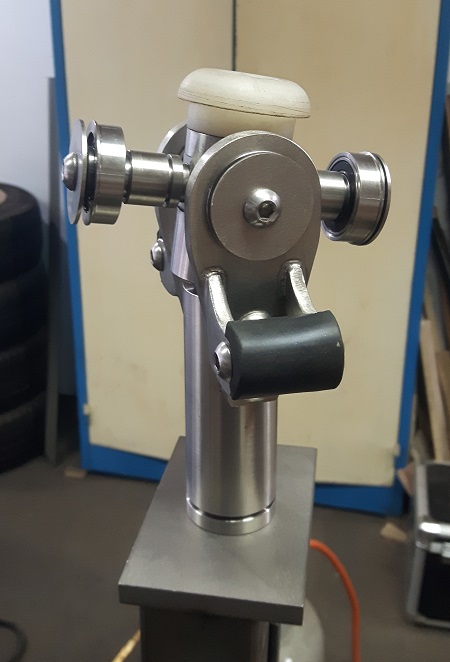
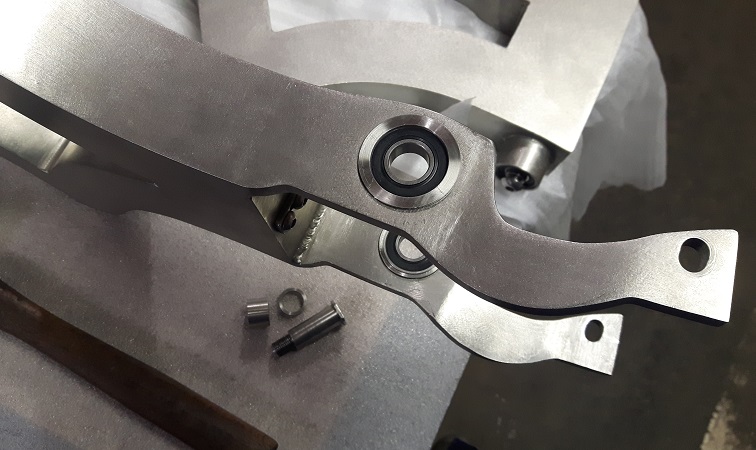
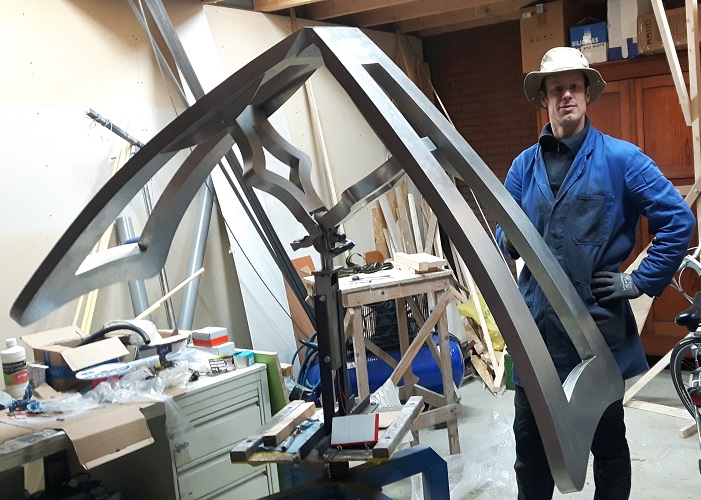
Much work has been done on the Floating Pyramids Sculpture this week. The first picture shows the assembly of the main bearing house which is mounted inside the large '7' pillar. The pillar has been constructed, bending sheets of stainless steel in wonderful curves....
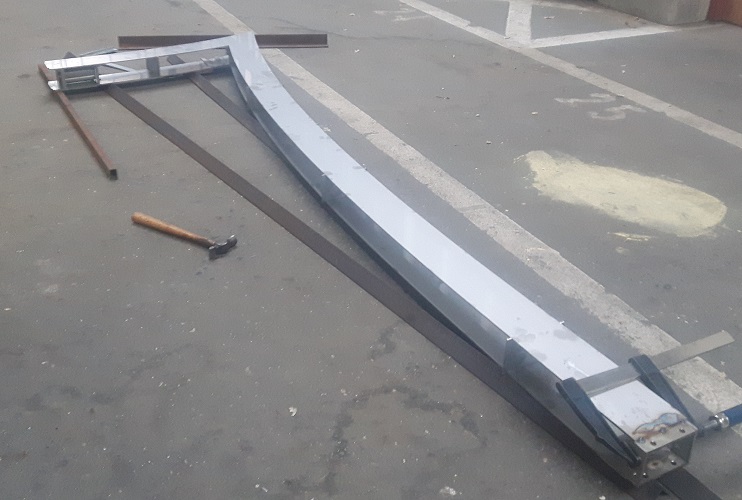
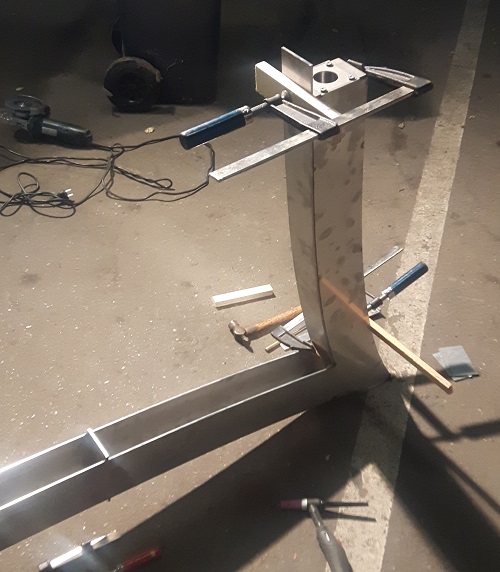
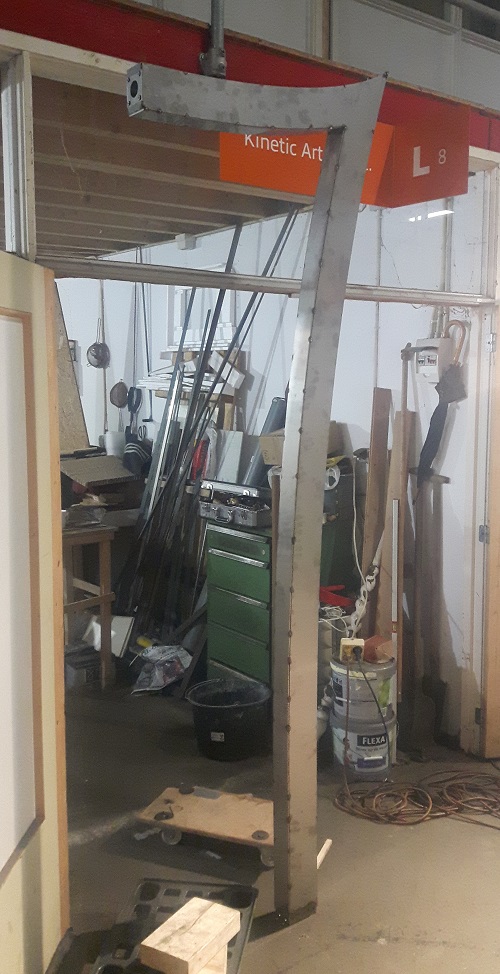
Also the balance arms have been constructed and the next step is to cast two 35 kg heavy plates of lead to be placed as counterweights in the triangular part of the balance arms.
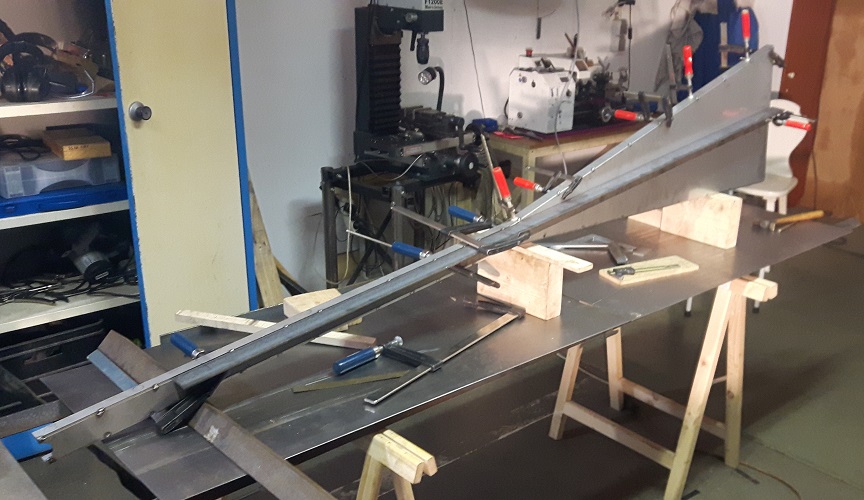
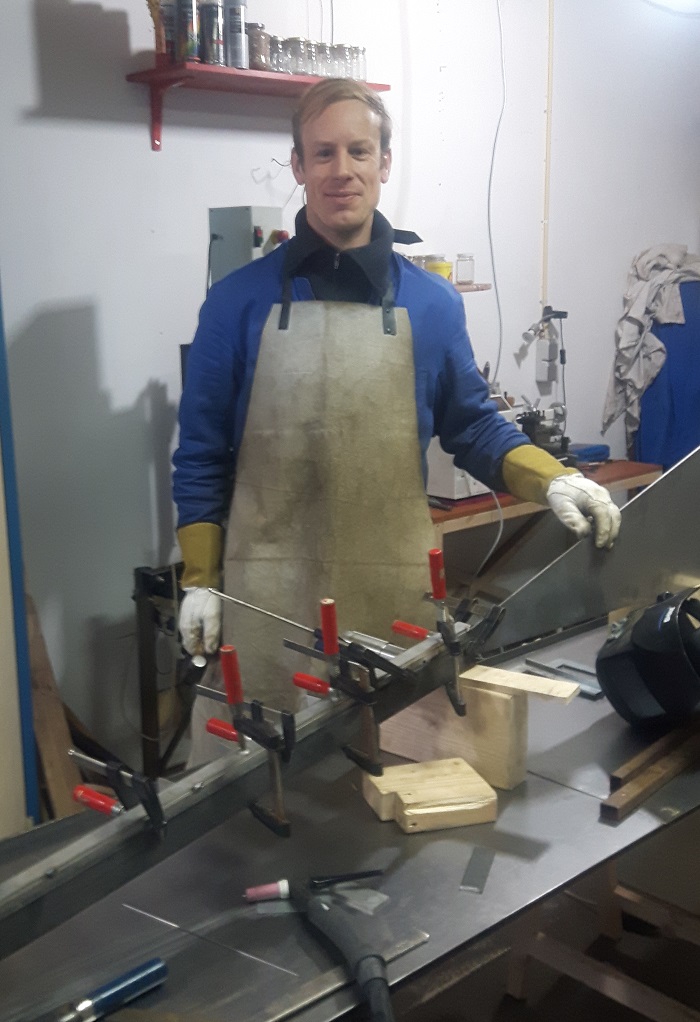
Reassembly of Anemone Magnifica
For the Delft Highlight Festival I have completely reassembled the Anemone Magnifica. The bearings have been cleaned and minor improvements have been made for perfecting the sculpture. The sculpture is almost ready for exhibition, and ready to be interactively moved by everyone who visits the festival.
Bronze casts of wax models
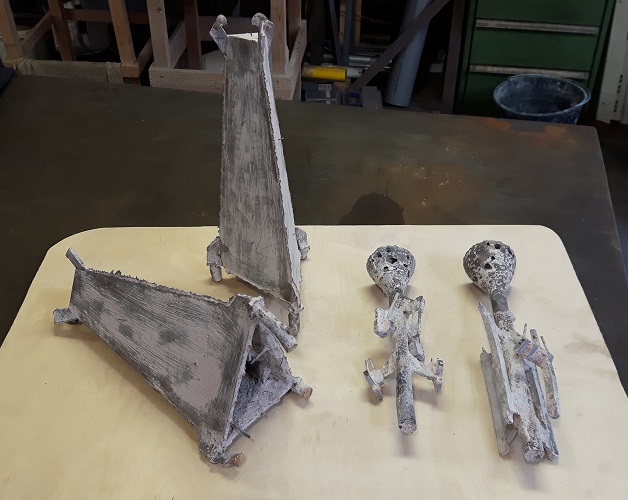
This week I received the bronze casts of the wax models of the sculpture I showed on 16 january. At first sight they look well casted, yet they still need significant postprocessing now in order to assemble all parts together and to finish the sculpture with a beautiful bronze appearance.
Maintenance of Taaie Tiller
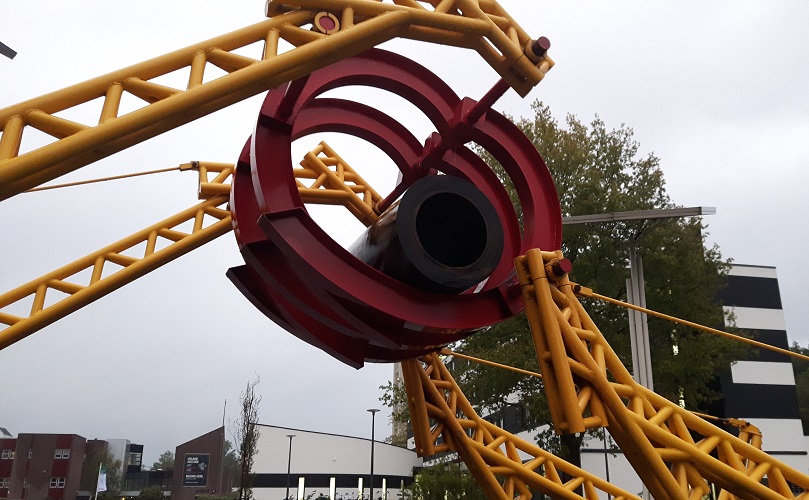
For the Taaie Tiller at the University of Twente to work daily without problems, regular maintenance is needed. Once a month I clean the algaes, which can grow very quickly and then block the sensors and waterpumps. Also inspection is needed for components that wear out, to replace them in time. Maintenance is an essential part of moving systems, for kinetic art works as well.
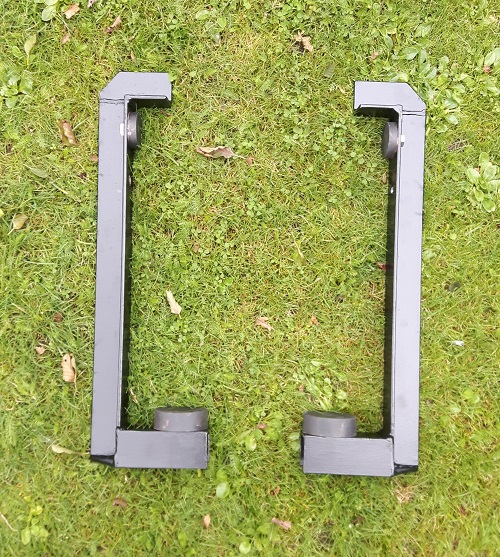
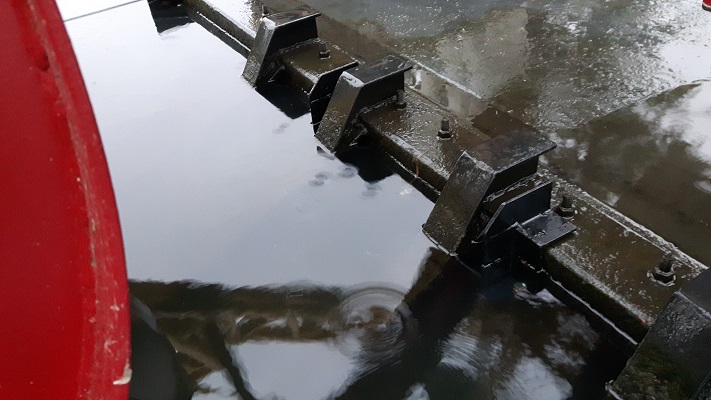
The impact of the mass of 300 kg falling from 3 meters high onto the structure that 'catches' the mass underwater is enormous. This week I replaced all the rubber dampers on one side that were completely worn out...not so bad actually after more than 4 years since the opening of the sculpture and more than 3000 (!) splashes or cycles since. I also installed two bracket clamps that have to prevent the catching structure to jump up too much. Because of the large impact, despite its 280 kg of mass it could jump up more than 15 cm, risking to come out of the pantoon.
Model of new large balance sculpture
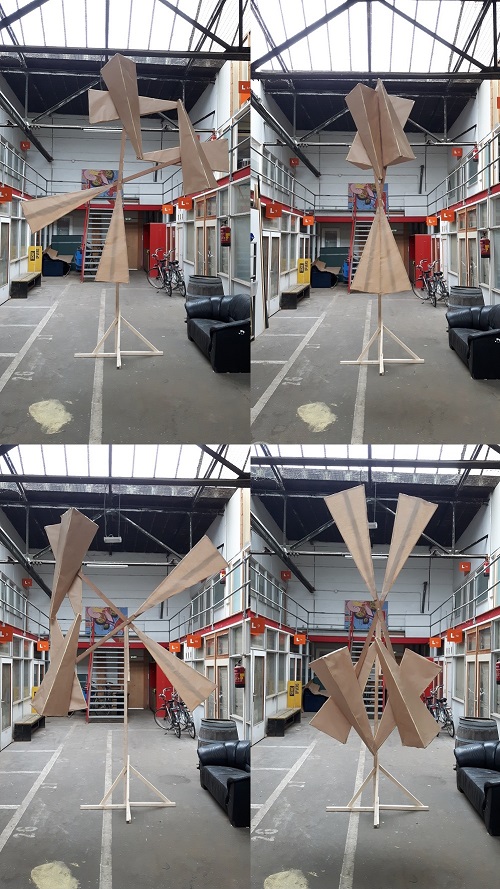
This is a real size test model of a new 4.2 meter heigh balance sculpture that I am currently developing. It consists of a moving composition of four pyramid shapes that is supported by two elements with triangularly shaped countermasses for balance. The sculpture will be of stainless steel and can be moved into a variety of beautiful poses by hand of the viewer. Hopefully the sculpture will be ready for exposition at the Delft Highlight Festival in November.
Wax models finished
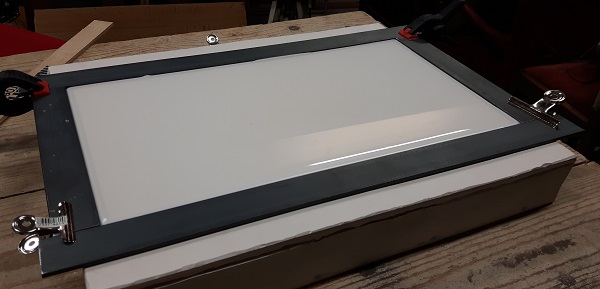
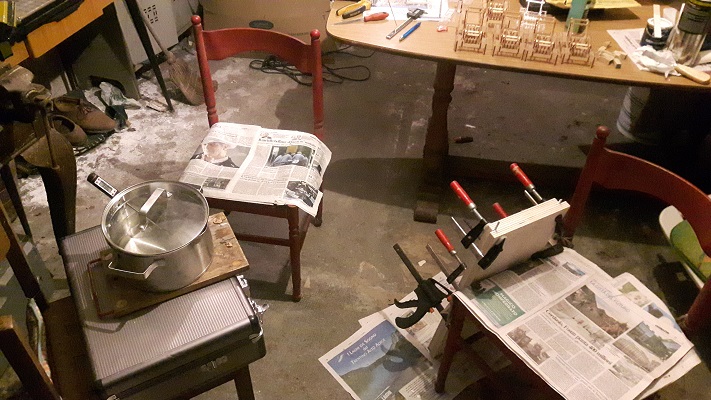
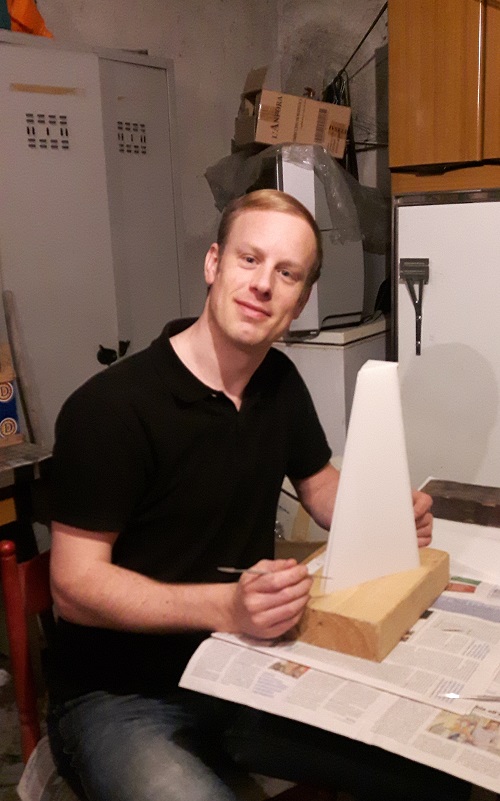
The wax models for the sculpture I showed on 16 january have been finished and they are now at the foundry for casting in bronze. I optimized my technique for making thin flat plates of wax with supersmooth surfaces by using a flat silicon slab. By cutting the parts from these plates of wax, the pyramid shapes and other elements of the sculpture were constructed.
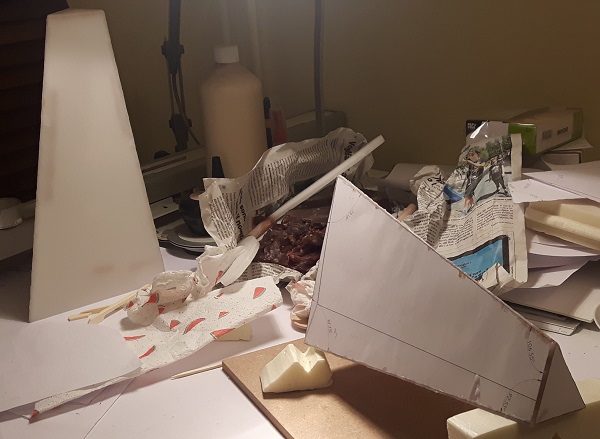
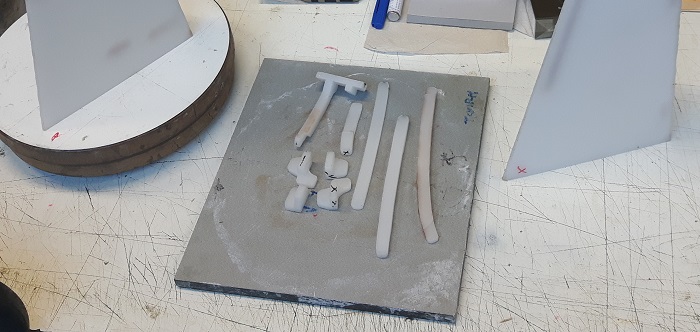
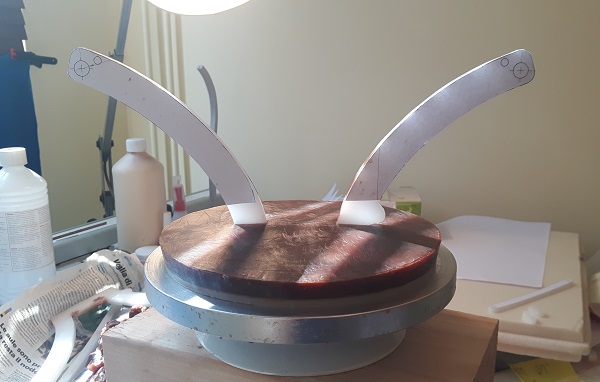
Also the base of the sculpture has been made of wax. The two large circles indicate the locations of the axles about which the pyramid shapes will rotate.
Teardrop profile
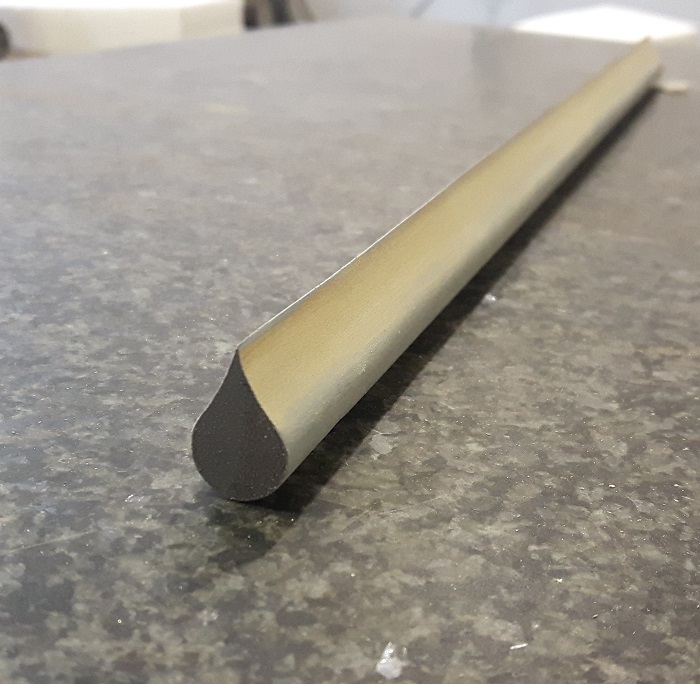
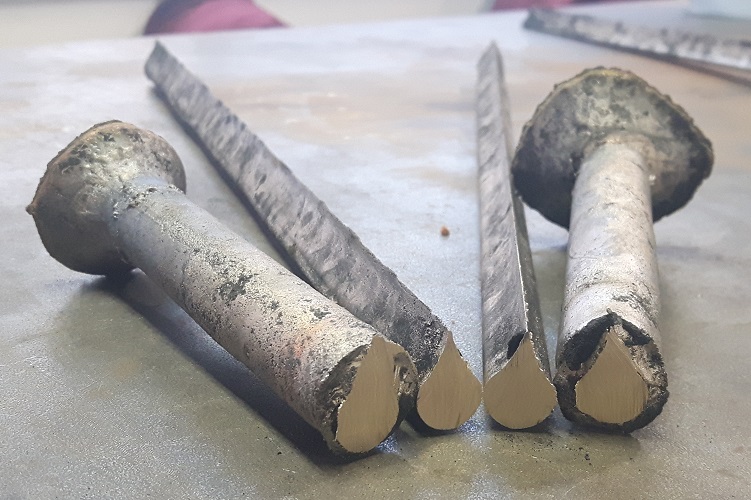
I have started with a new bronze version of Between Heaven and Earth in which the elements have a profile of a teardrop. The top picture shows the casting model made of wood by milling and sanding and below you can see the results of the first sand casting, which turned out very well. Soon I will cast another 10 of these bars which in total should be sufficient for the complete sculpture.
One side finished
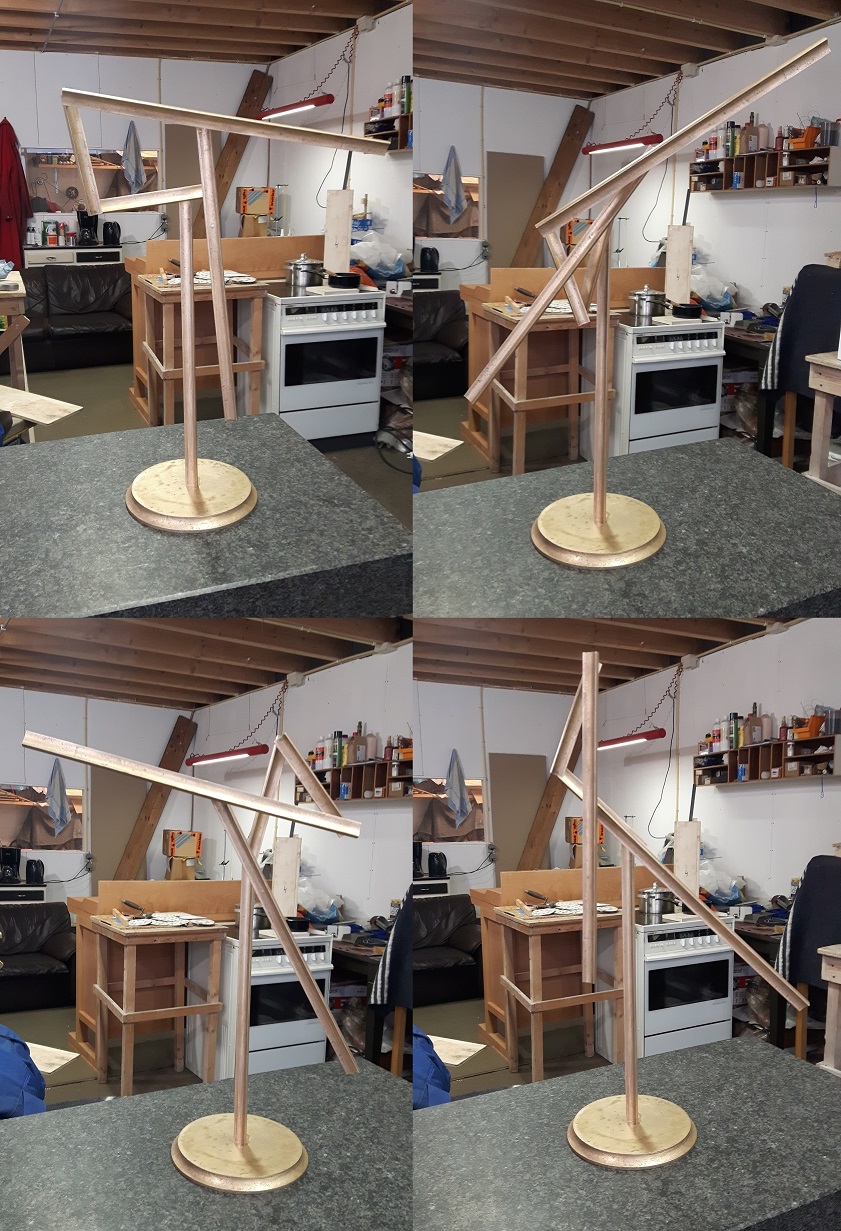
The frontside of the new sculpture Plumage in Bronze has been finished: the 4 moving bars are balanced and can be moved smoothly all around and they remain steady in any of its poses. It functions wonderfully! To make the long moving bars at the right length for perfect balance was a challenge since the mass distritution of the bars is not equal along their length. It required extensive calculations.
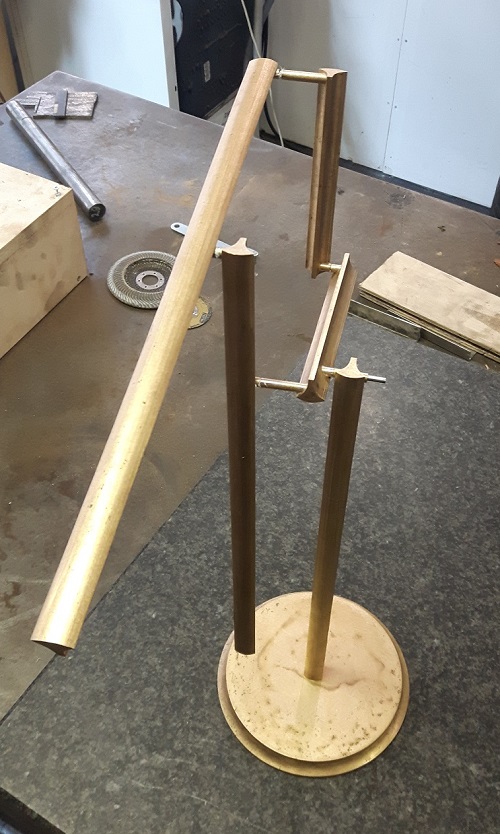
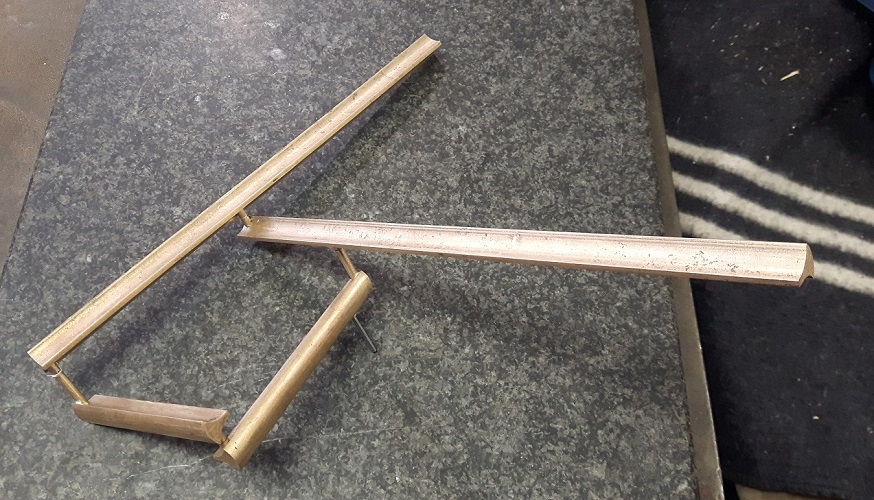
At the moment I am constructing the other side, which is equal to the front side.
Bearings and Center of Mass
The development of the new sculpture Plumage in Bronze proceeds well. From the sprues of the bronze casting of the profiles I made bronze bearings, with axles of stainless steel.
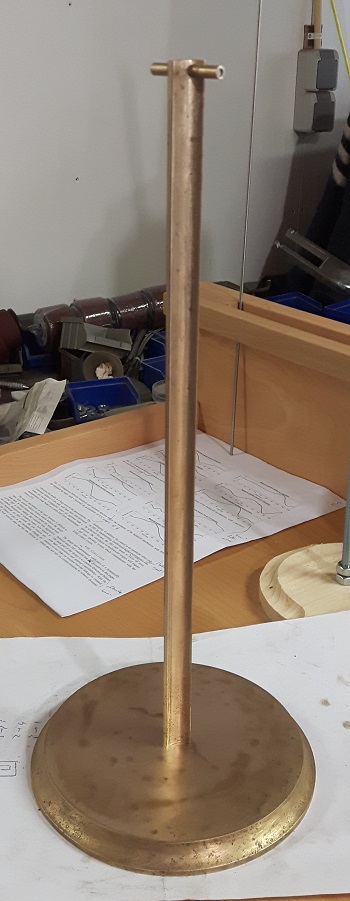
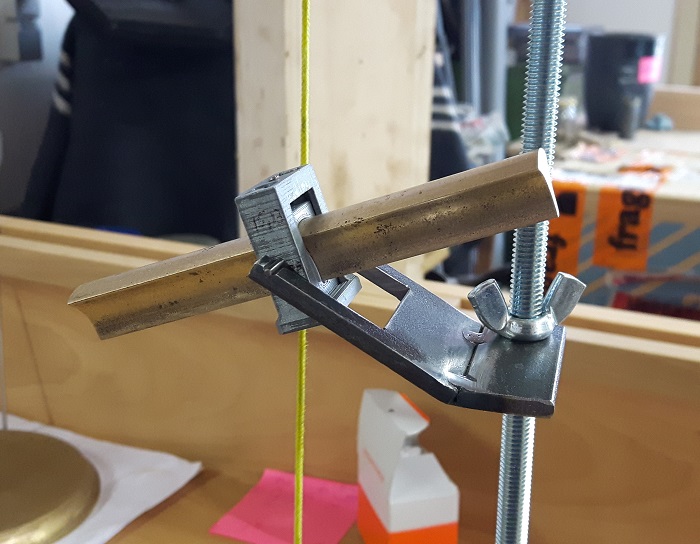
The sculpture is now being build up step by step, this is the base with the central rotational joint. Since the moving sculpture has to be perfectly balanced in all different poses, it is important to know of each part precisely the mass and the location of the center of mass. For finding and measuring the center of mass I developed a measurement system, shown in the last photo. Here the profile is clamped in a block with a small axle. By moving the block hence and forth and up and down the point can be found in which the profile is balanced and does not turn around. The axle then is in the center of mass. The results of the measurement influence the exact lenght of the other parts, which then can be calculated.
Bronze casting of profiles
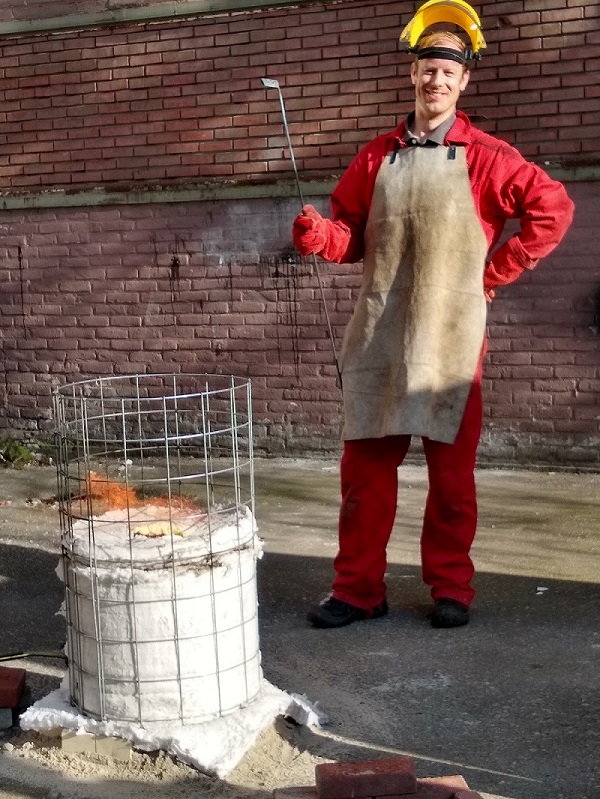
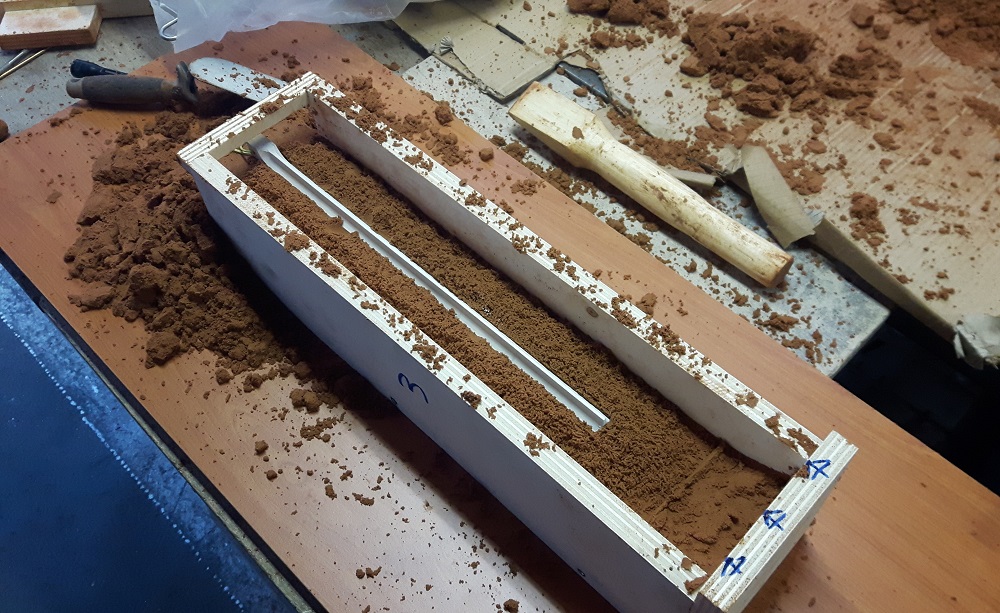
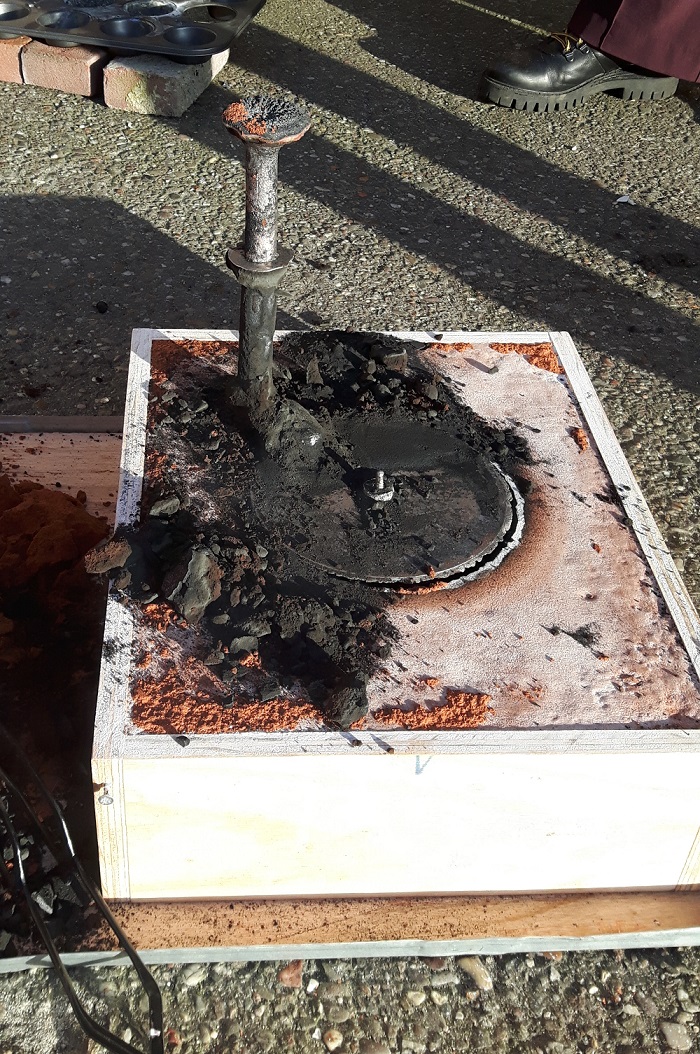
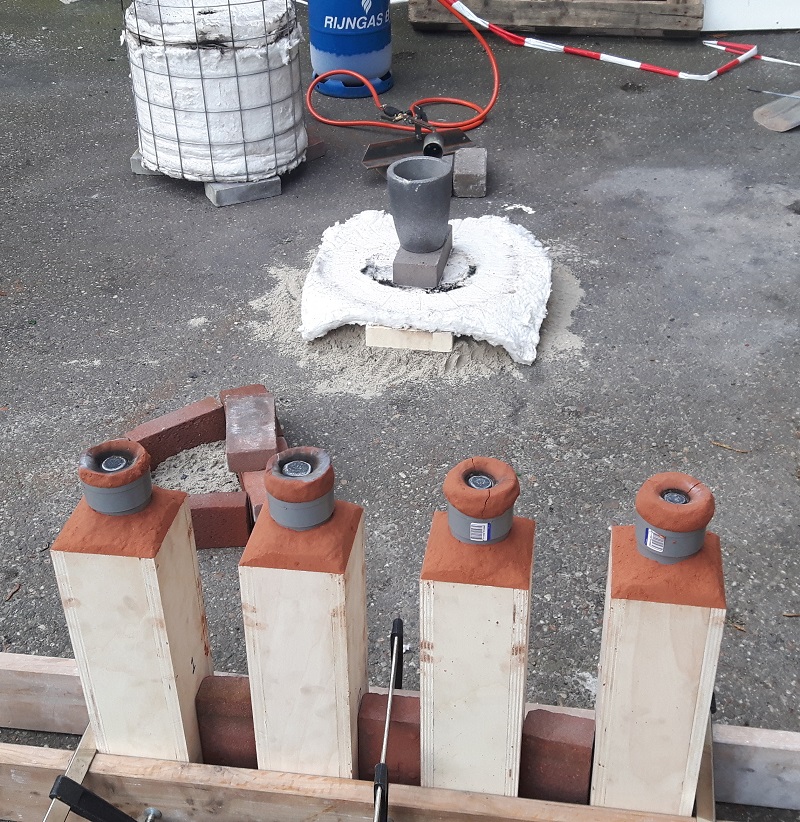
I have been bronze casting the profiles I prepared in wood earlier together with the round base plate for the new Plumage in Bronze sculpture. I made specific flasks for creating the sand molds from Delft clay. After closing the molds the profiles could simply be pulled out, leaving an empty space in the sand which I filled with liquid bronze. Therefore the bronze was heated to about 1050 °C in my oven made of ceramic wool. The results have become very nice, the profiles came out perfectly straight and with a high level of detail. Also the base plate turned out nice. I finished the surfaces by directionless sanding, which showed to fit well with the natural appearance of casted bronze.
Plates of wax
Wood profile casting pattern
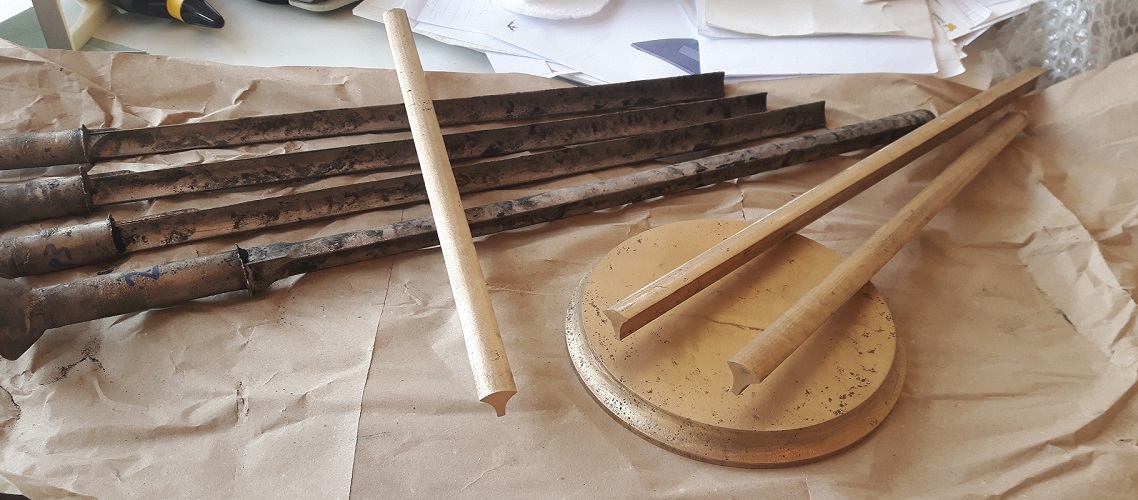
I am making a 65 cm tall bronze version of Plumage I for which I manufactured these wooden profiles:
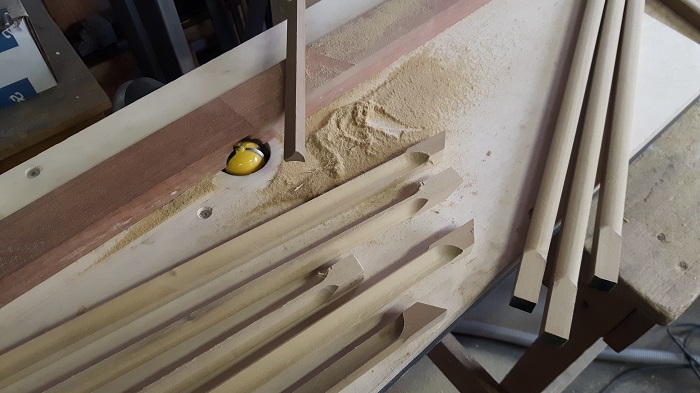
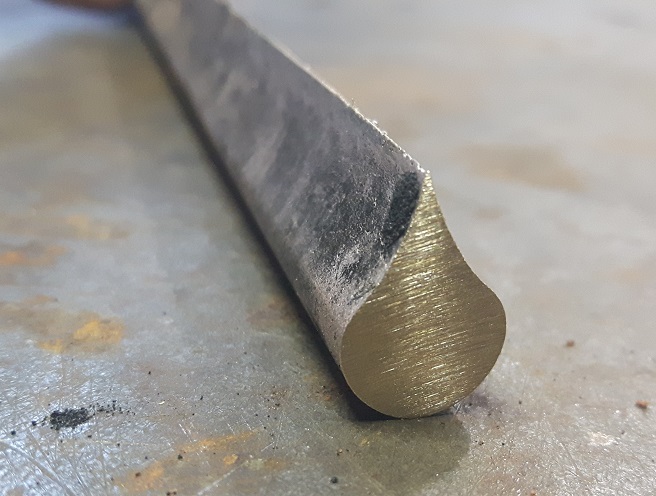
The profile consists of a convex face on top, concave faces on the sides and a flat face from below. They will be used as sandcasting patterns for bronze casting to obtain the profiles in bronze. The bronze profiles will then be assembled as elements of the Plumage I balanced movable sculpture.
Shiny pyramids of stainless steel
The pyramid shapes of the previous blog inspired me to make a balanced sculpture with multiple small pyramid shapes of shiny stainless steel:
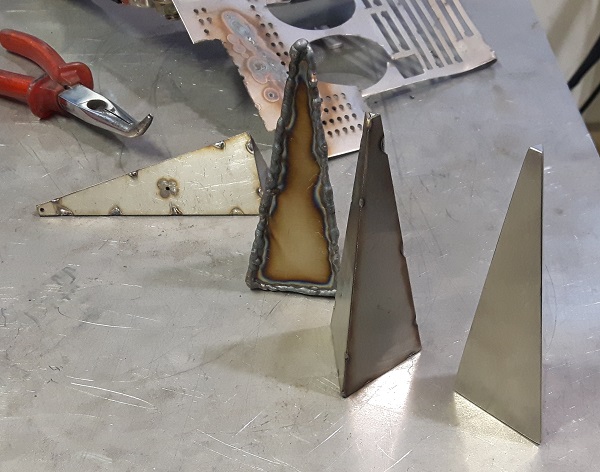
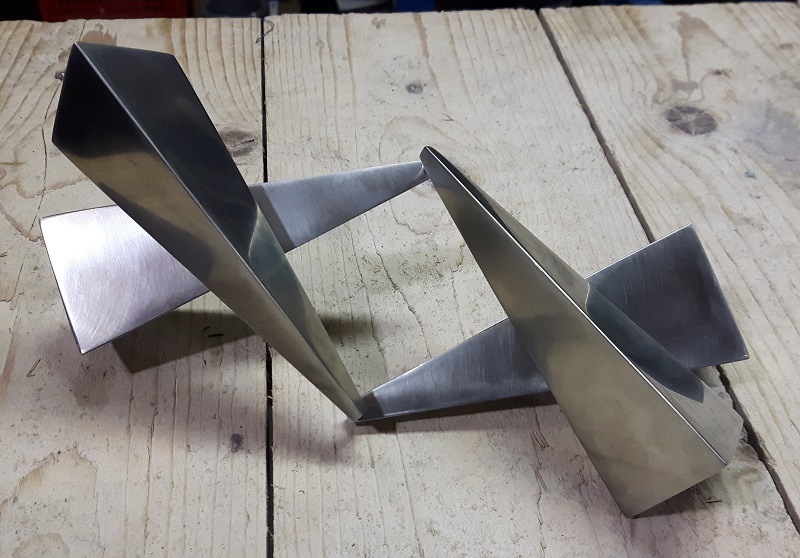
The first picture reveals the production steps of assembling the surfaces, welding the edges, and finishing it to flat polished surfaces. The second picture shows the assembly of four pyramid shapes in a movable parallelogram. I am now working on the remaining part of the sculpture which will hold and float this assembly up in the air.
New sculpture in development
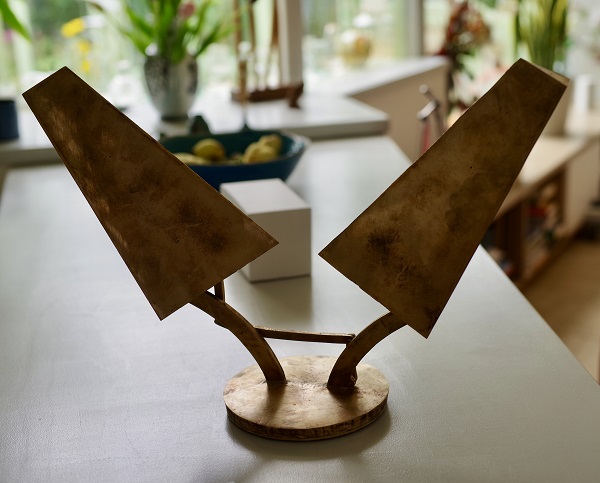
Just before Christmas I designed a new sculpture which expresses a person's extreme need for an intimate hug. This is inspired by the current time where due to the Covid-19 pandemic intimacy is very restricted, a rather inhuman situation.
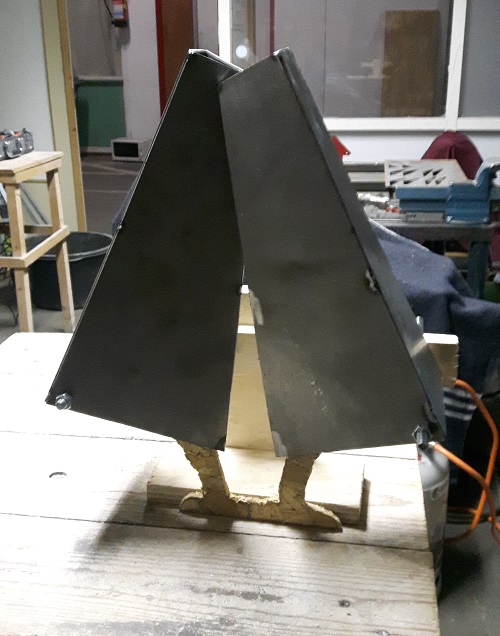
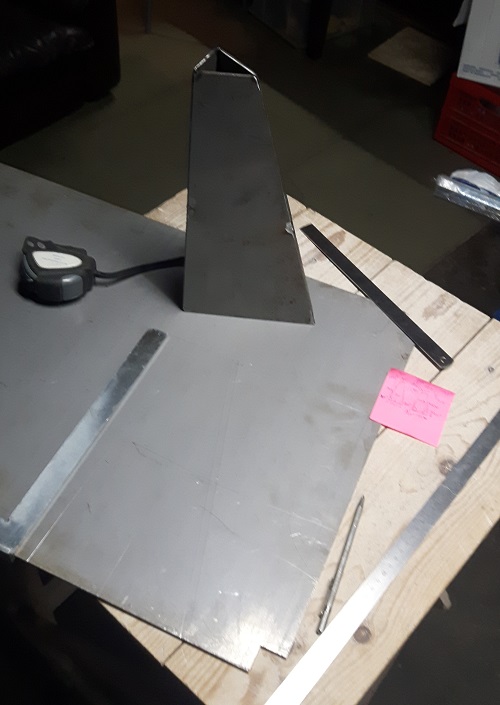
I don't want to reveal too much yet, but here are the first pictures. The two shapes will fall from an open 'distant' position towards each other in the position shown. At the moment I am developing the sculpture in steel and then I will cast it completely in bronze. Ultimately, it will be a fully bronze moving sculpture.

